Lost in
Space debuted on September 15, 1965, and as an 8 year old I
loved it. Some
of the coolest things to
me was the equipment of Lost in Space, such as the Jupiter 2,
the Robot and the Chariot.
But I always was fascinated with the weaponry,
especially the Laser
Rifle. So, I set out to try to build a working model myself.
Click on images for larger version
The first thing I needed to do was to
find some good reference material. I got out my Limited
Edition Lost in Space Blu-Ray set, and started looking for
some good
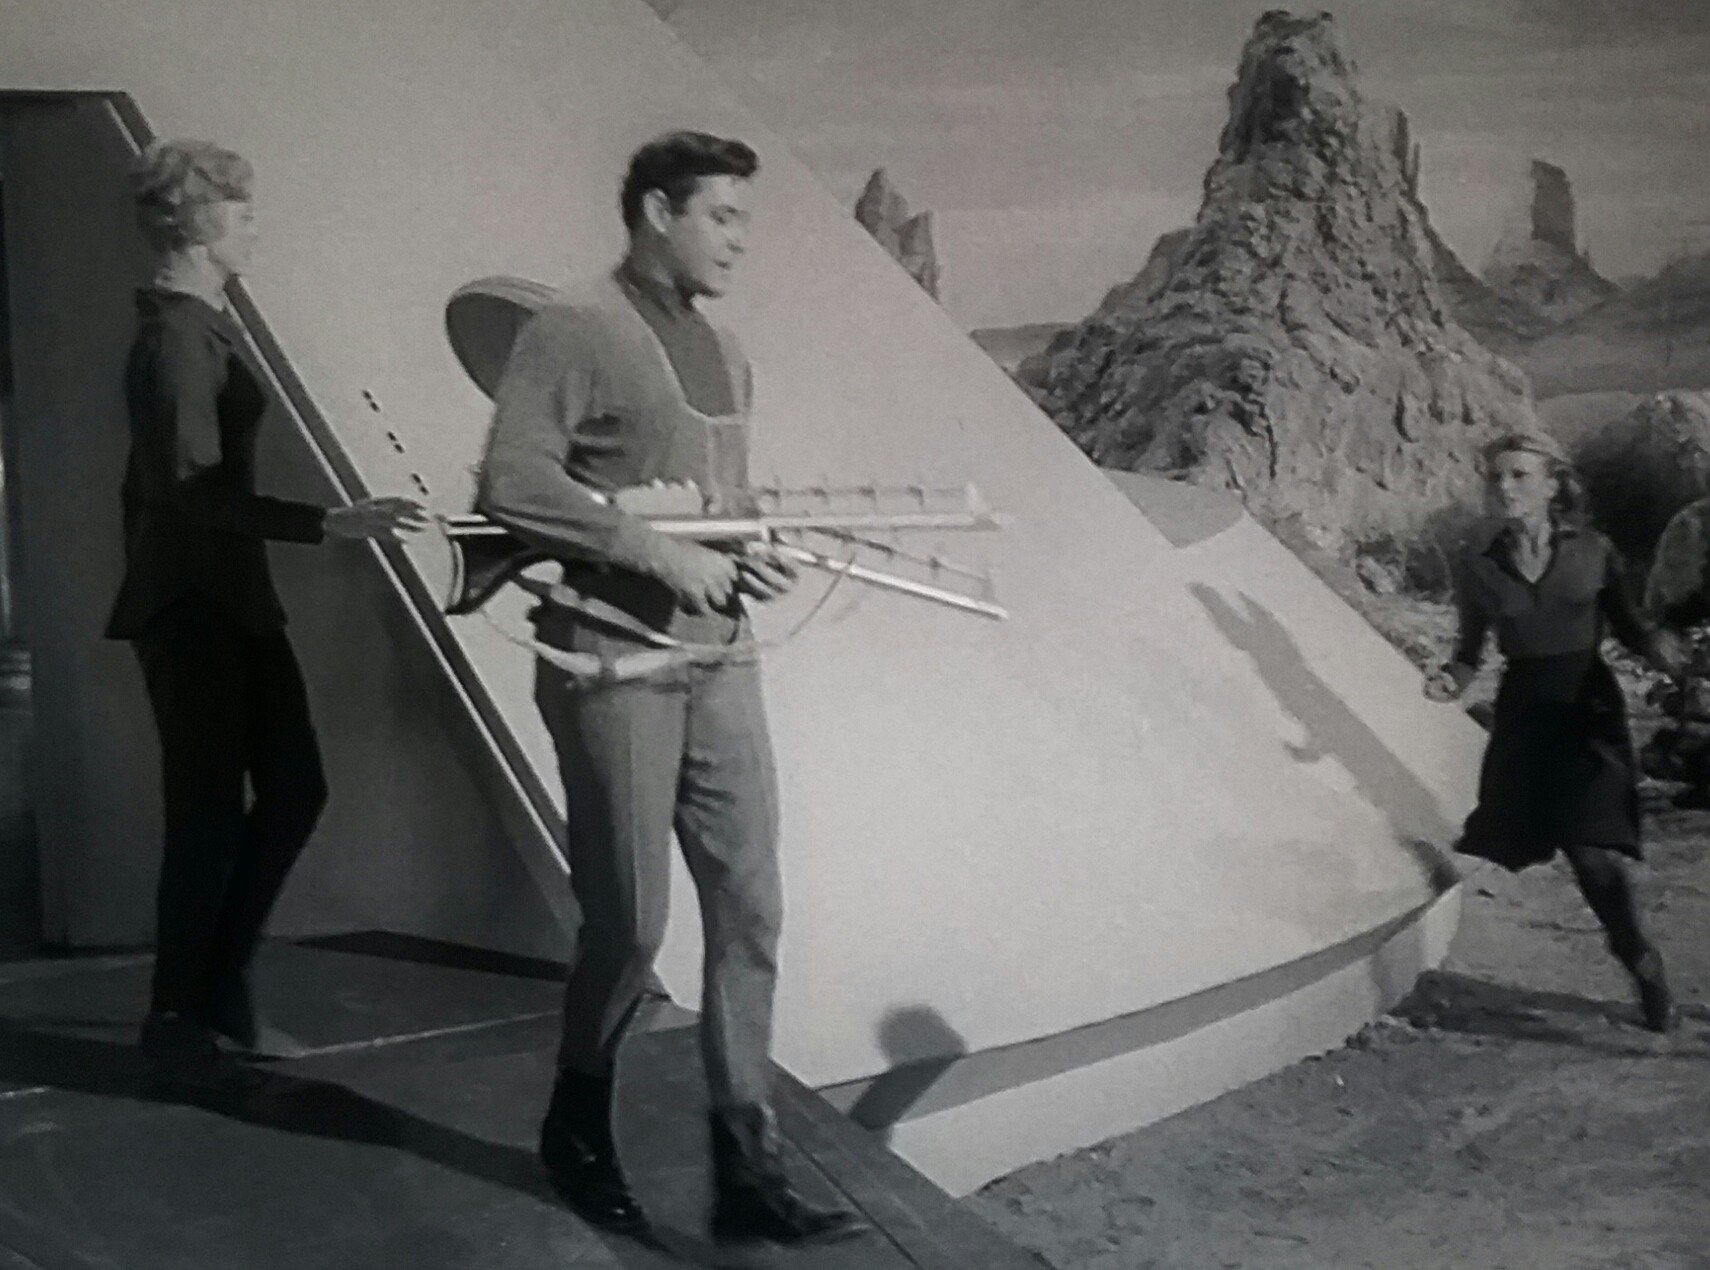
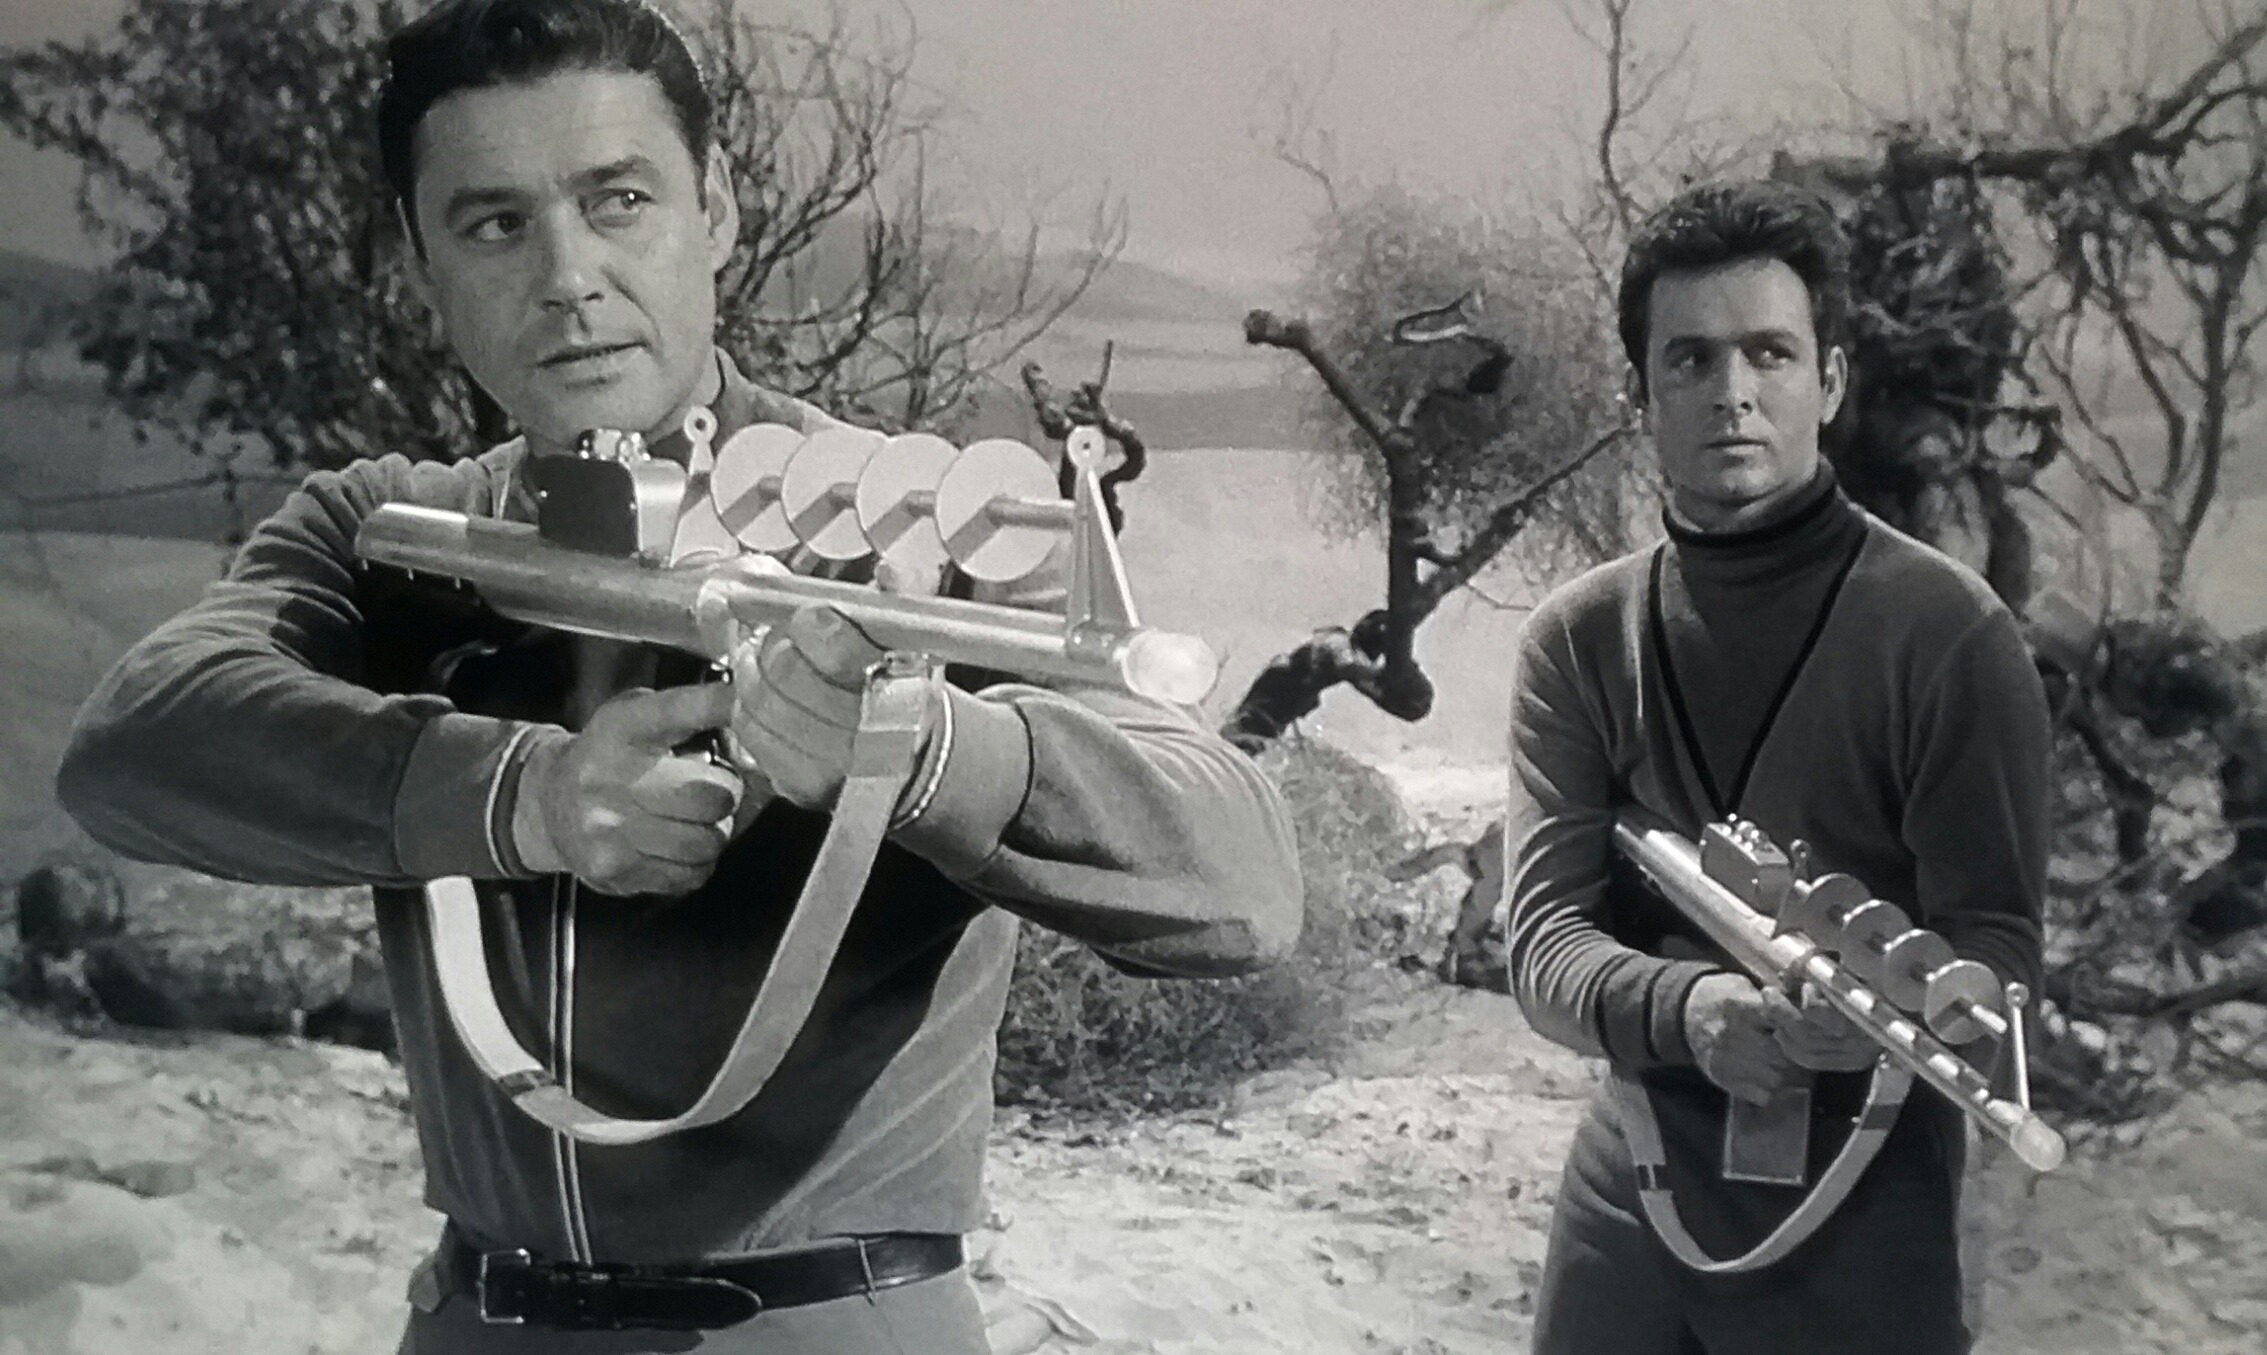
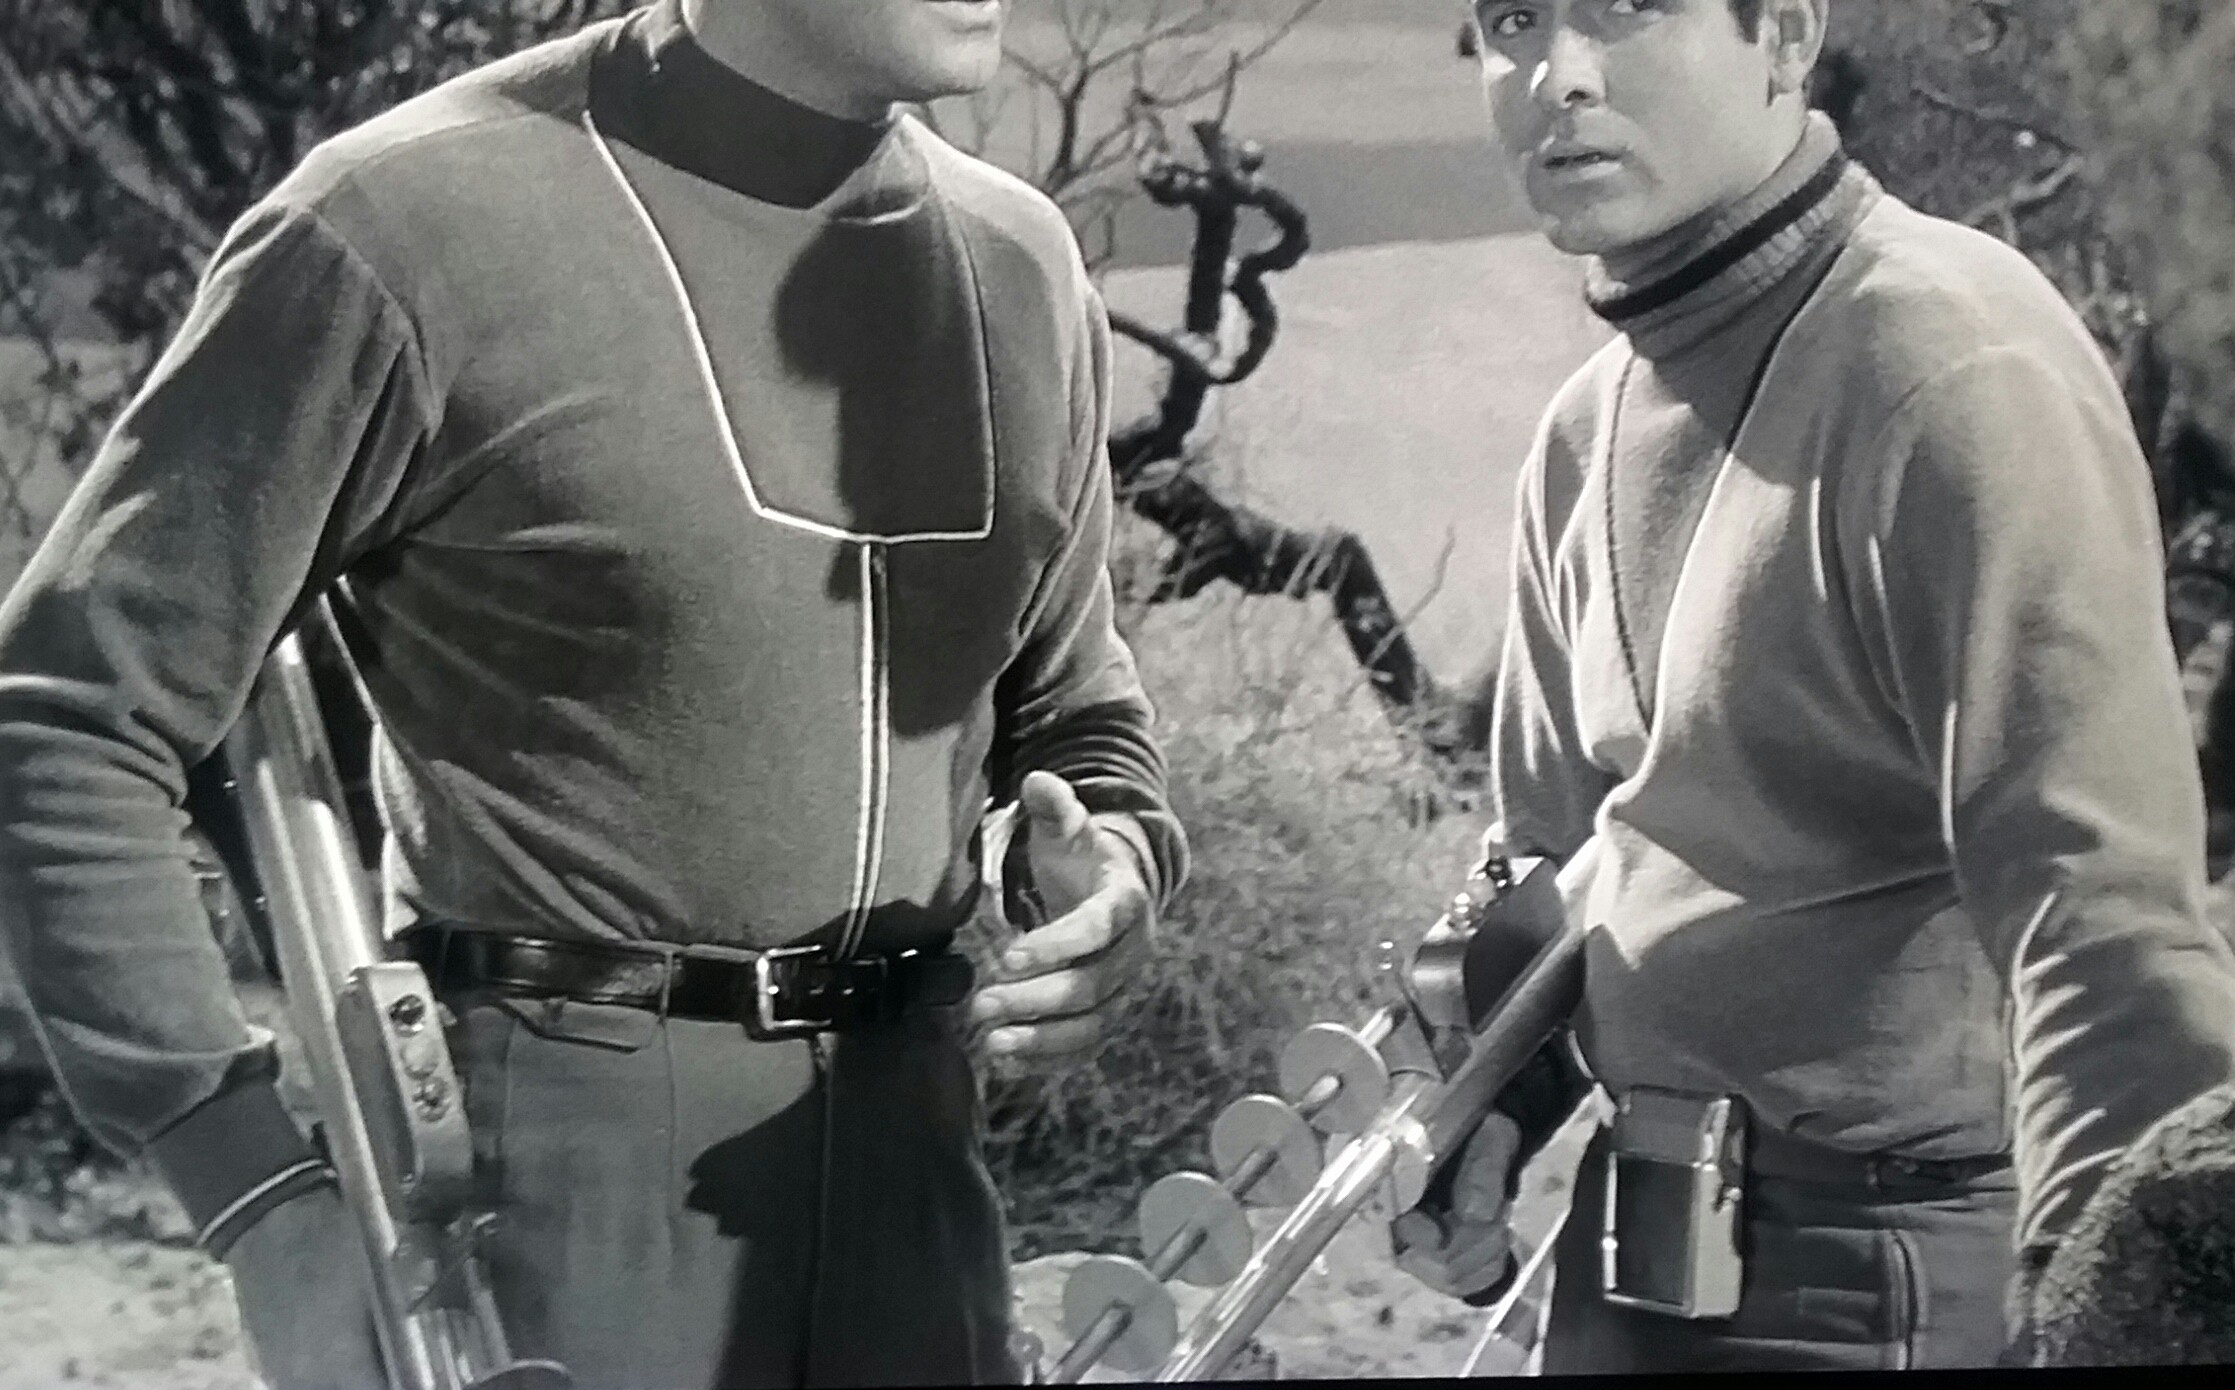
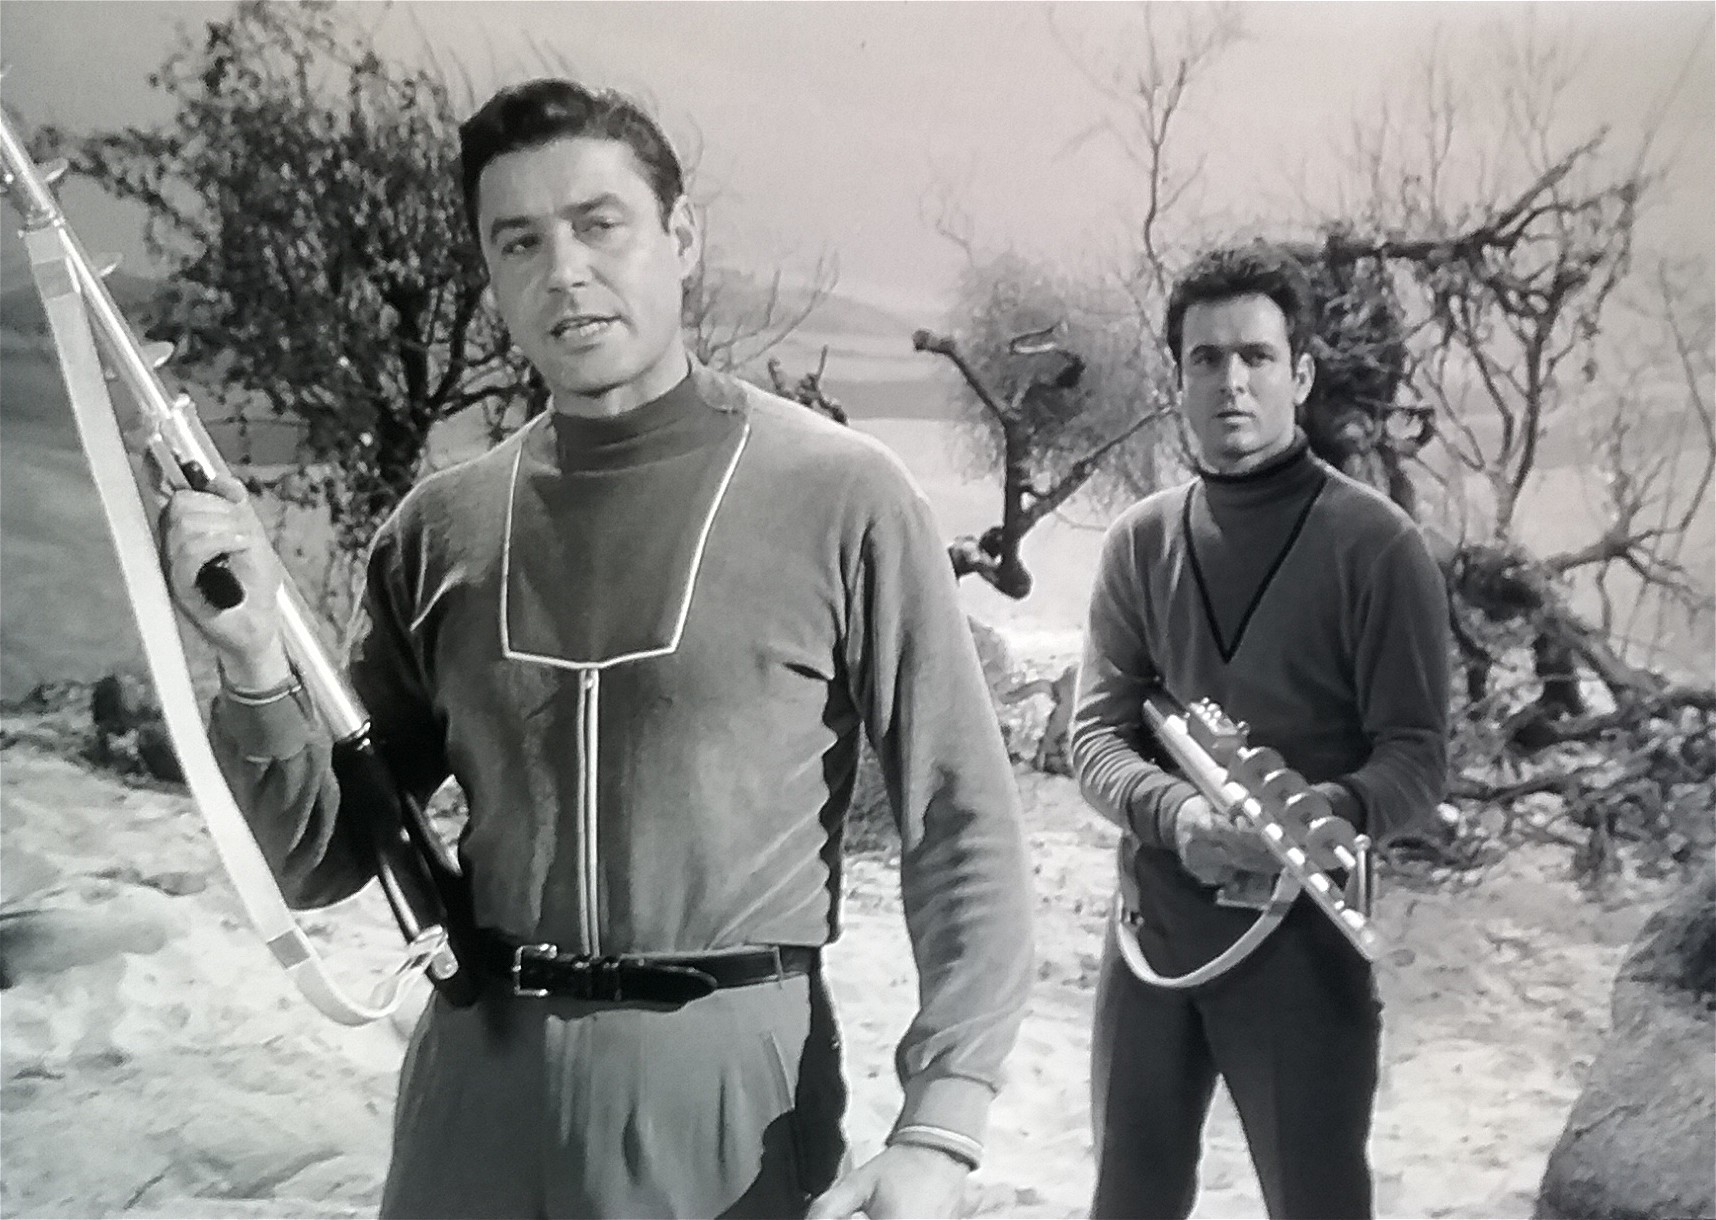
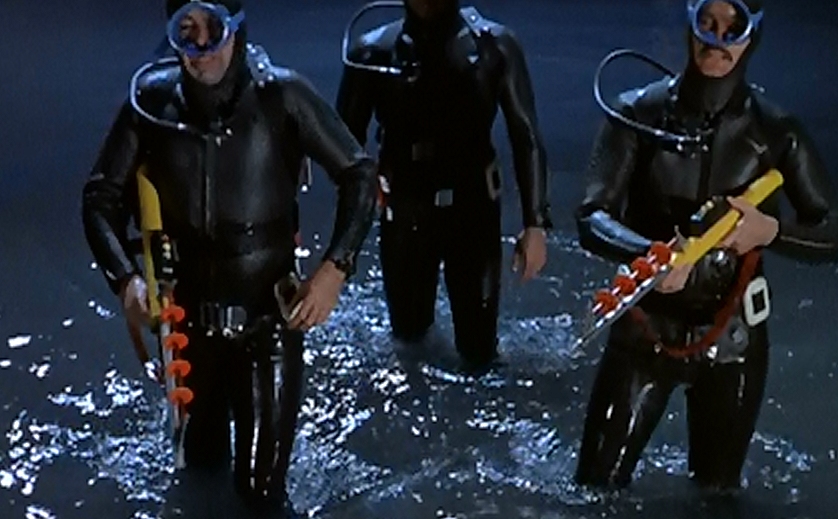
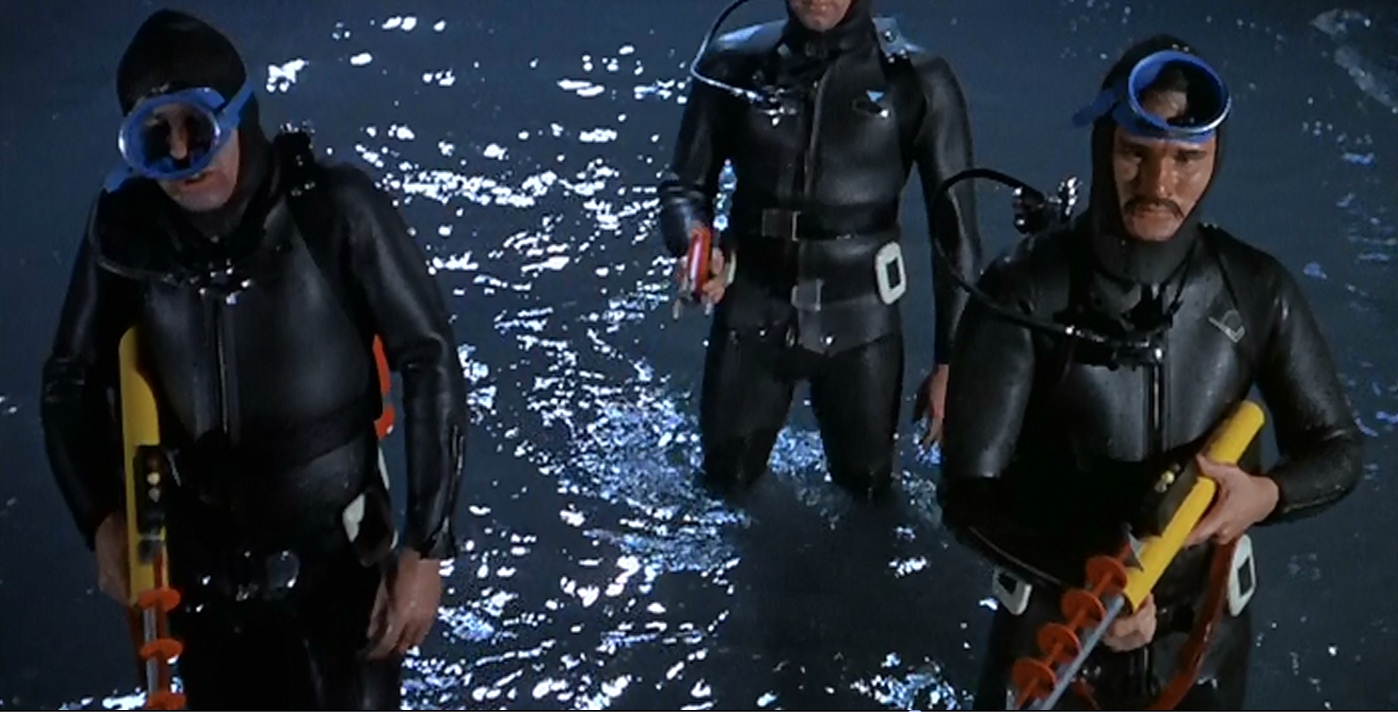
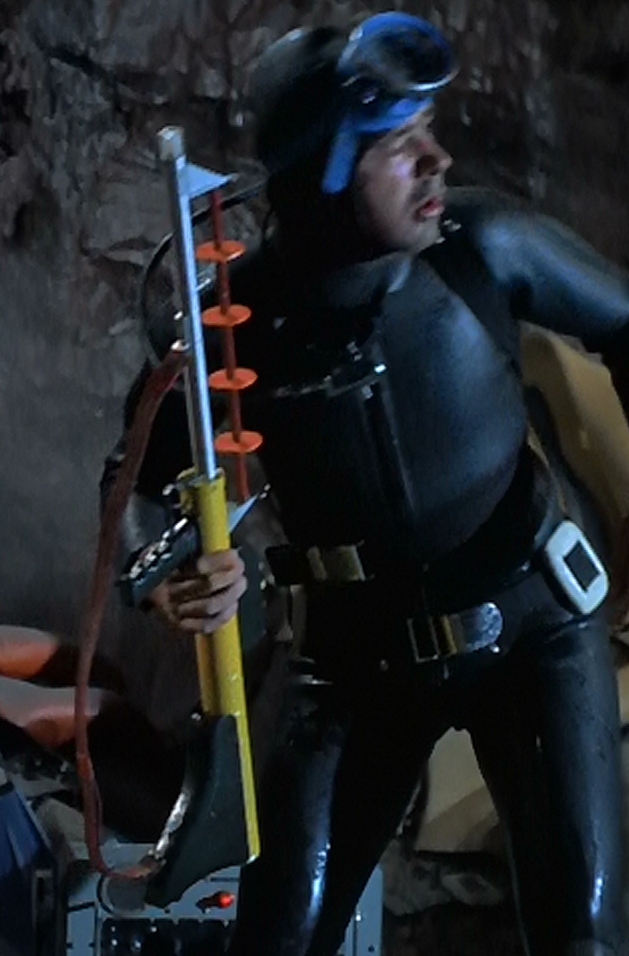
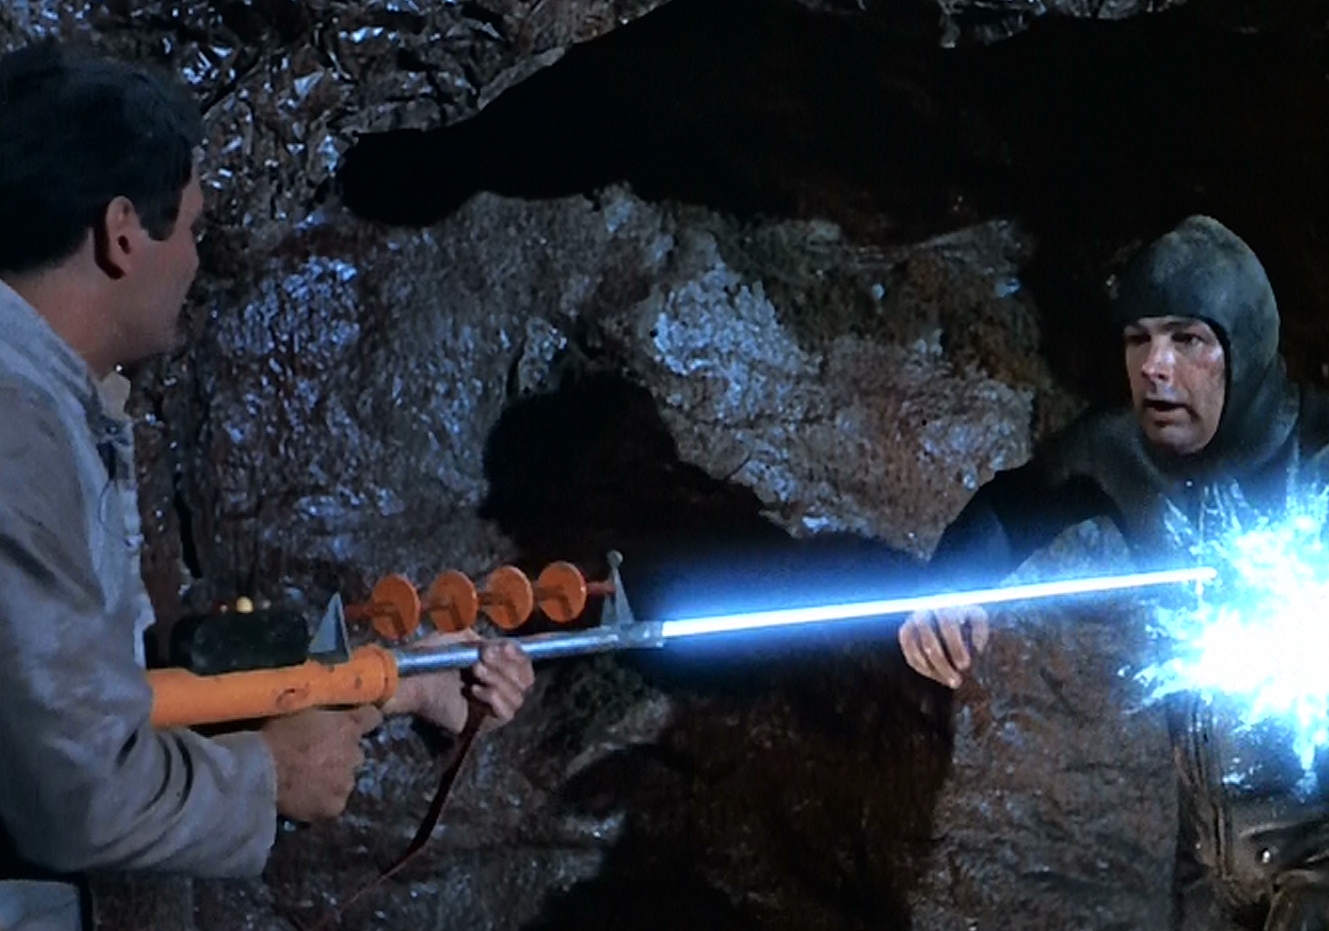
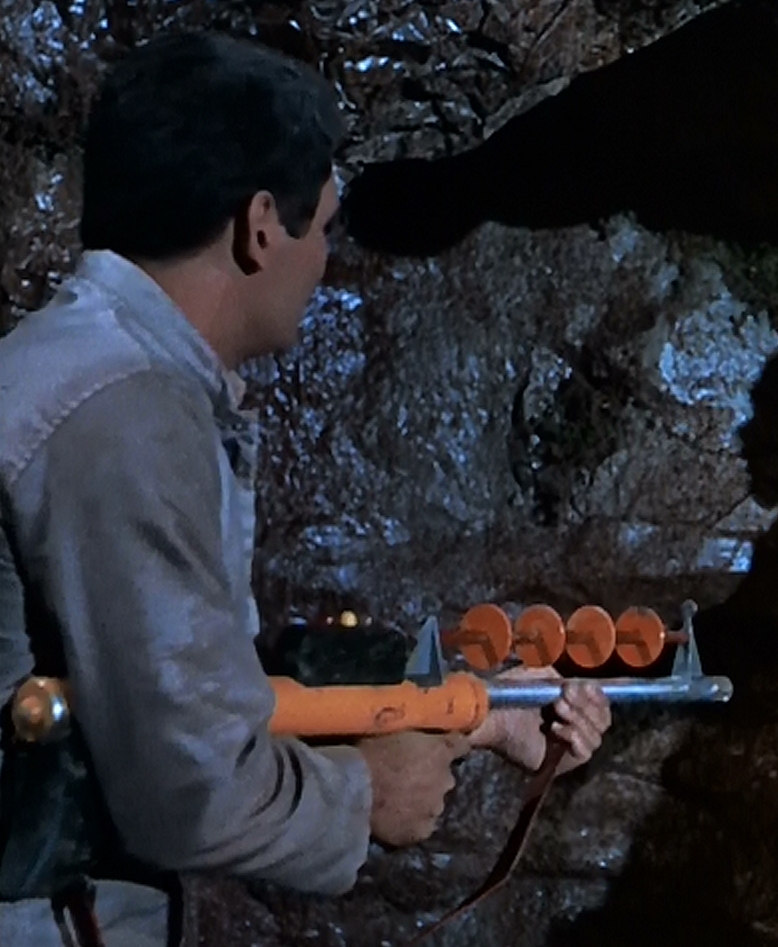
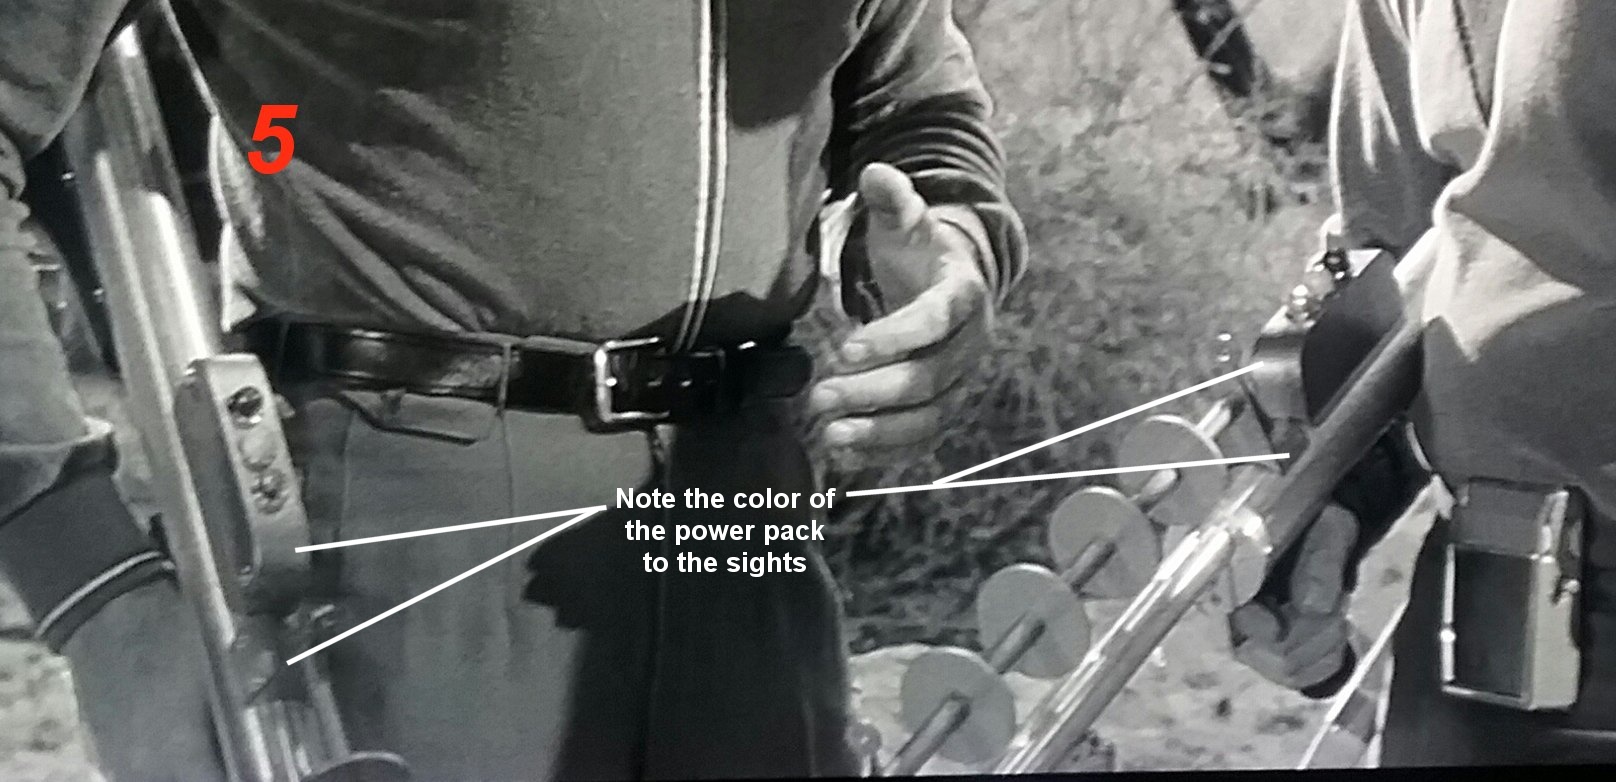
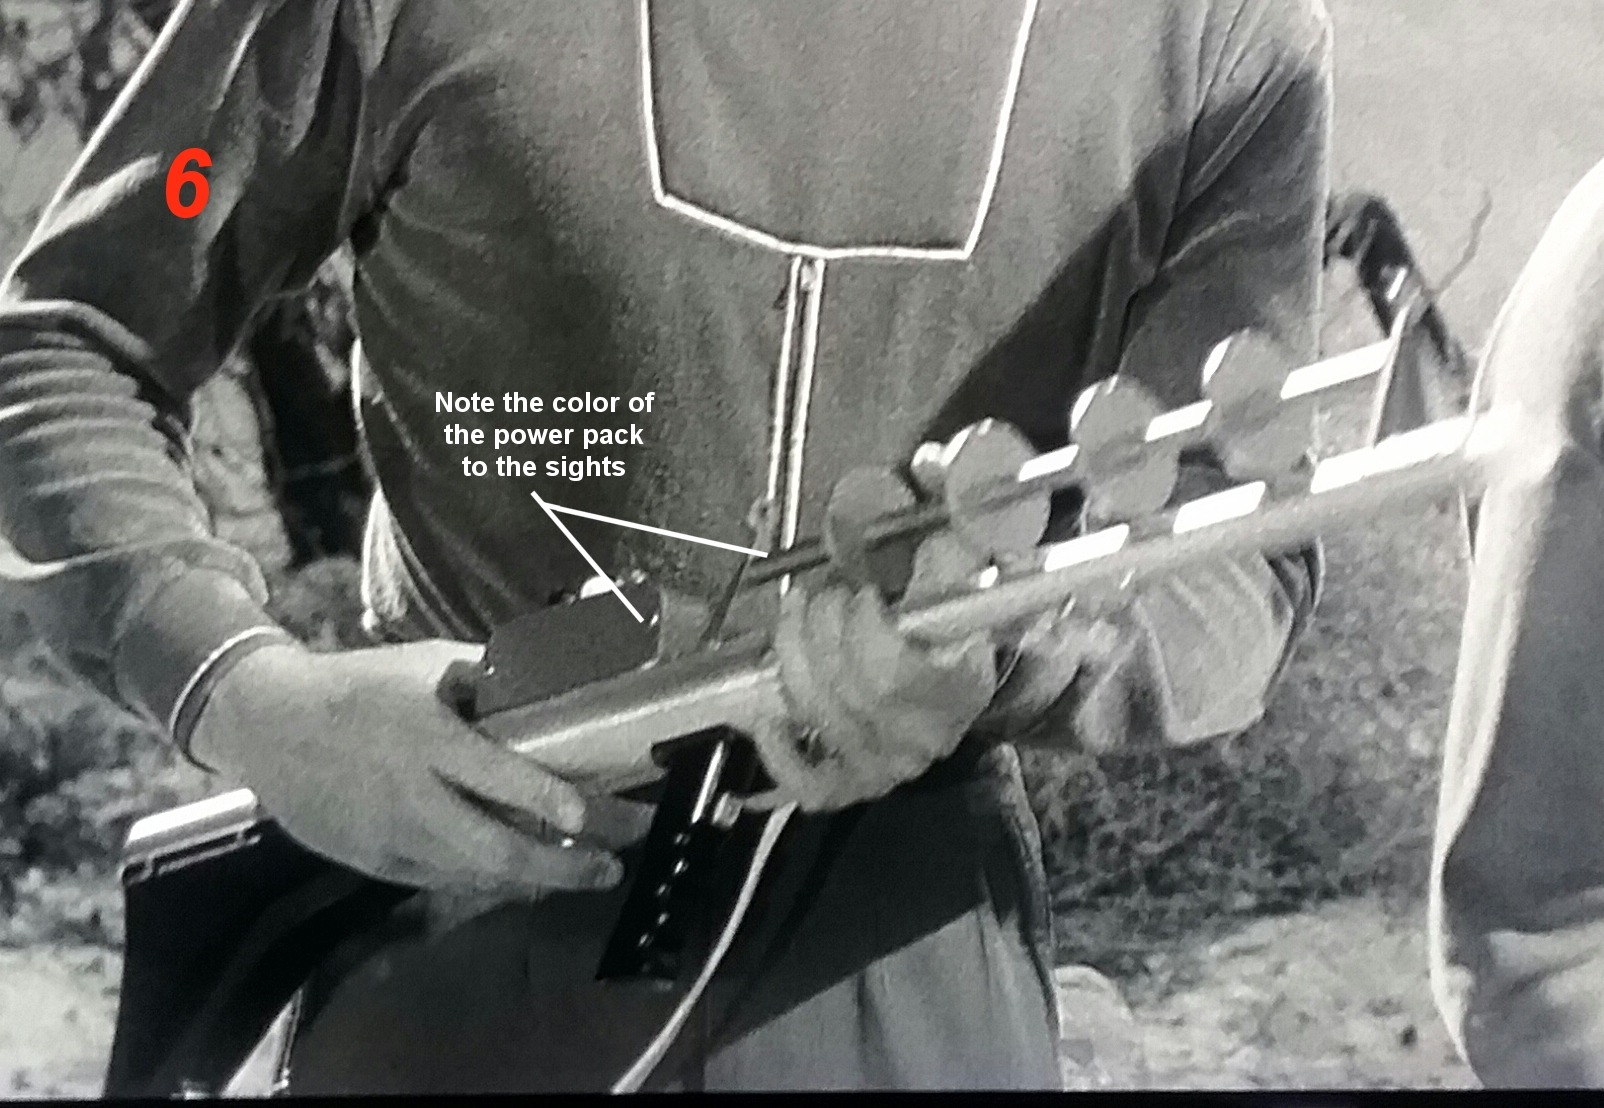
stills. There are several episodes with the laser rifle, but
I felt the Season 1 The Keeper two-part episode had
some of the best laser rifle action. Below are some of the
stills I used.
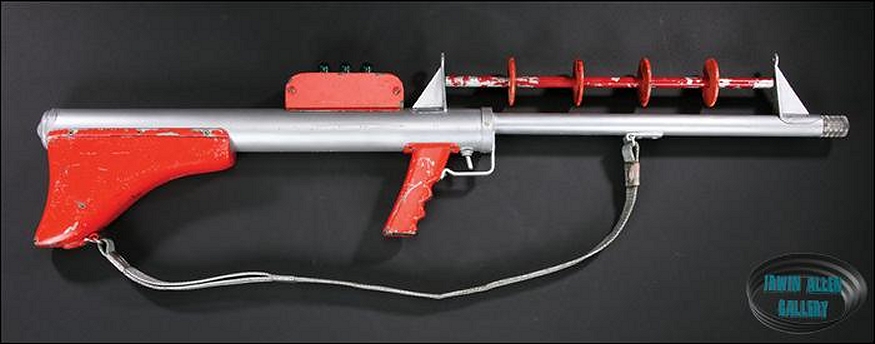
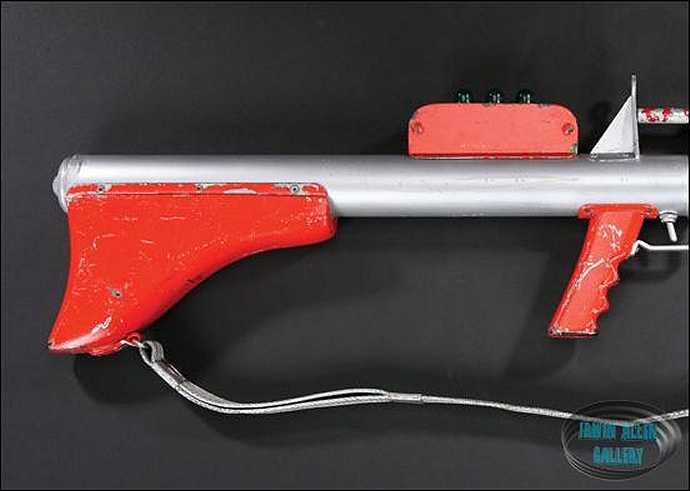
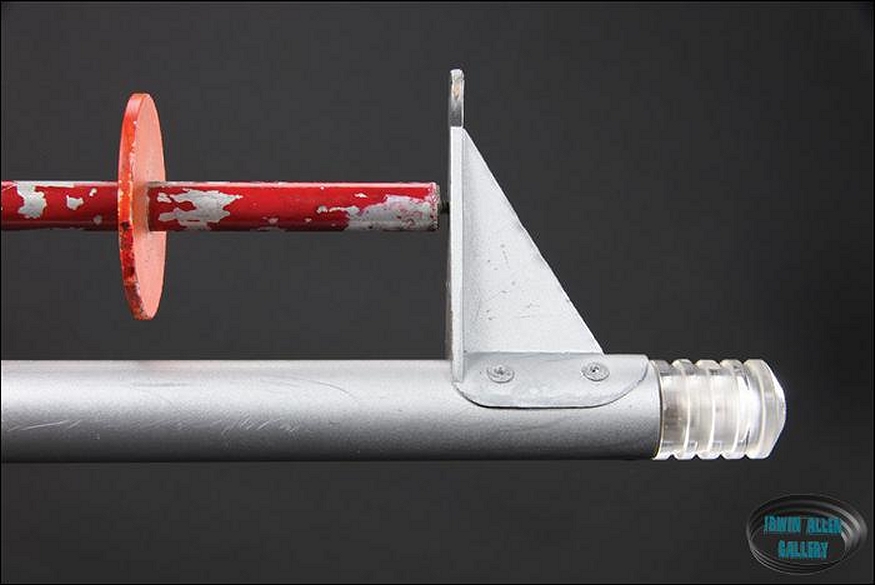
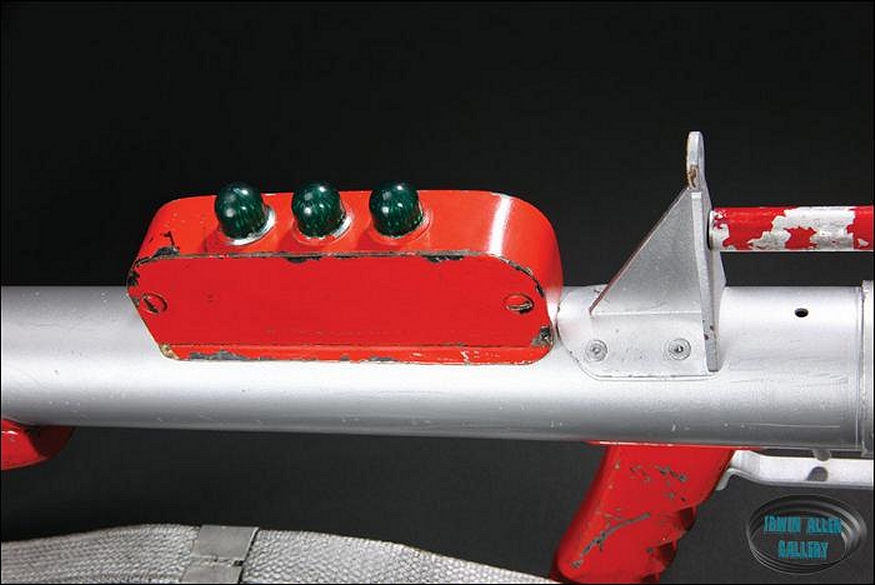
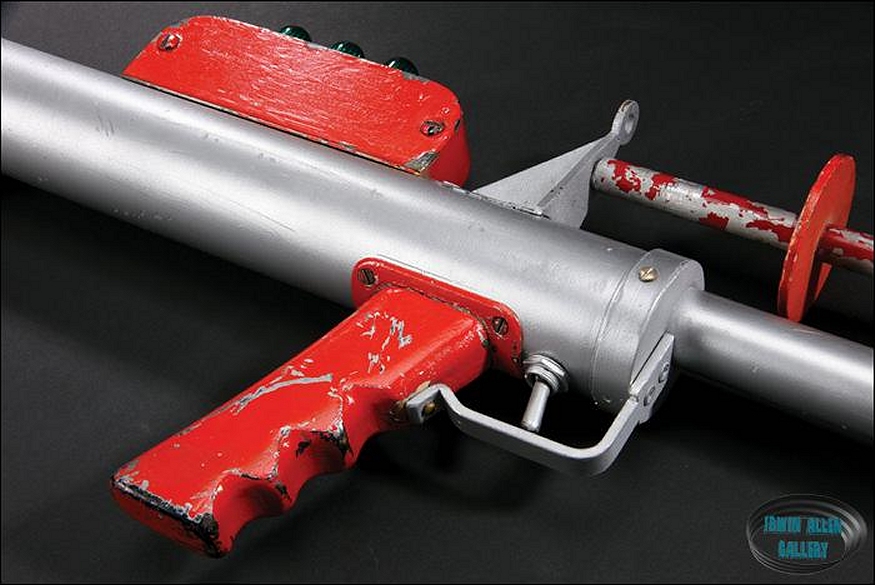
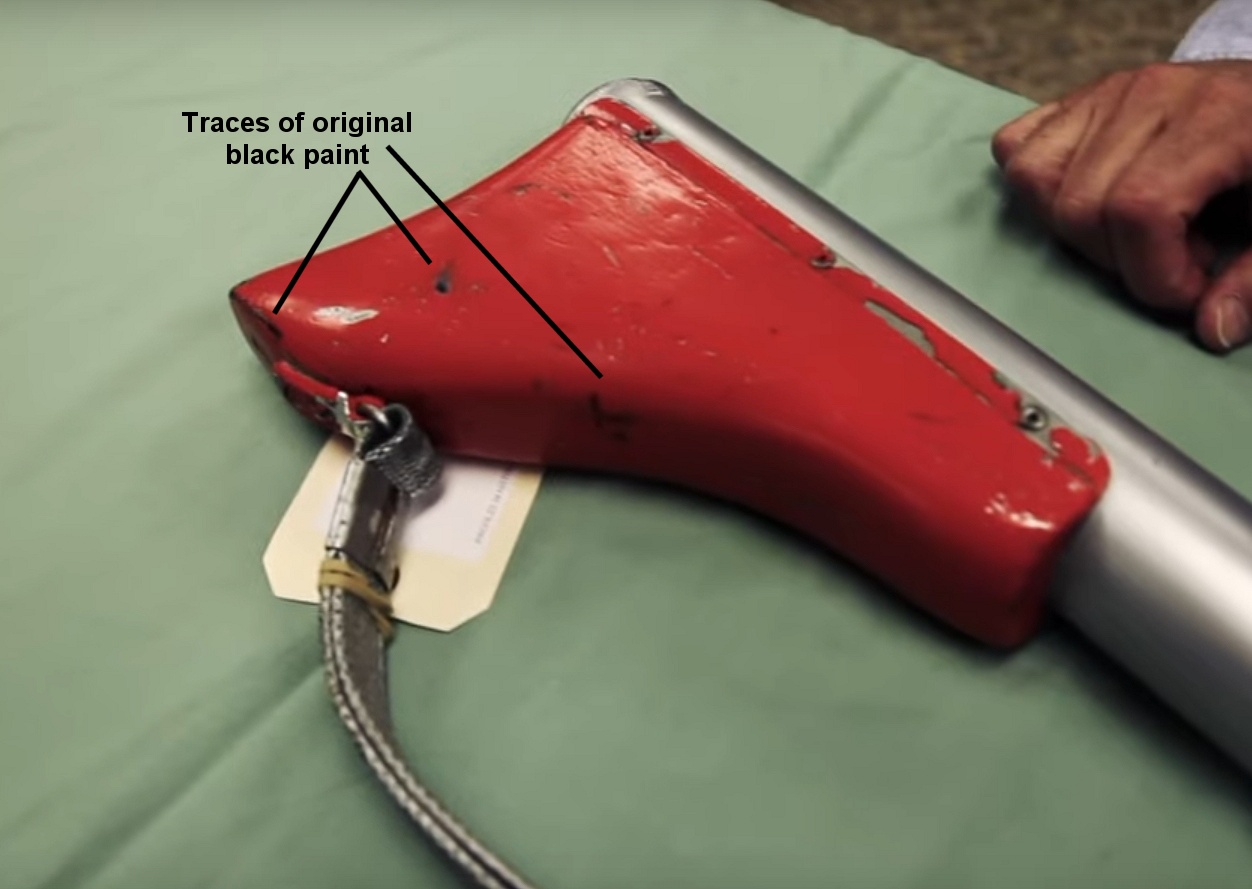
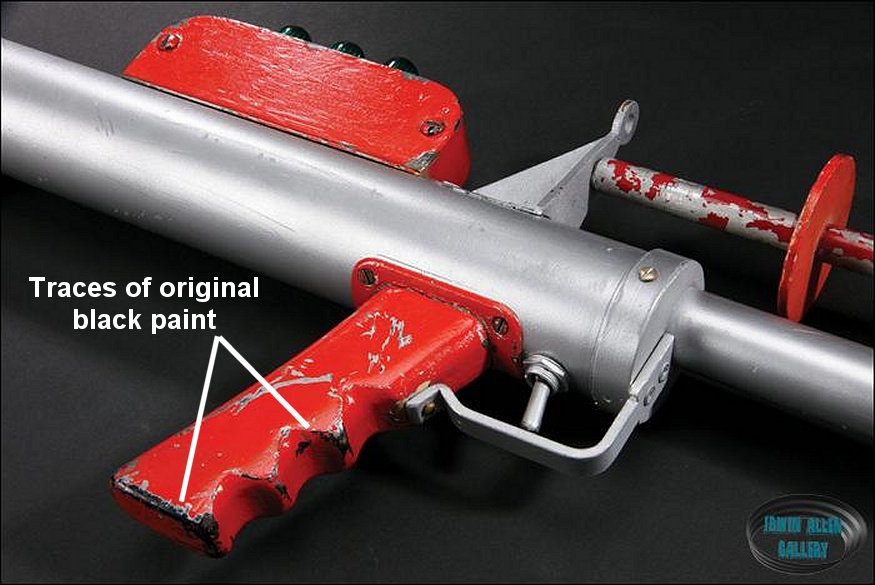
I
also searched online and found these images of the original
existing prop.
The watermark in the
bottom corner shows Irwin Allen Gallery but I don't see the
images there now.
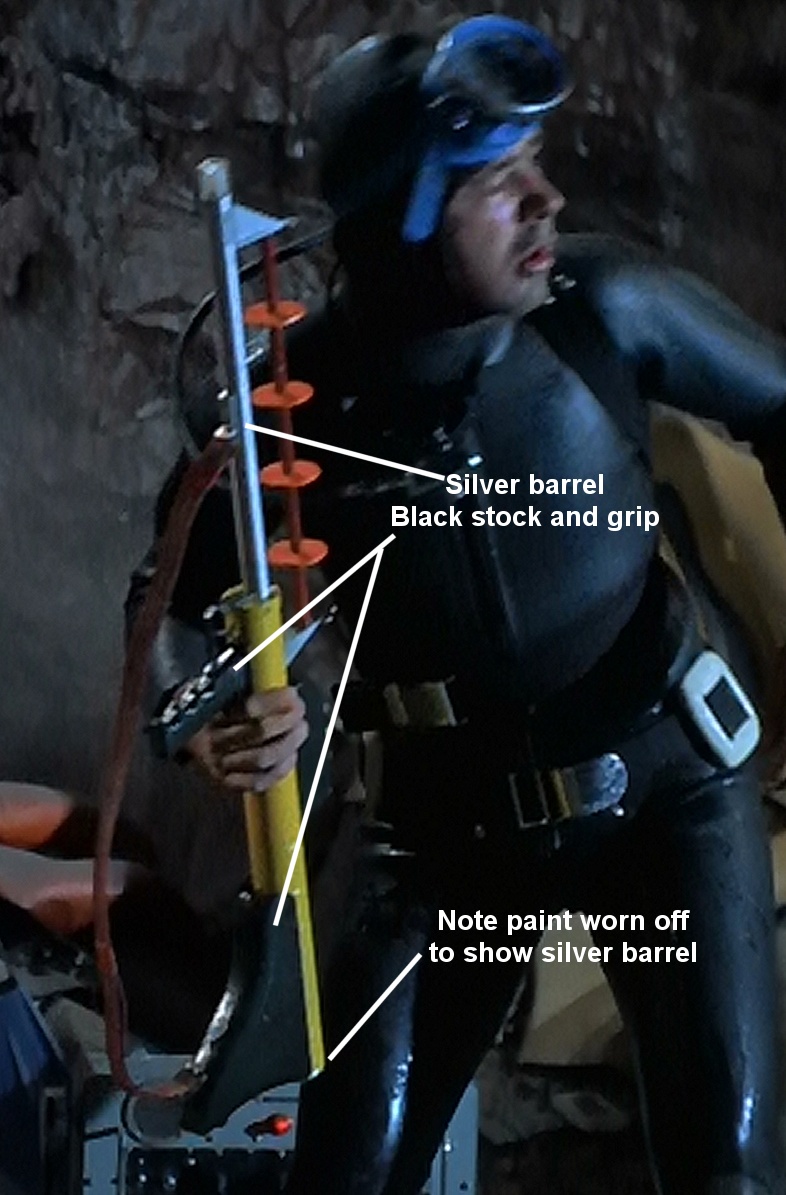
The laser rifle was also reused (and repainted) on
other Irwin Allen TV shows, such as the
Season 3, Episode 26 Voyage to the Bottom of the Sea
episode, Destroy Seaview, where it's called a "stun
gun".
Now, on to the build.
The first thing I did was to do a lot of scientific
estimation (i.e. I guessed) as to the length of the laser
rifle.
I came up with 32 inches (813mm), from the end of the main
rifle barrel to the clear tip on the front end. Next, I
loaded the first existing side view prop photo above into an
image/photo editing program and enlarged the
image until it was 32 inches (813mm). From there, I was able to pull
other measurements and get a pretty fair
approximation of various dimensions of the laser rifle.
I started with a piece of PVC pipe (1.5 inch - 39mm ID,
1.9375 inch - 49mm OD) 16.5 inches (419mm) in length.
For the front barrel I used an aluminum tube (0.75 inch -
19mm ID, 0.875 inch - 22mm OD). The front barrel that
protrudes from the rear barrel is 13.5 inches (343mm) in
length, with an additional 3 inches (76mm) that is inserted
into the rear barrel, more on that below.
I wanted this to be an operating laser rifle, so I wanted to
add a laser. I decided on a Thor II 450nm blue, 3000mw
laser.
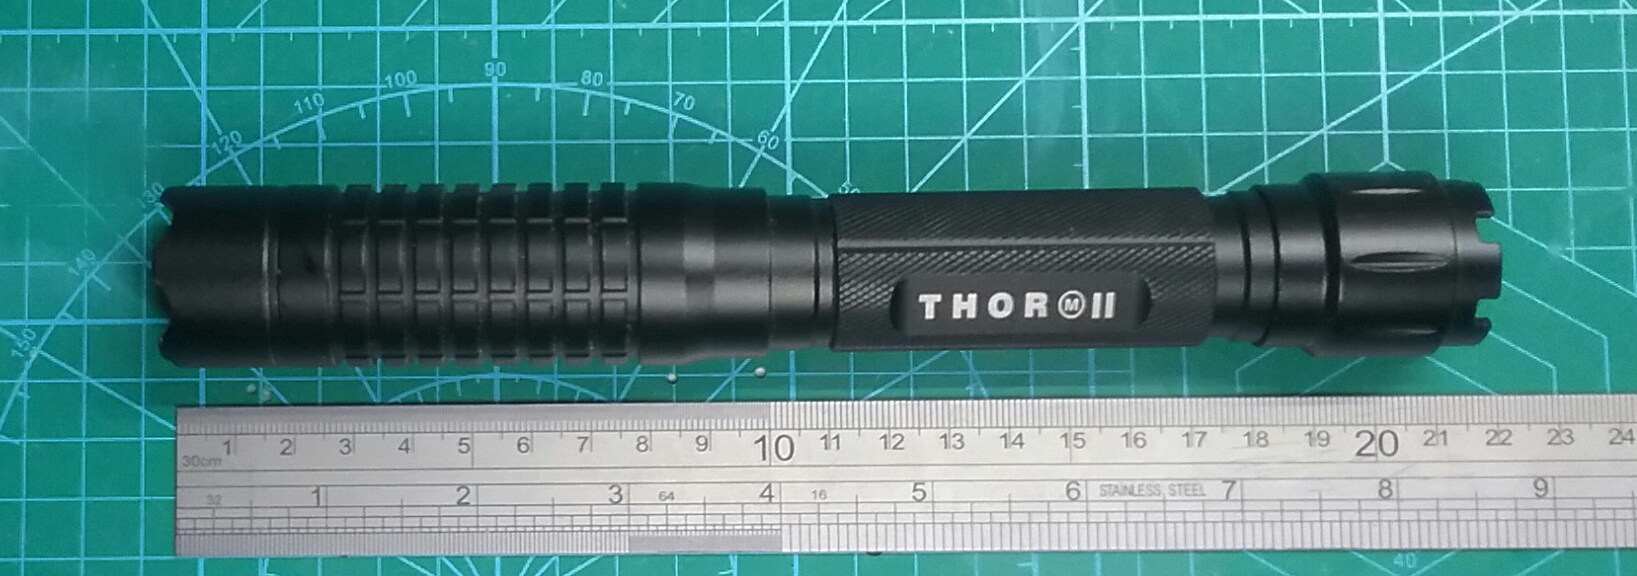
This was a little too long for my liking, so after taking it
apart, this is what I had:
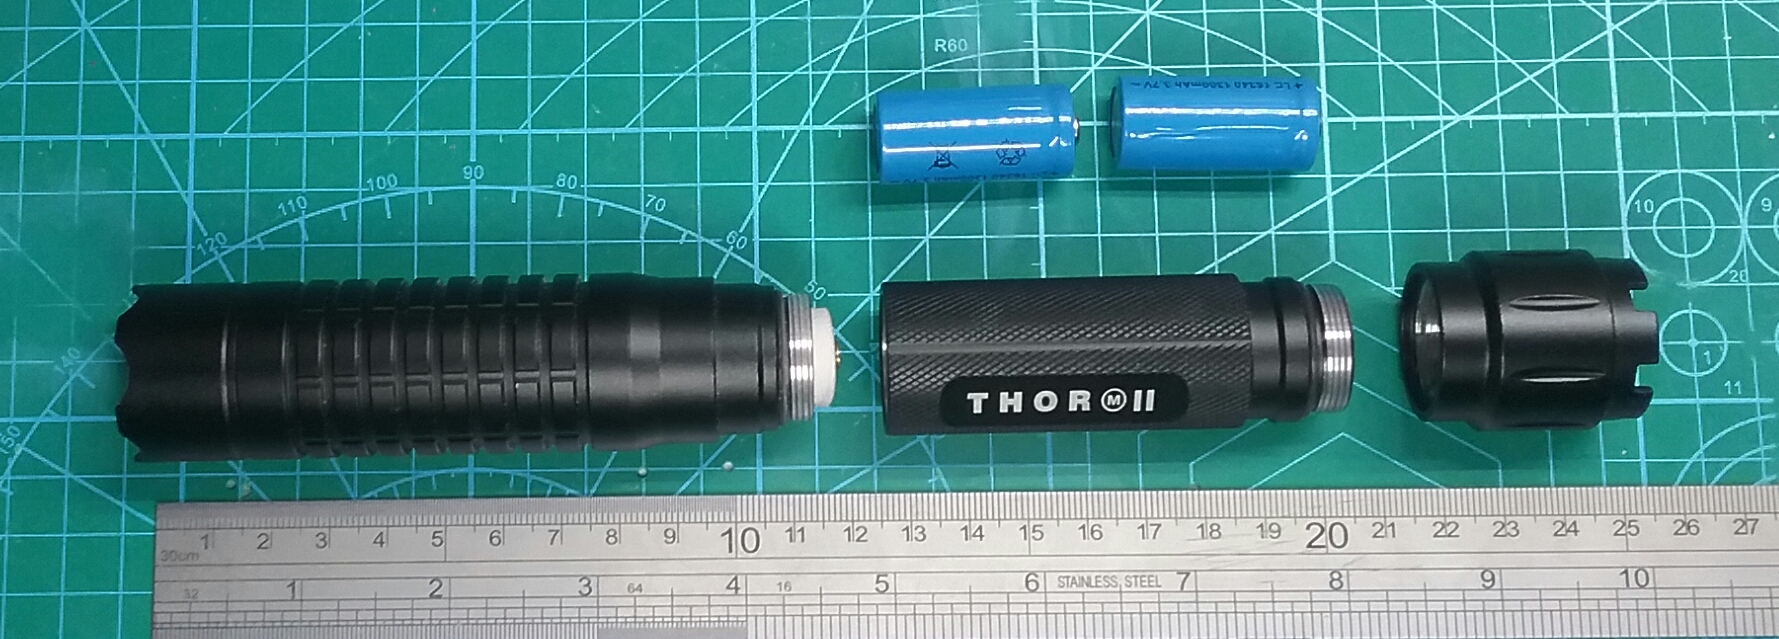
Ok, so the actual laser part was about 4.5 inches (114mm), I
can work with this.
I thought of several options, I finally decided on option 3
in the image below:
First, I purchased an aluminum tube (1.25 inch - 32mm ID, 1.375 inch - 35mm
OD)
and cut it down to house the laser. I also had to cut down
the sides of the aluminum tube
to fit against the PVC pipe to help later alignment and to
give a good gluing surface.
There was still a little play when I put the laser in the
tube, so I cut a piece of sheet styrene
(0.010 inch, 0.25mm), rolled it into a tube and inserted it
into the aluminum tube.
The laser fit very snugly with no play at all.
After making some test fits, the laser wasn't in the center
of the front barrel. I added
a plastic tube to sleeve over the front aluminum barrel, and
it seemed to do the trick.
I initially tried to mount the laser assembly first and then
add the front aluminum barrel separately,
but after several failed attempts it was just too difficult
to get and keep a good alignment for the
laser to line up dead center of the front aluminum barrel. I
finally decided to make the laser
assembly and front aluminum barrel into one big assembly.
This had the advantage of getting the
laser alignment almost perfect, plus I could insert this
whole assembly into the rear PVC barrel
and hopefully get a good alignment when sighting down the
completed laser rifle.
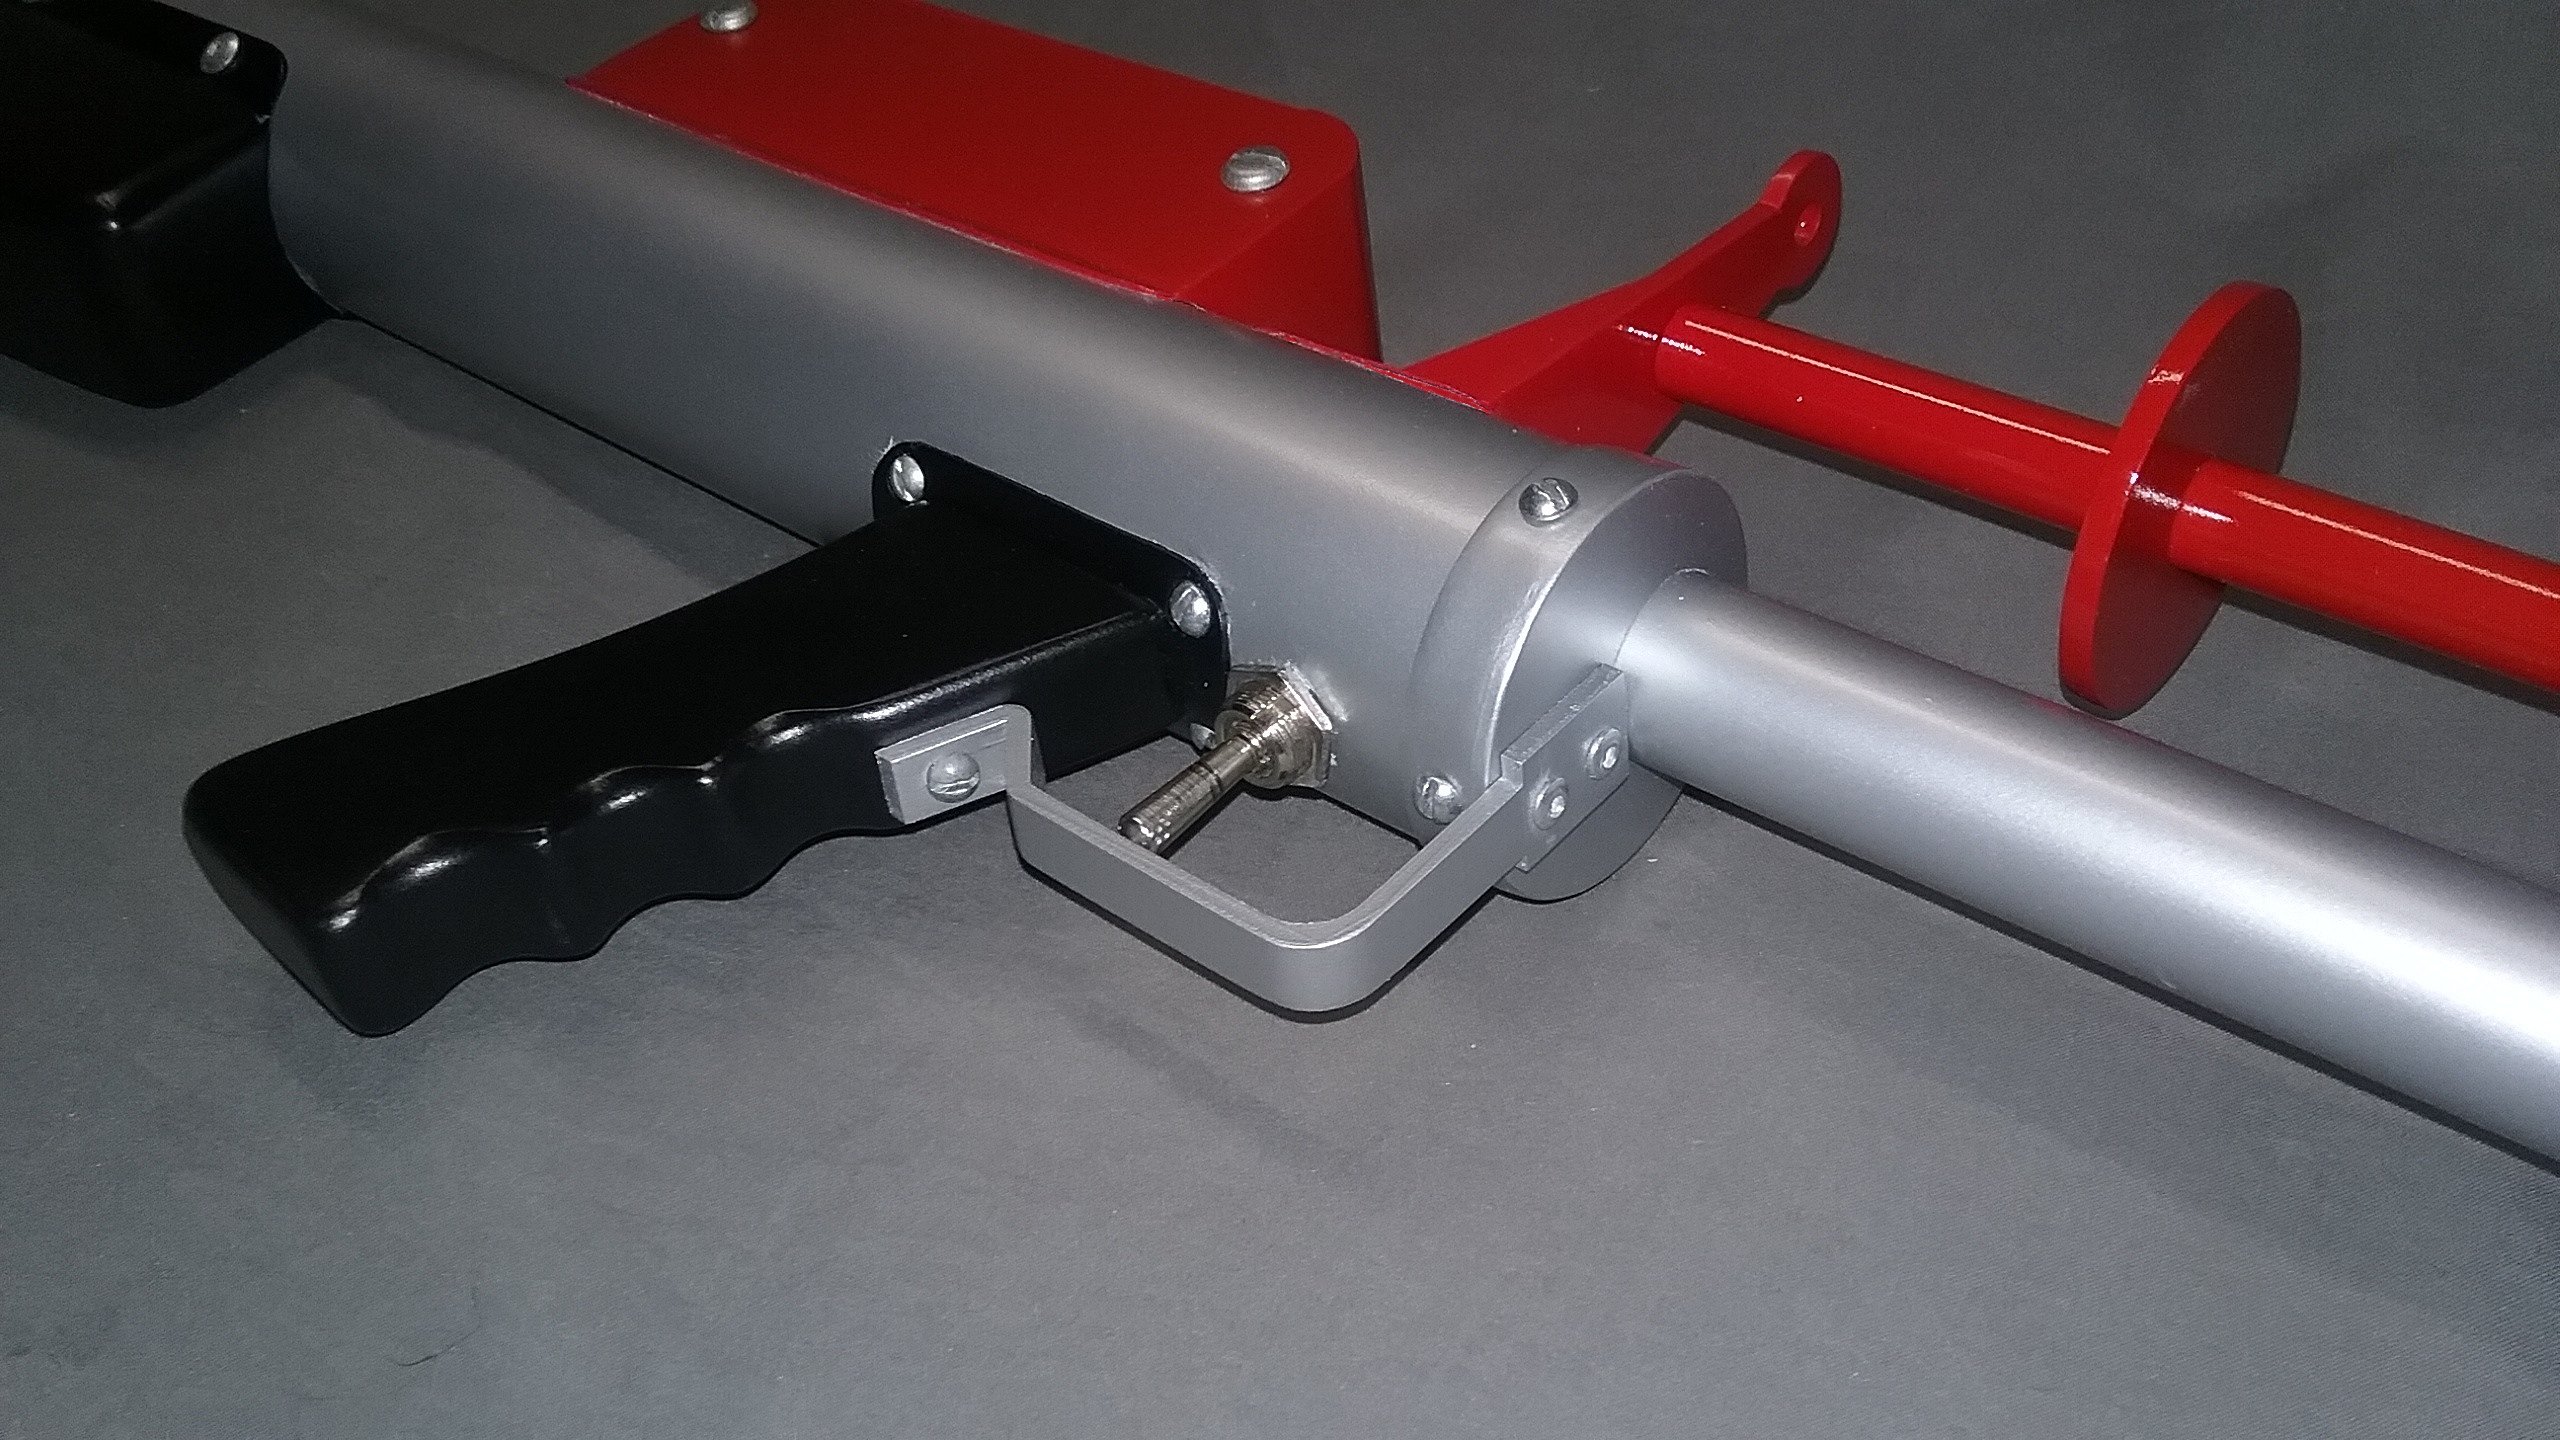
The next problem was figuring out the switch/trigger.
Looking at some reference photos, I could
see the original prop used a simple on/off toggle switch. I
wanted to keep the look of the original prop, but I
wanted an actual trigger feel. I found a momentary toggle
SPDT (on)/off/(on) switch that I thought would work.
Unfortunately, when I did a test fit, that switch was too
big to work.
I got a similar smaller toggle switch that would fit, but
now the toggle was way
too small to look accurate. After a few bad ideas, I finally
figured out that I could maybe
take the big toggle switch apart and use some of the parts
on the smaller toggle switch.
I wanted to use the large toggle, plus the large mounting
nut assembly. After breaking apart the large
toggle, I had to cut off the end and drill a hole to accept
the small toggle. To make sure everything
fit snug and secure, I ground down the smaller toggle switch
locking nuts so they would fit
tightly inside the larger mounting nut assembly, and also
the small toggle needed a little grinding.
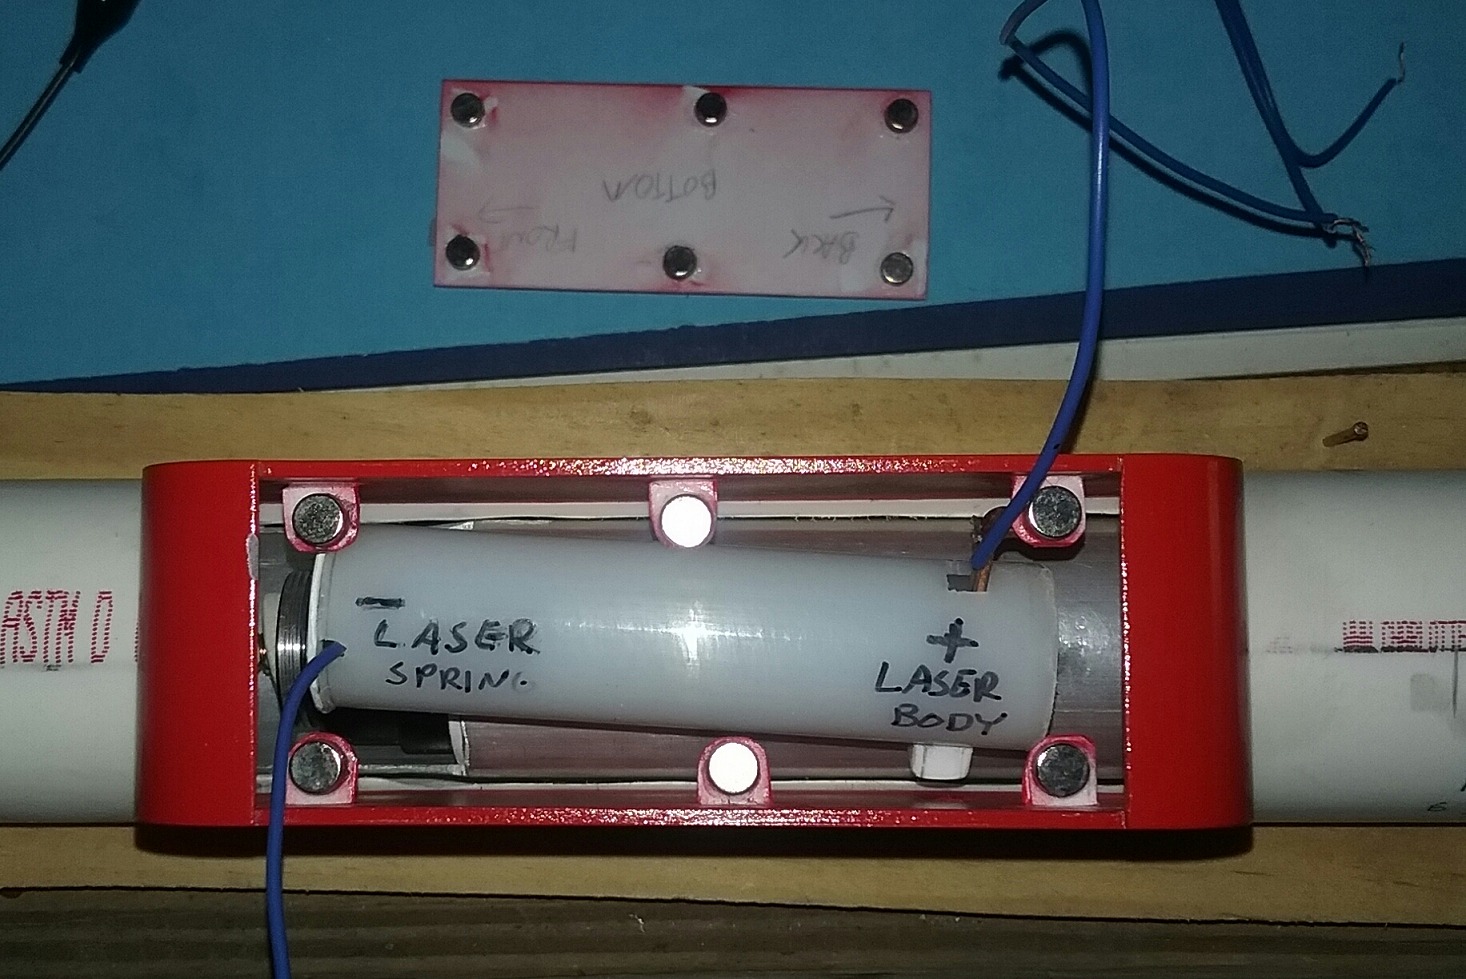
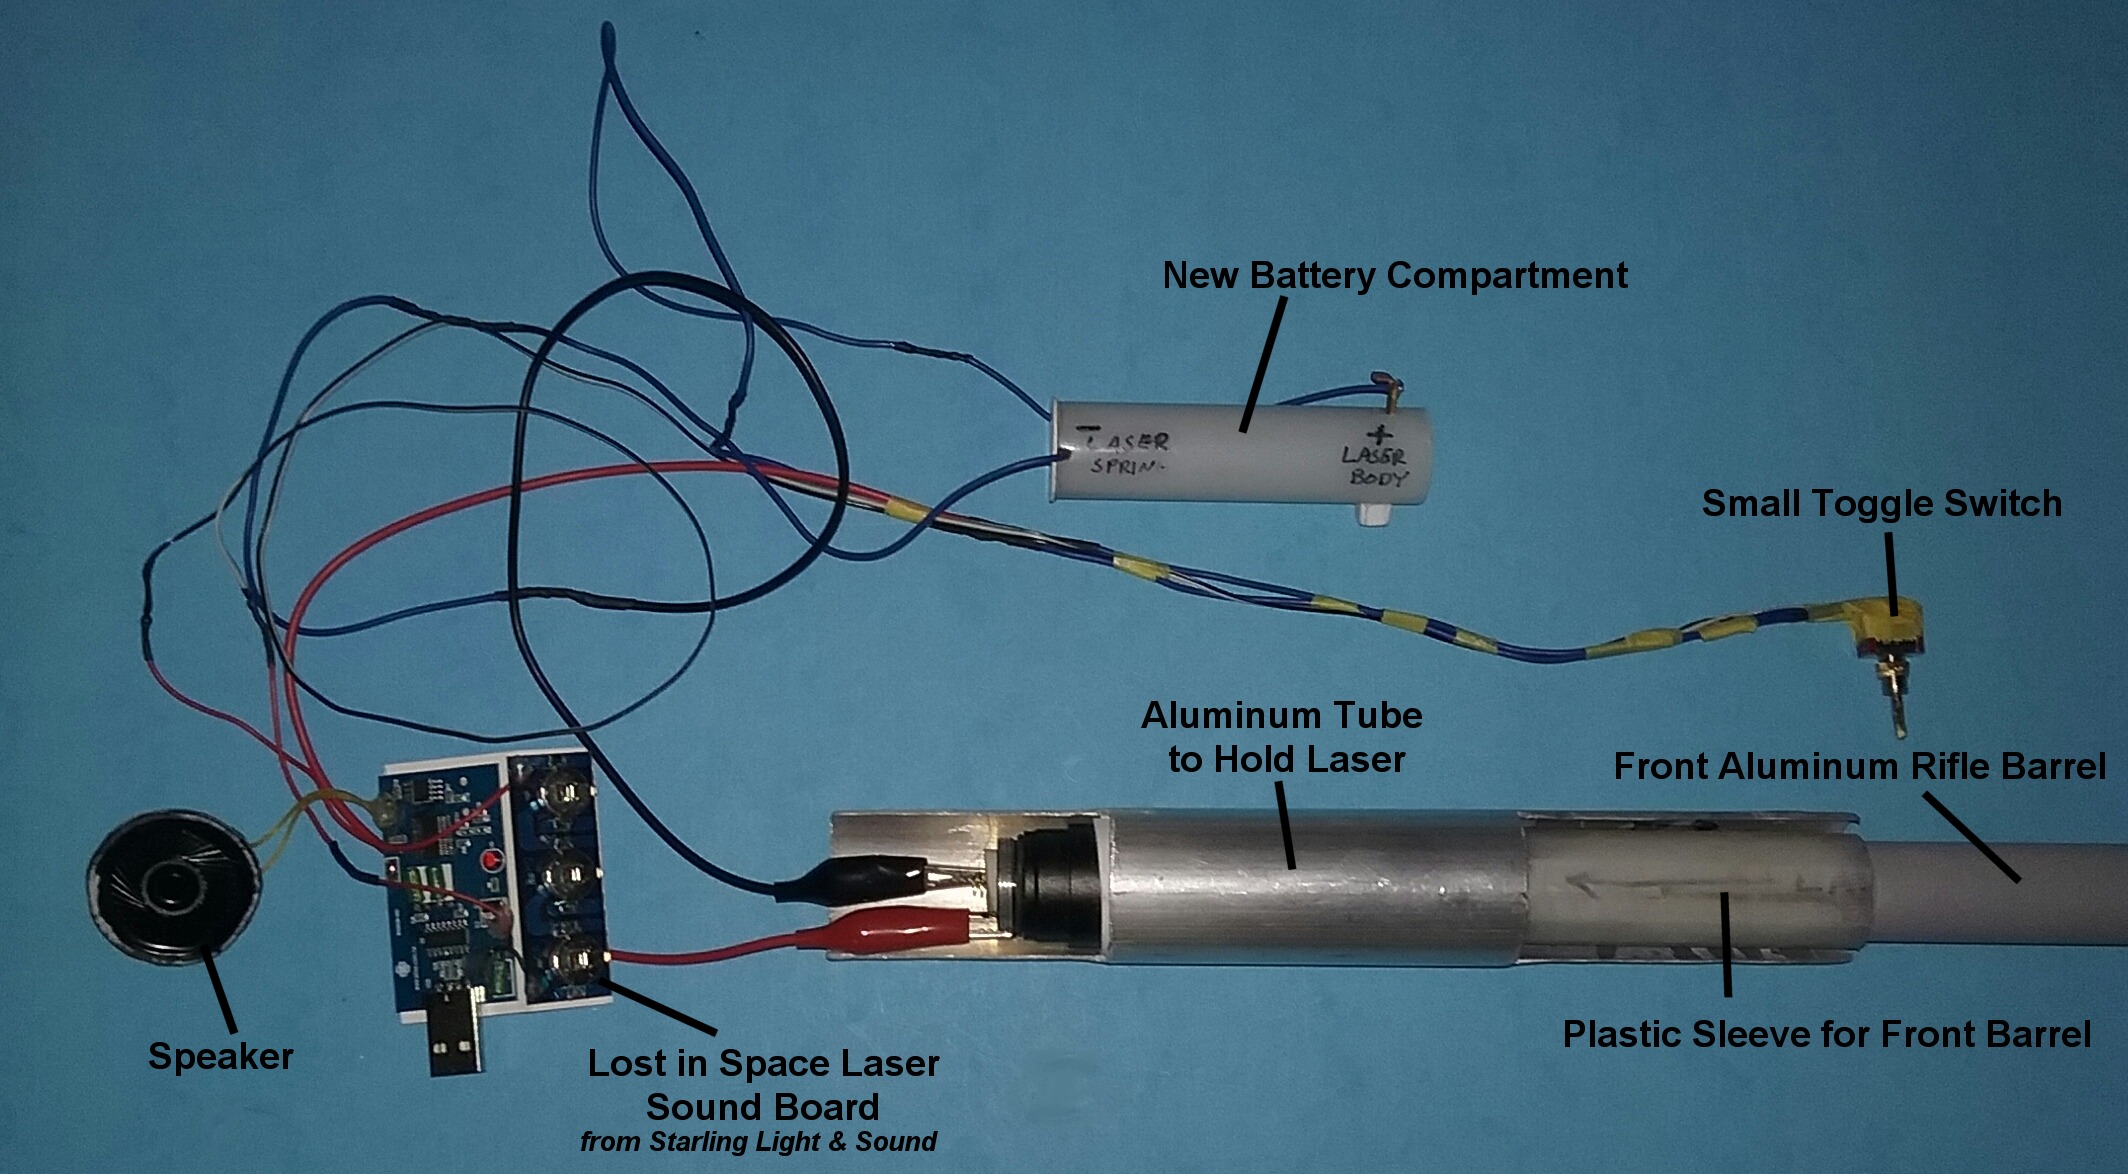
Since I took apart the laser, I needed to make a new battery
compartment. I took
a spring from an old battery holder and soldered a wire to
the spring for one lead.
Next, I cut a small strip of copper sheet and soldered
a wire for the other lead.
Then it was just a matter of cutting a piece of plastic tube
and adding the two leads.
I drilled a hole in the rear PVC rifle barrel to accept the
cobbled together toggle,
did a few test fits, and got acceptable results.
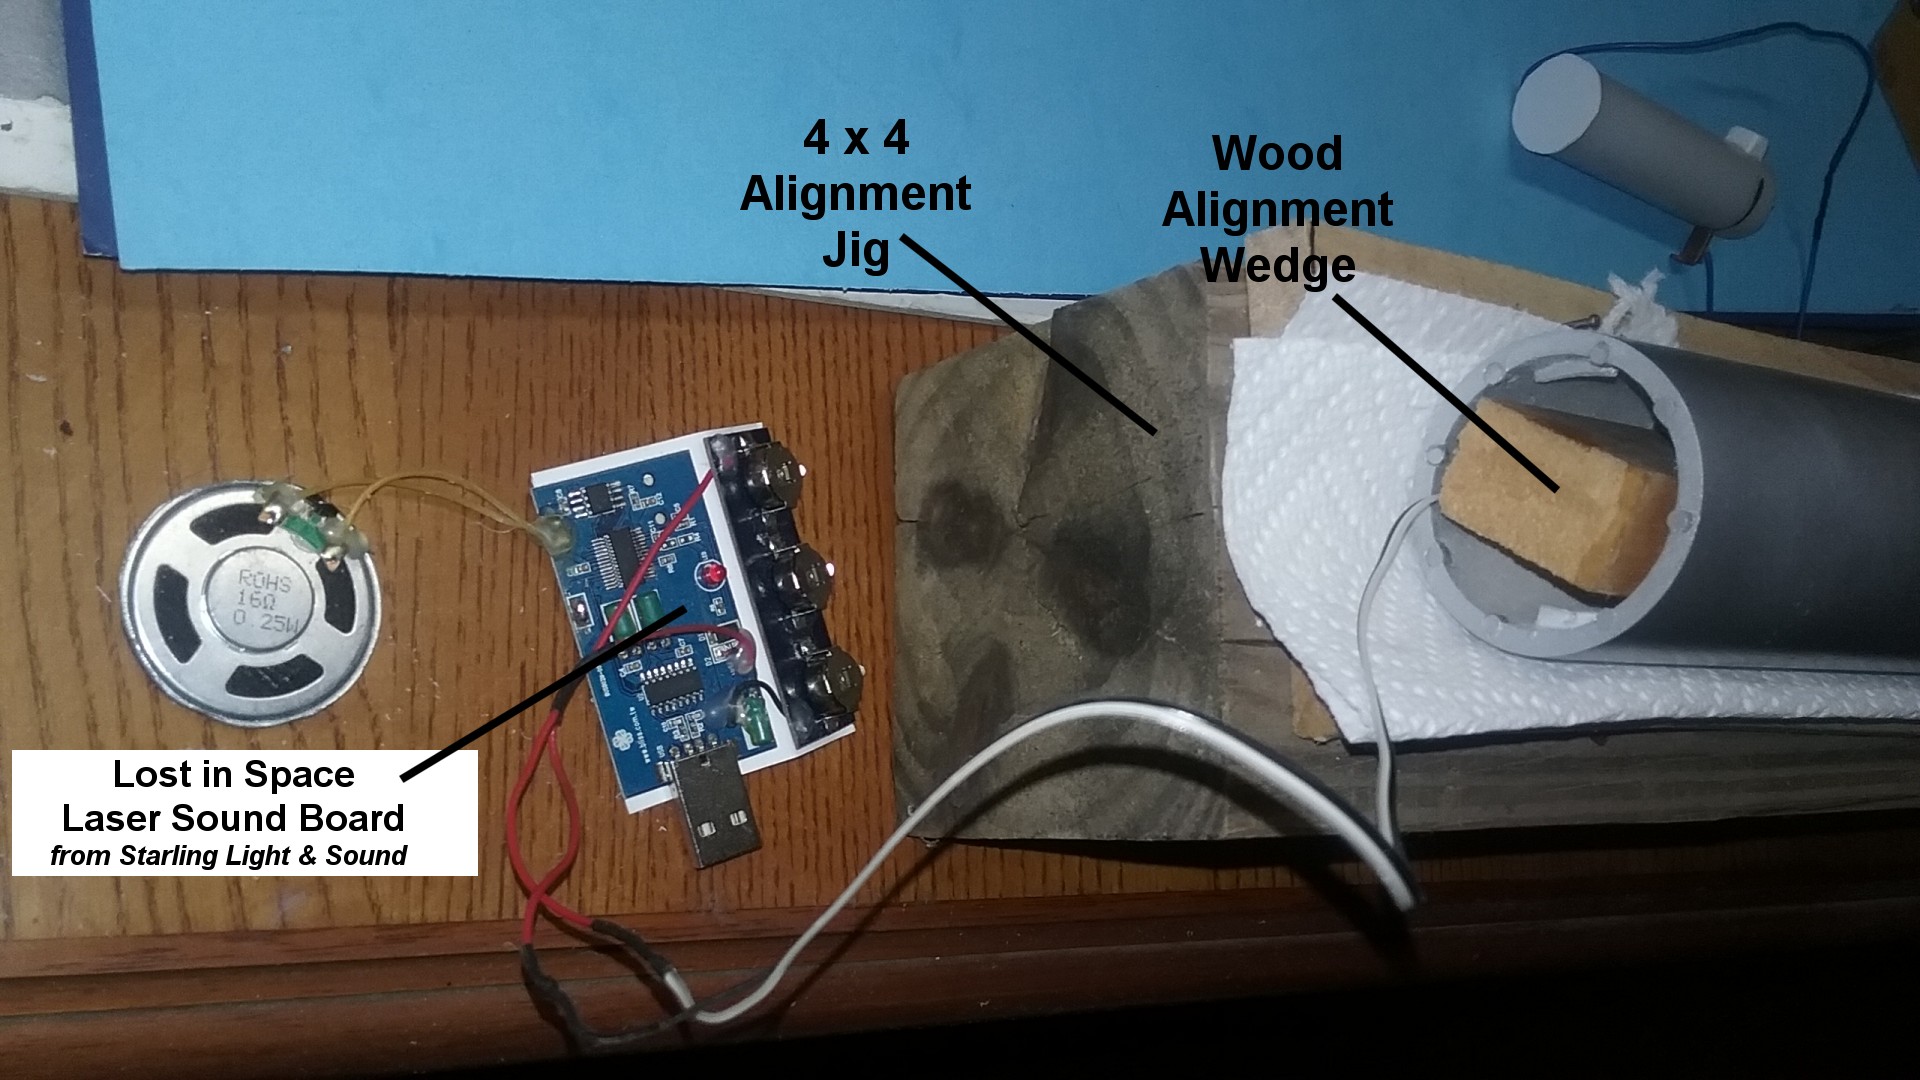
It seemed to me that just a laser by itself is cool, but it
would be better with sound.
After contacting Stan at Starling
Light & Sound, he had a sound board with the Lost
in Space
laser sound, so I had to have it to complete the build. I
hooked up all the wiring, did a few test fires,
then soldered everything together. At last, the front rifle
barrel assembly with all electronics was finished!
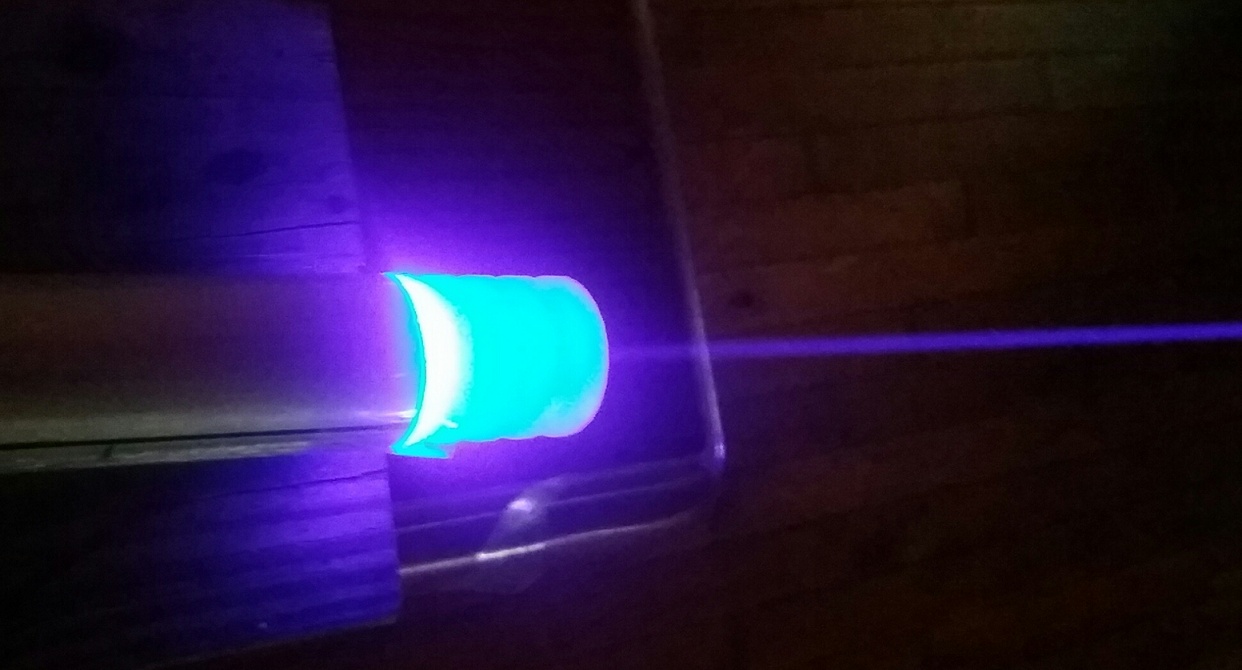
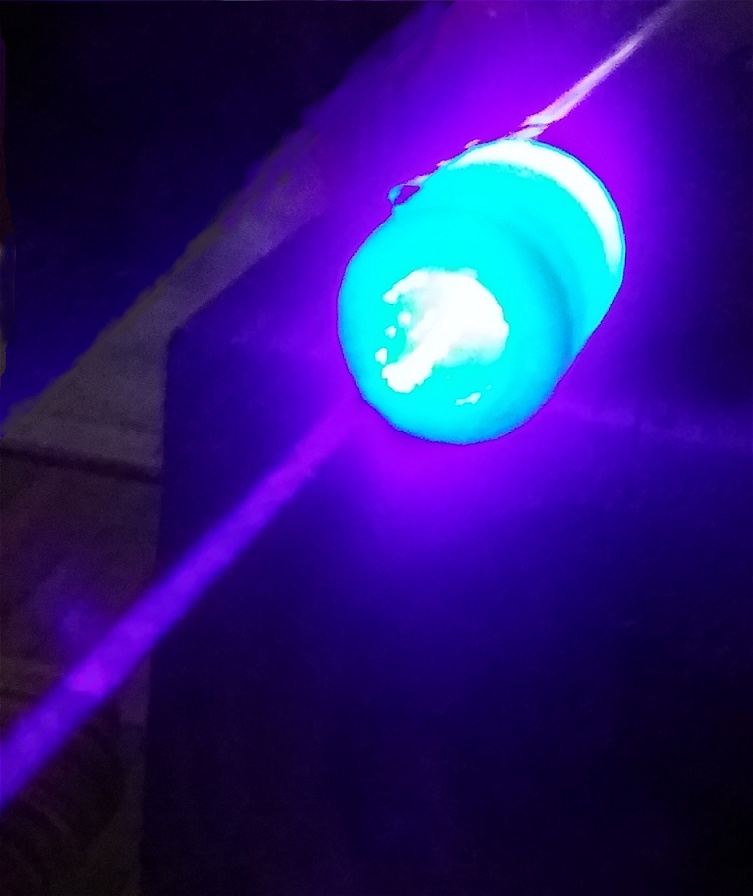
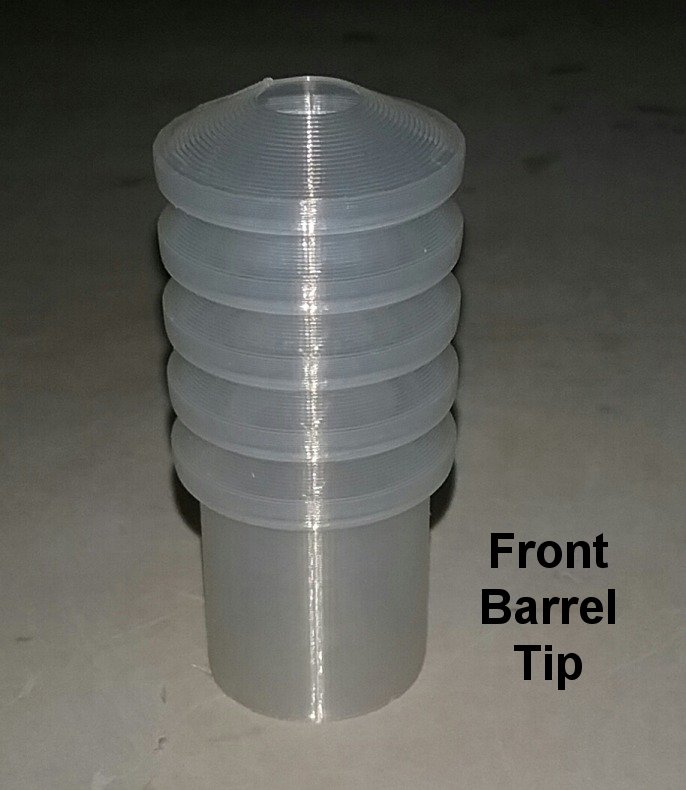
I wasn't expecting the front barrel tip to fluoresce when
the laser was fired... cool!
My camera had problems with how bright the laser was, so the
tip looks much
brighter in the photos than it really is in person.
Here's a video of the laser rifle in action:
Laser
Rifle Test Fire
Now that the operating
parts have been sorted out, it's time to build the detail
parts.
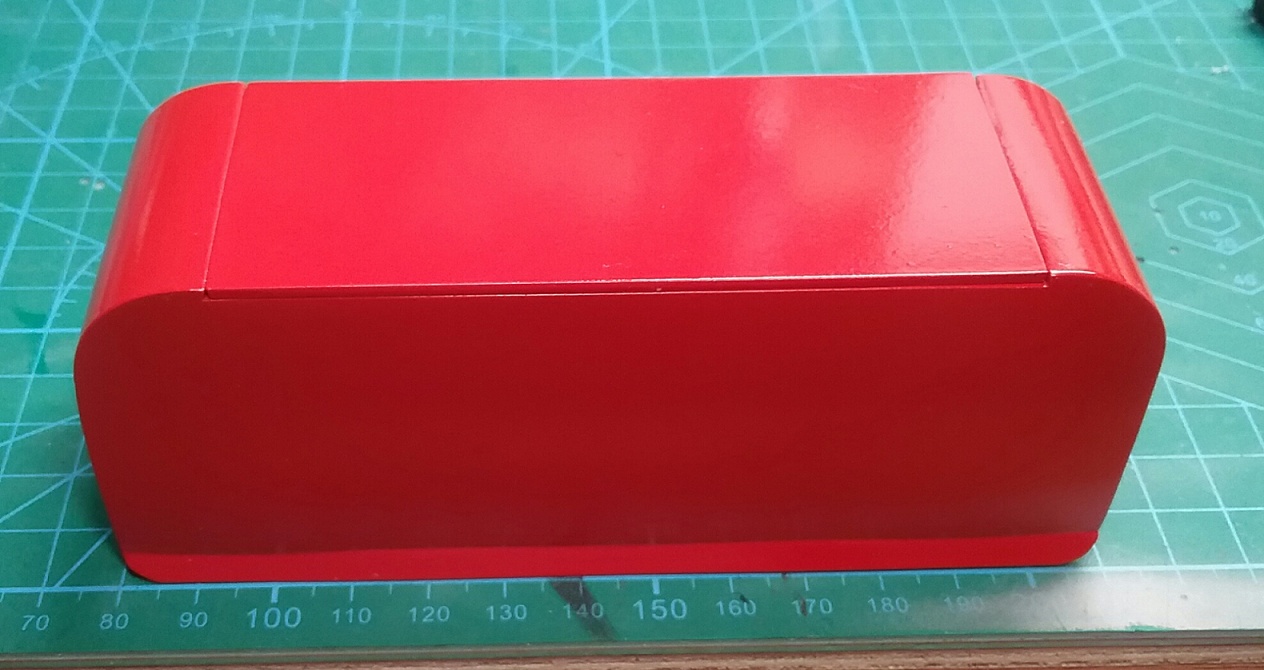
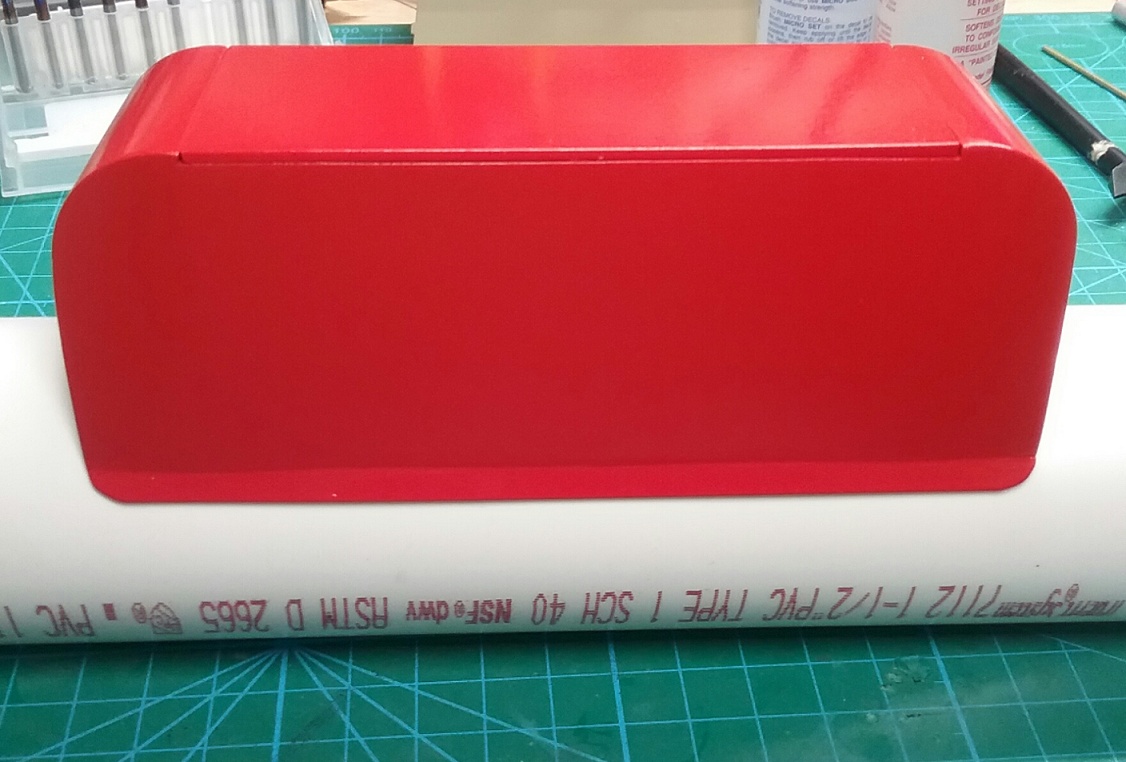
For the power pack box, I made a paper template to check the
fit and appearance
of the parts, then cut the power pack pieces out of 0.060
(1.5mm) sheet styrene.
It's a little bigger than the one on the existing prop but I
had to make it bigger
for the laser body to fit. I added a removable top held on
with 3mm magnets for
access to the battery pack for recharging the batteries.
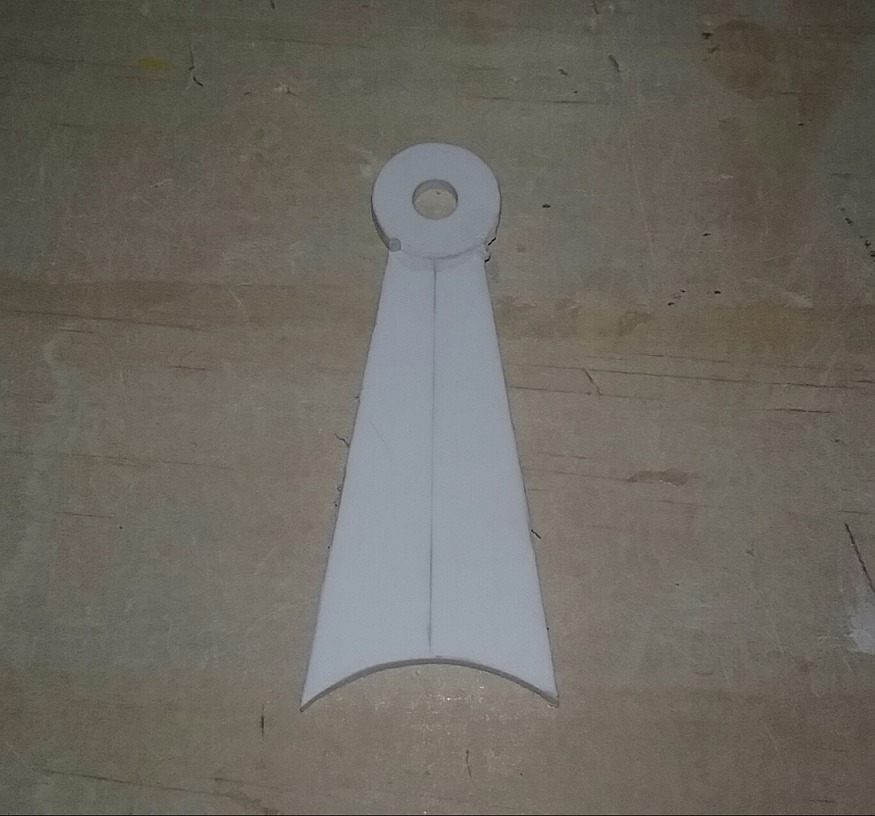
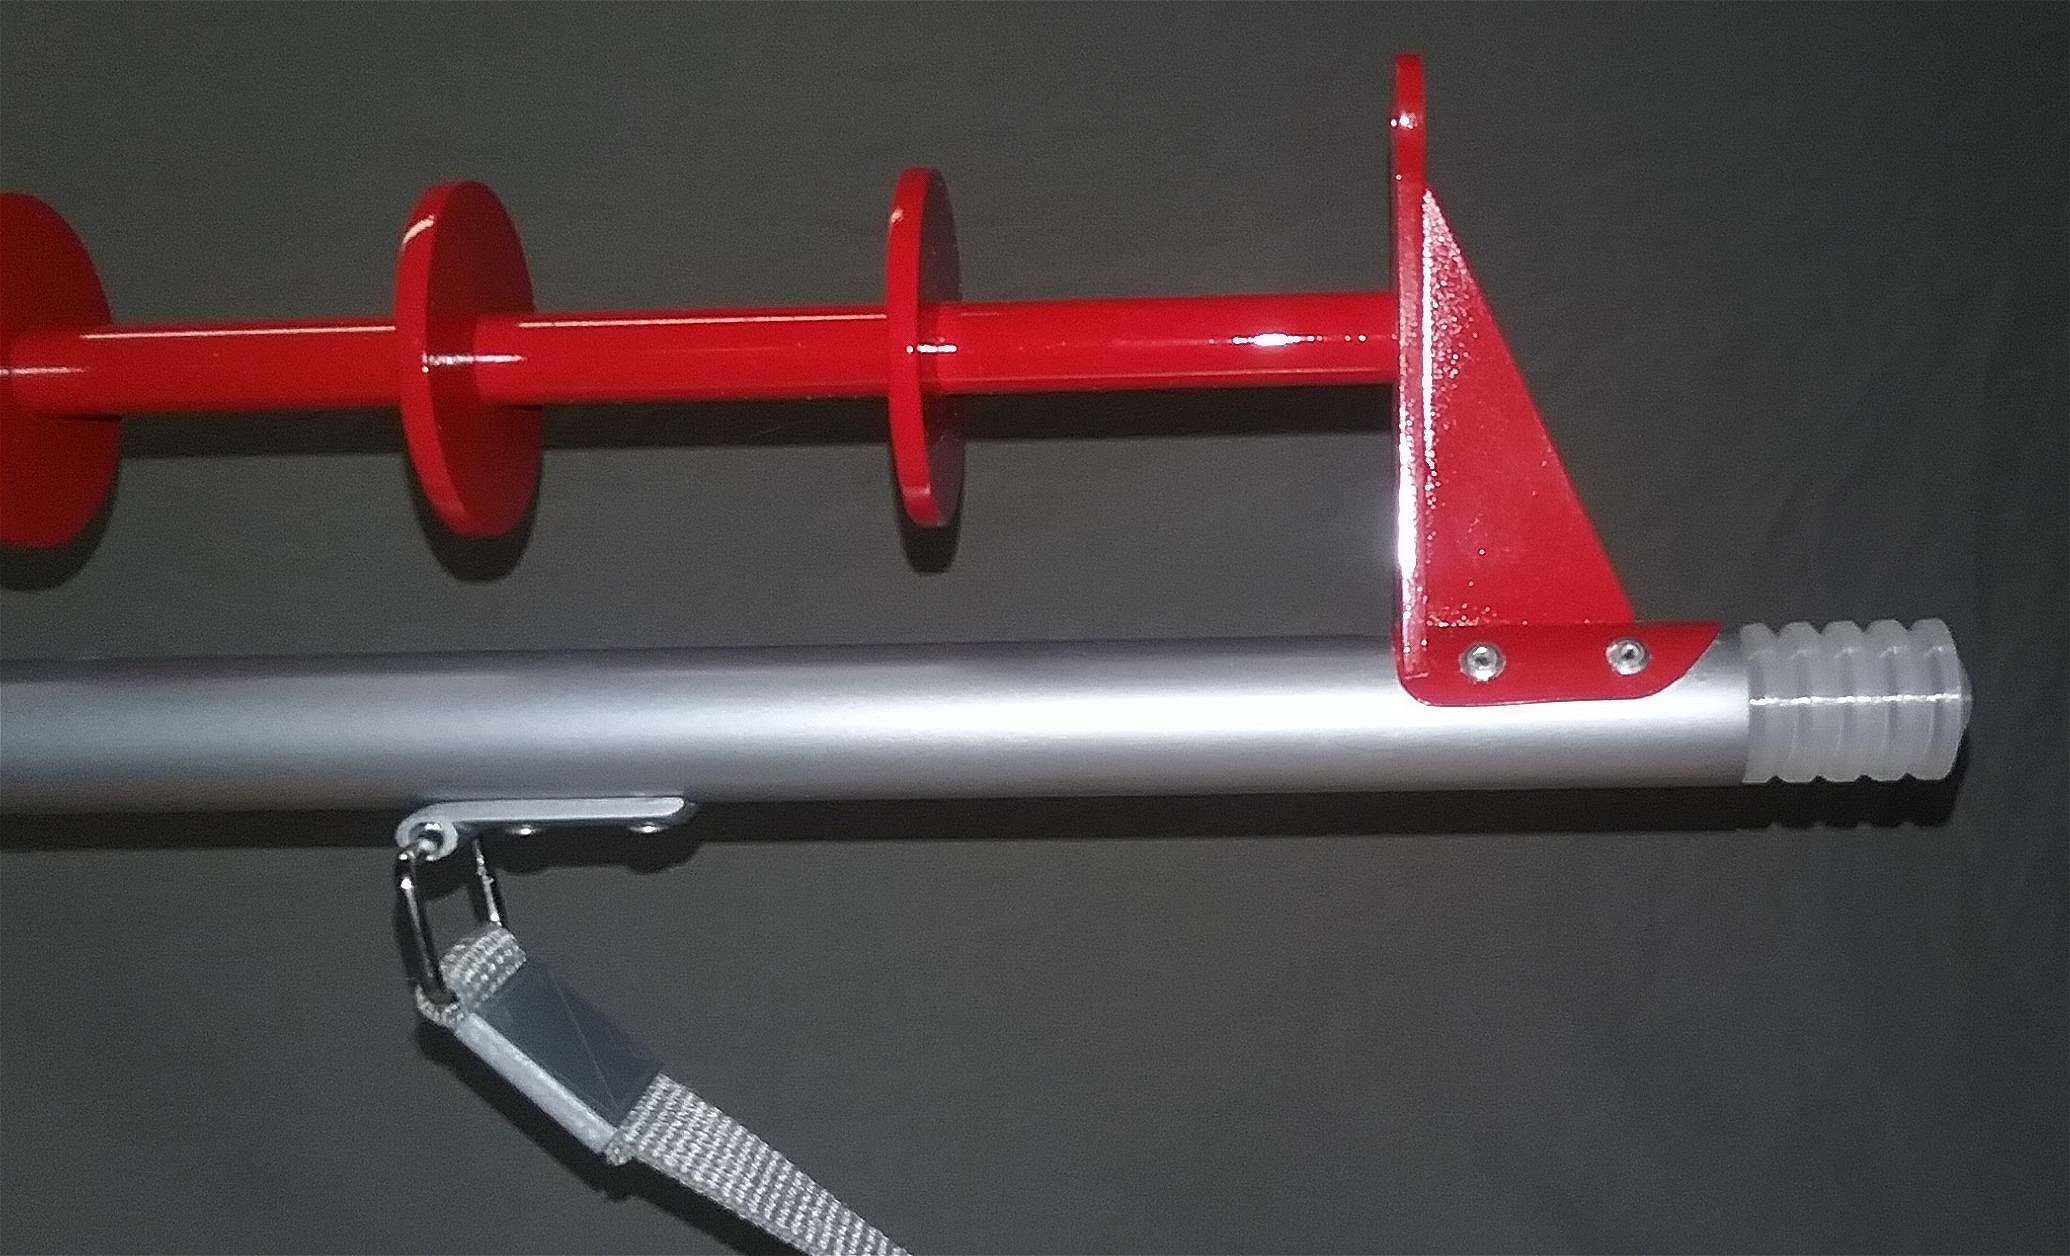
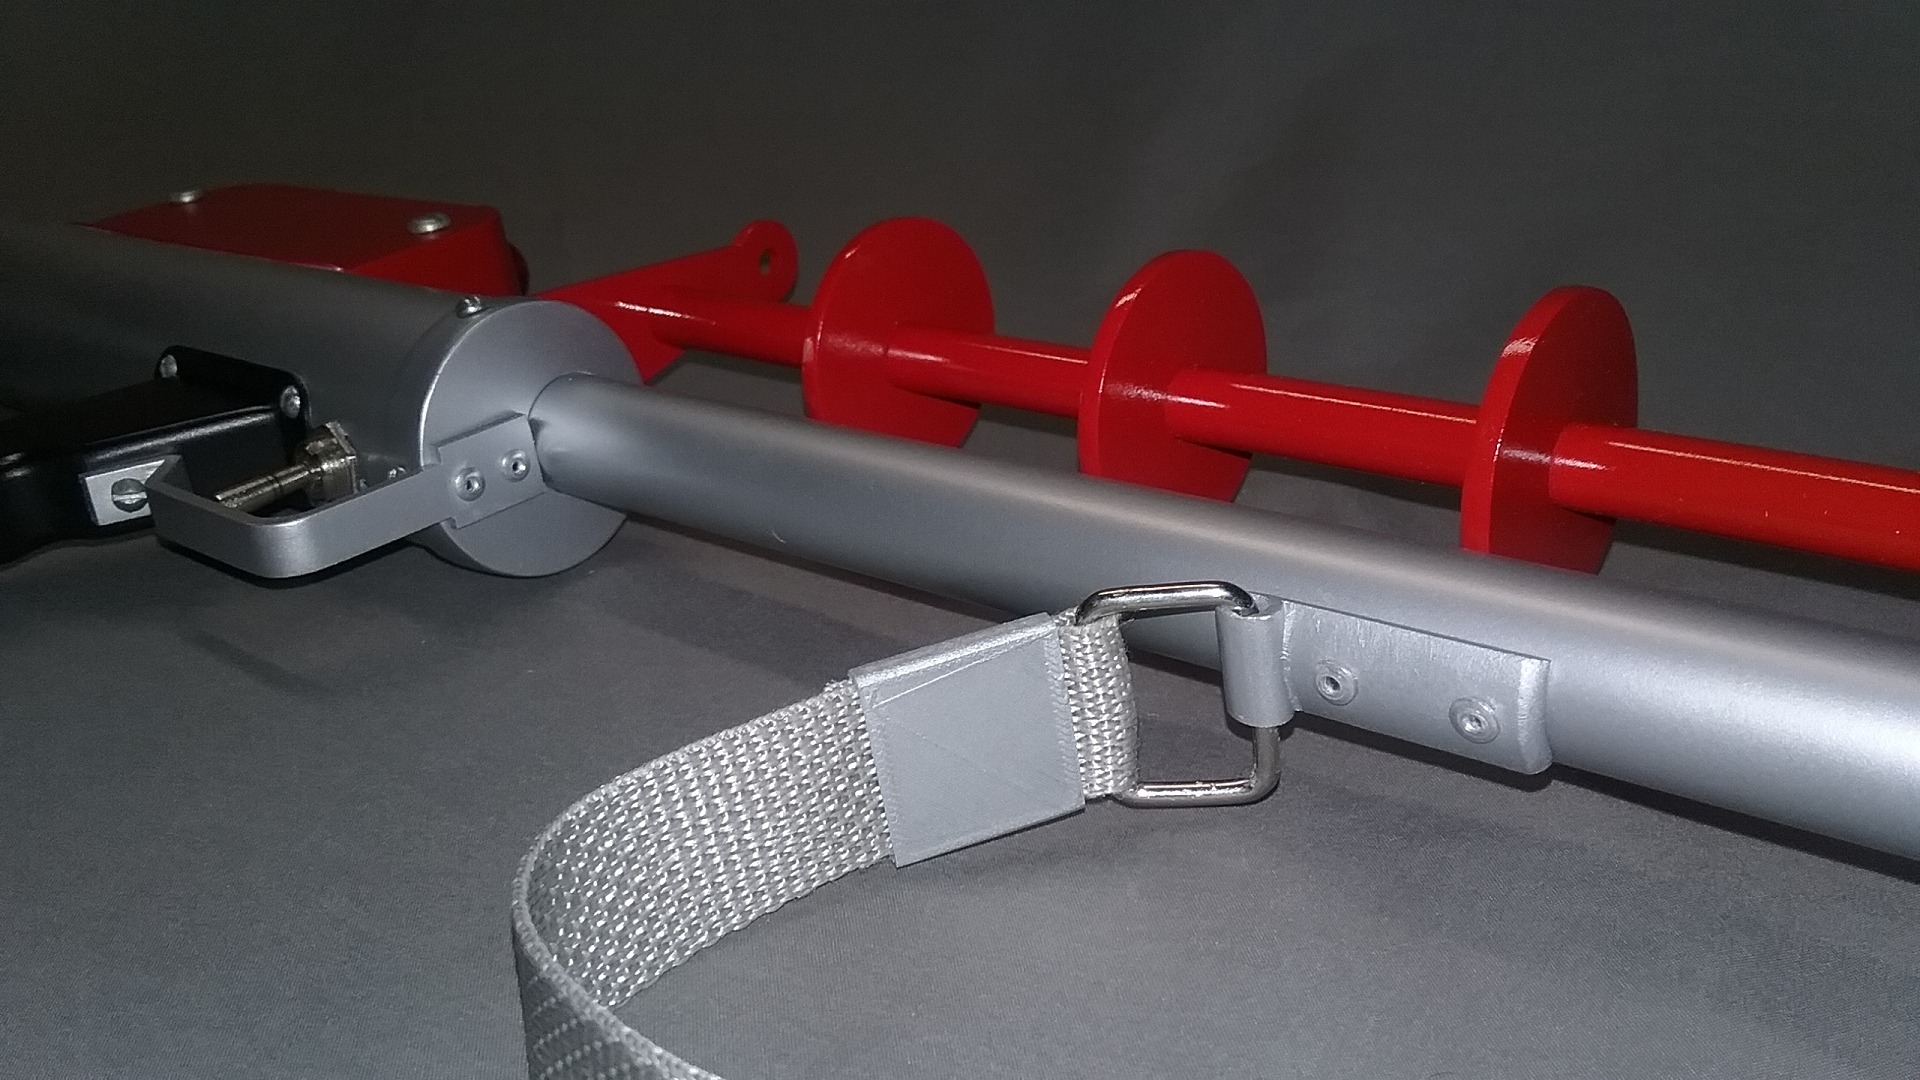
For the front and rear sights, I made a paper pattern and
test fitted it to the
front and rear barrels until I was satisfied, then cut them
both out of sheet
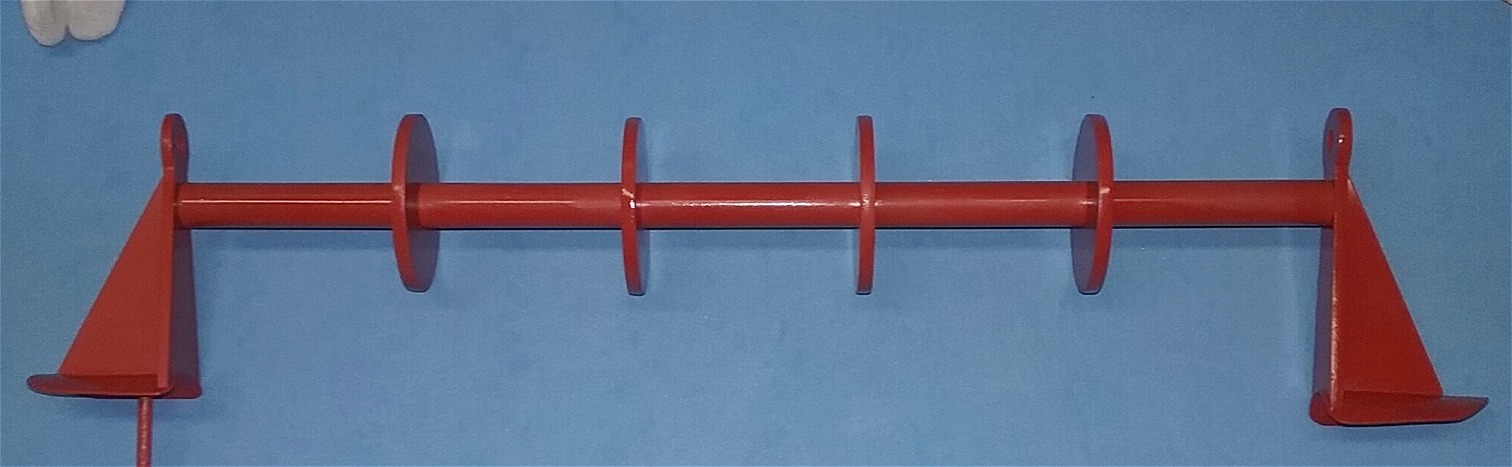
styrene. I used 0.040 inch (1mm) sheet styrene for the
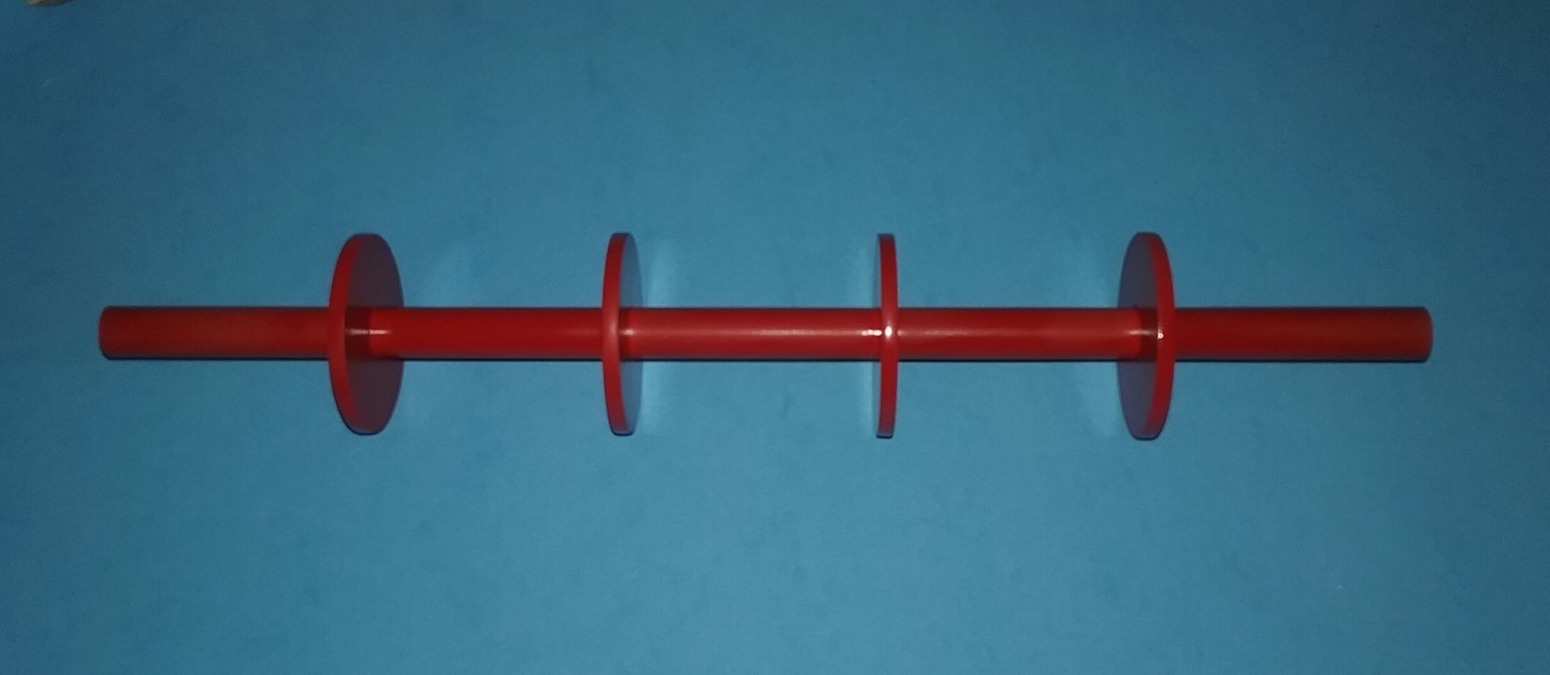
sights' mounting plates. The
heat sink assembly was made from a 0.50 inch (13mm) OD
plastic tube, with a slightly
smaller 0.46875 inch (12mm) OD brass tube inside to add
rigidity. Each
of the four disks were made of two 0.080 inch (2mm) styrene
sheet that
were cut out with a 2.125 inch (54mm) hole saw and glued
together to make a
0.16 inch (4mm) thick disk. I spray painted the power pack
box, front and rear
sights and the heat sink assembly with Tamiya Bright Red
(TS-49 85049).
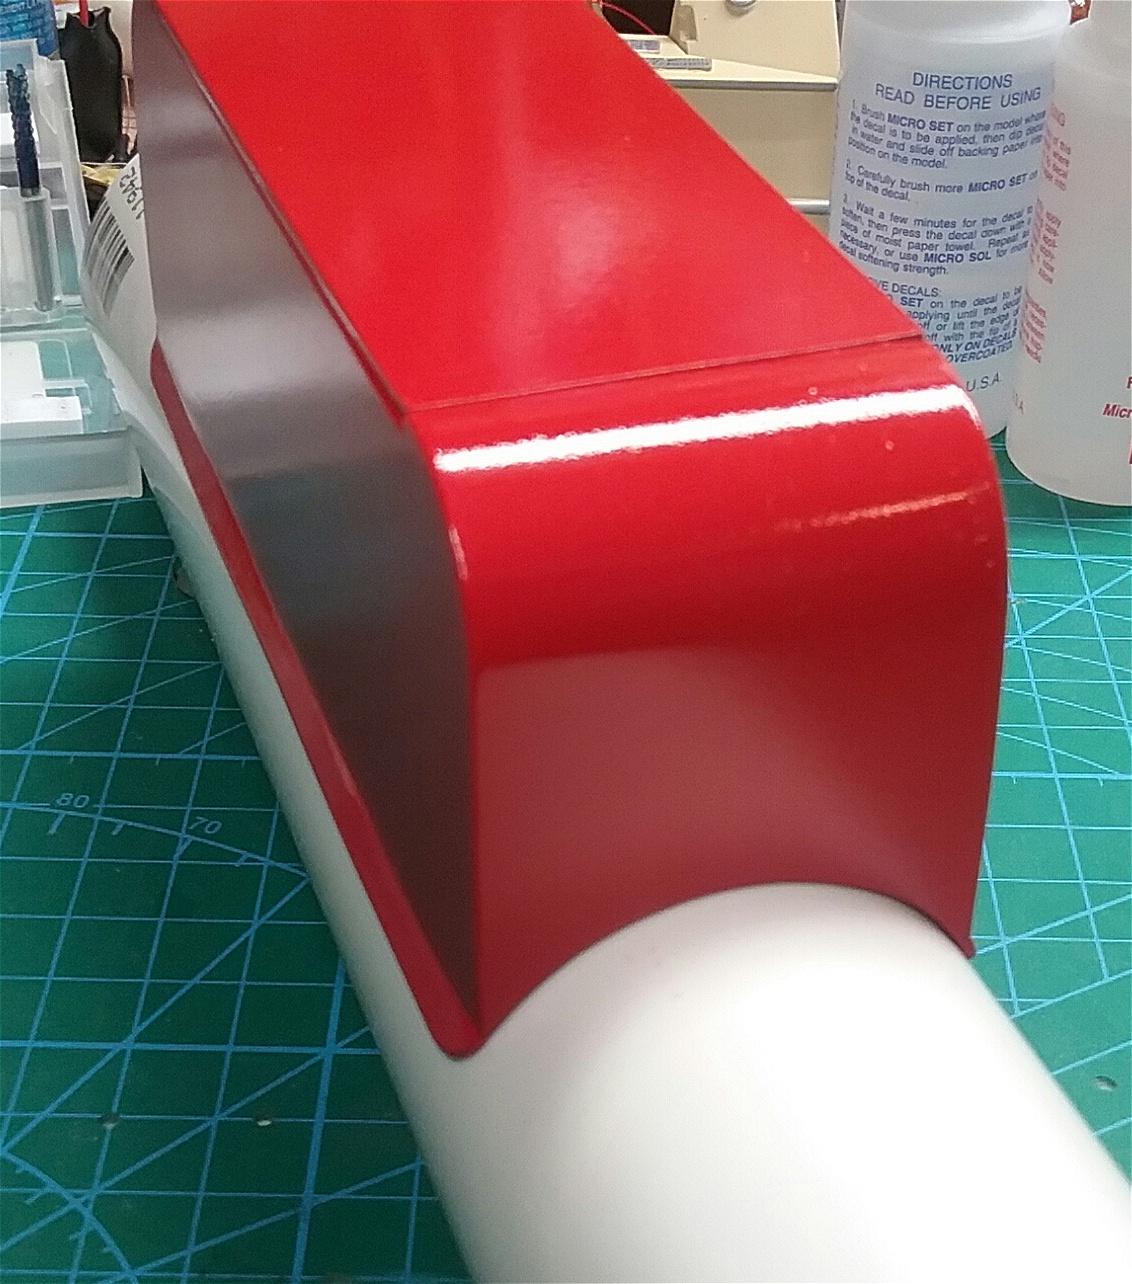
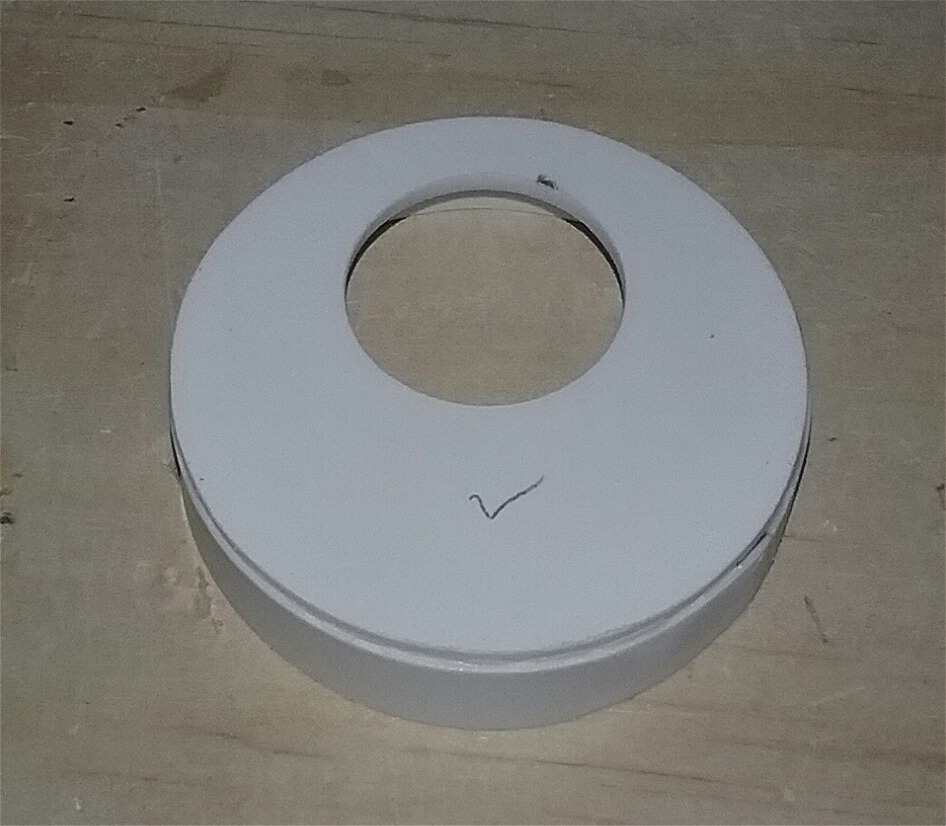
The front cap that goes at the front of the rear barrel was
also made of
sheet styrene, 0.080 inch
(2mm) for the top and 0.020 inch (0.5mm)
for the side, which I rolled to the same diameter as the
rear barrel.
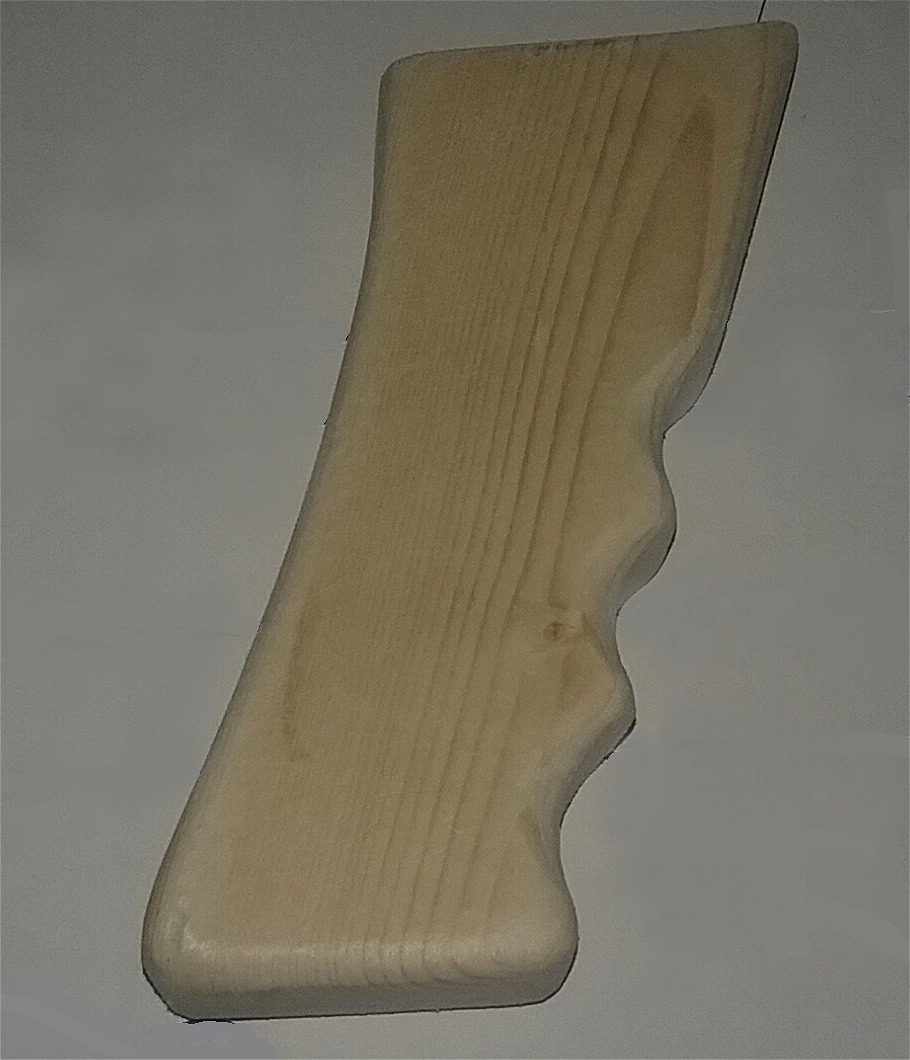
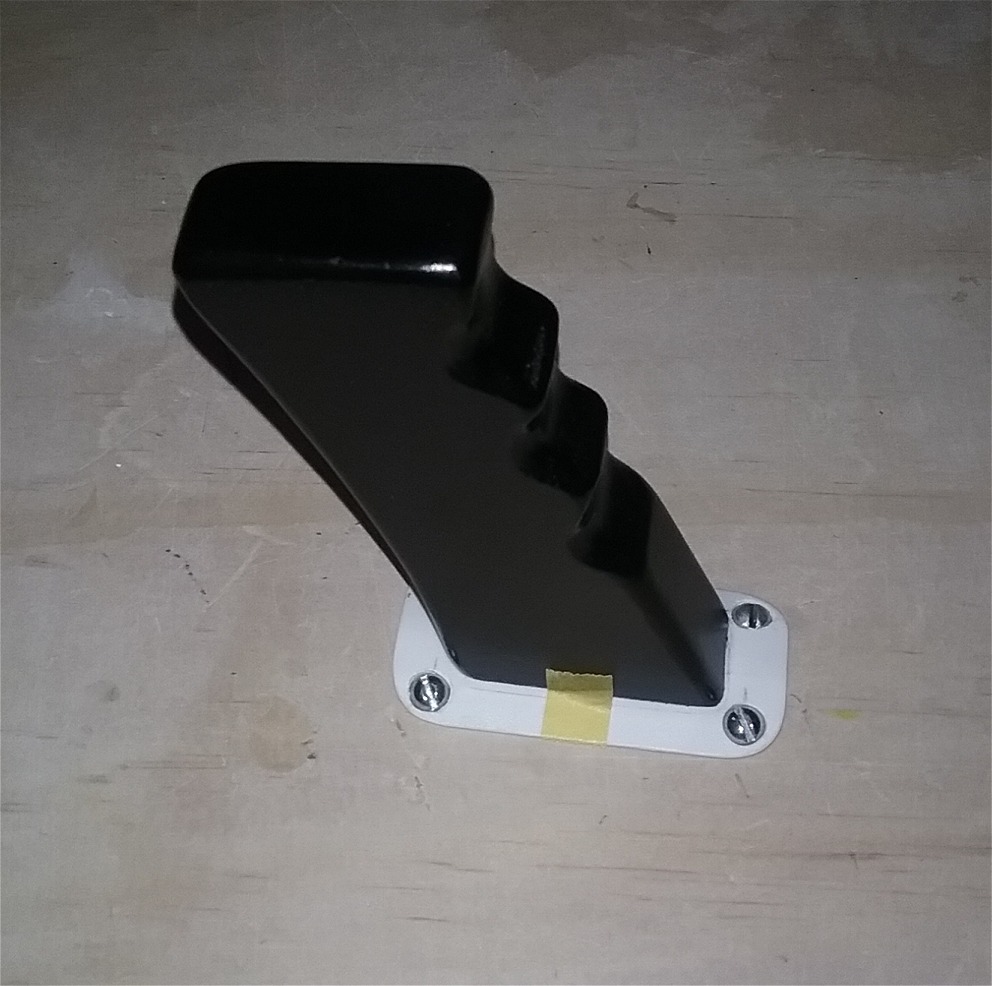
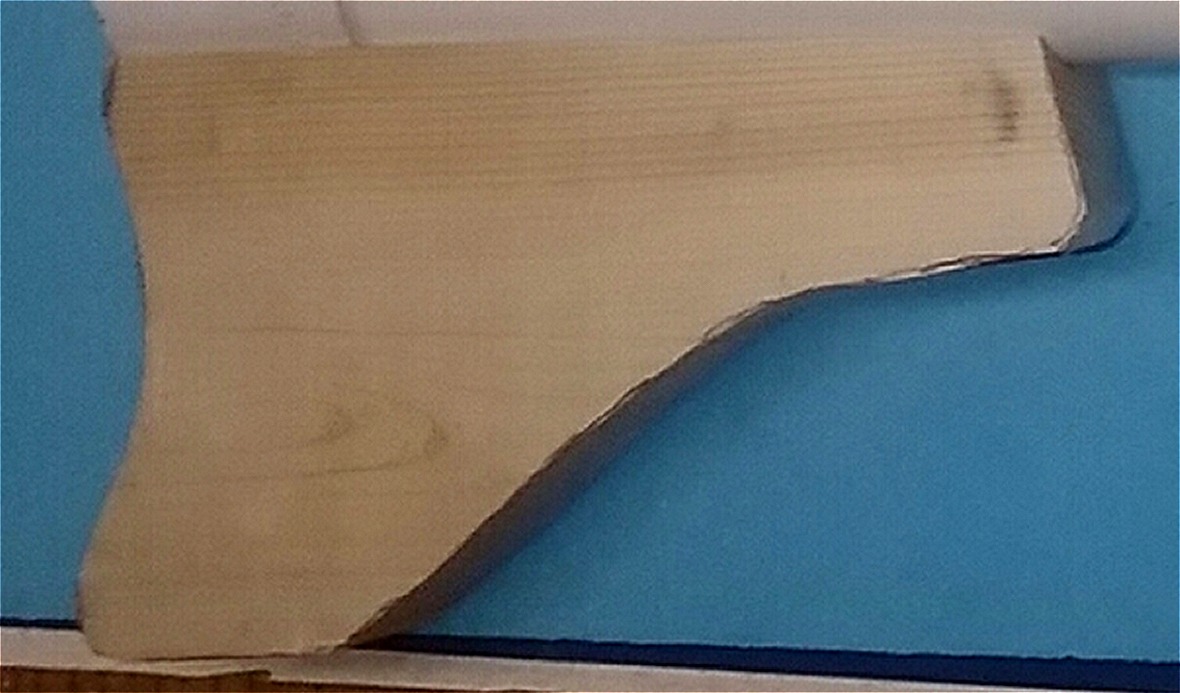
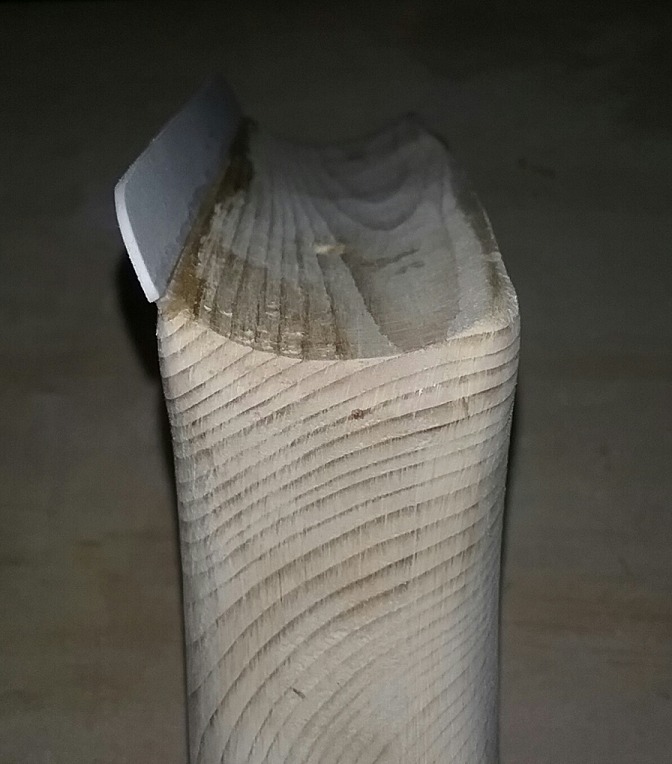
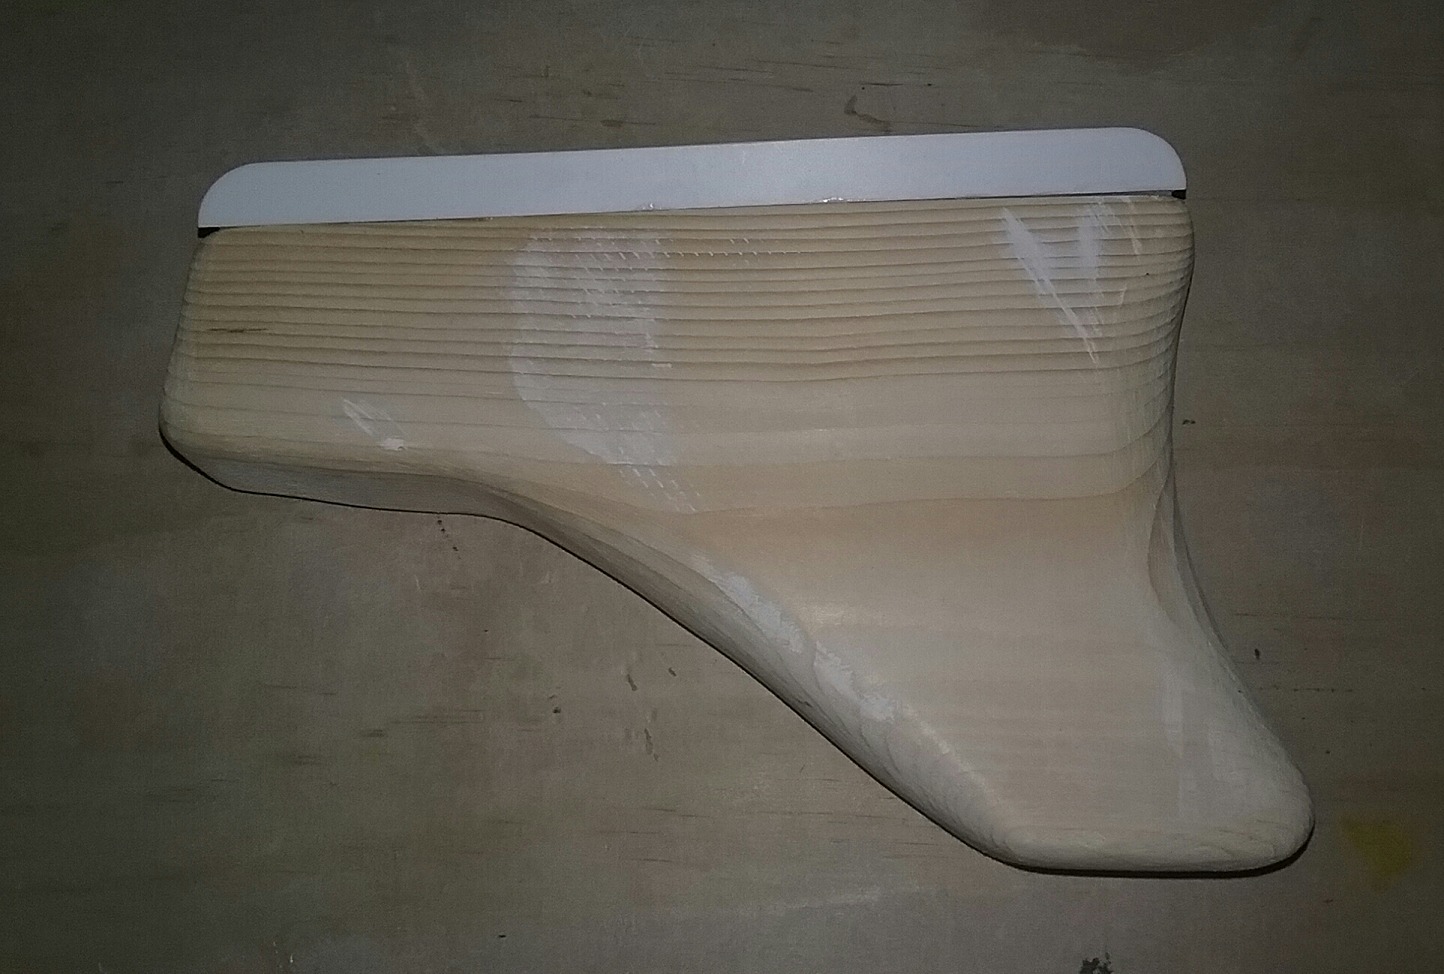
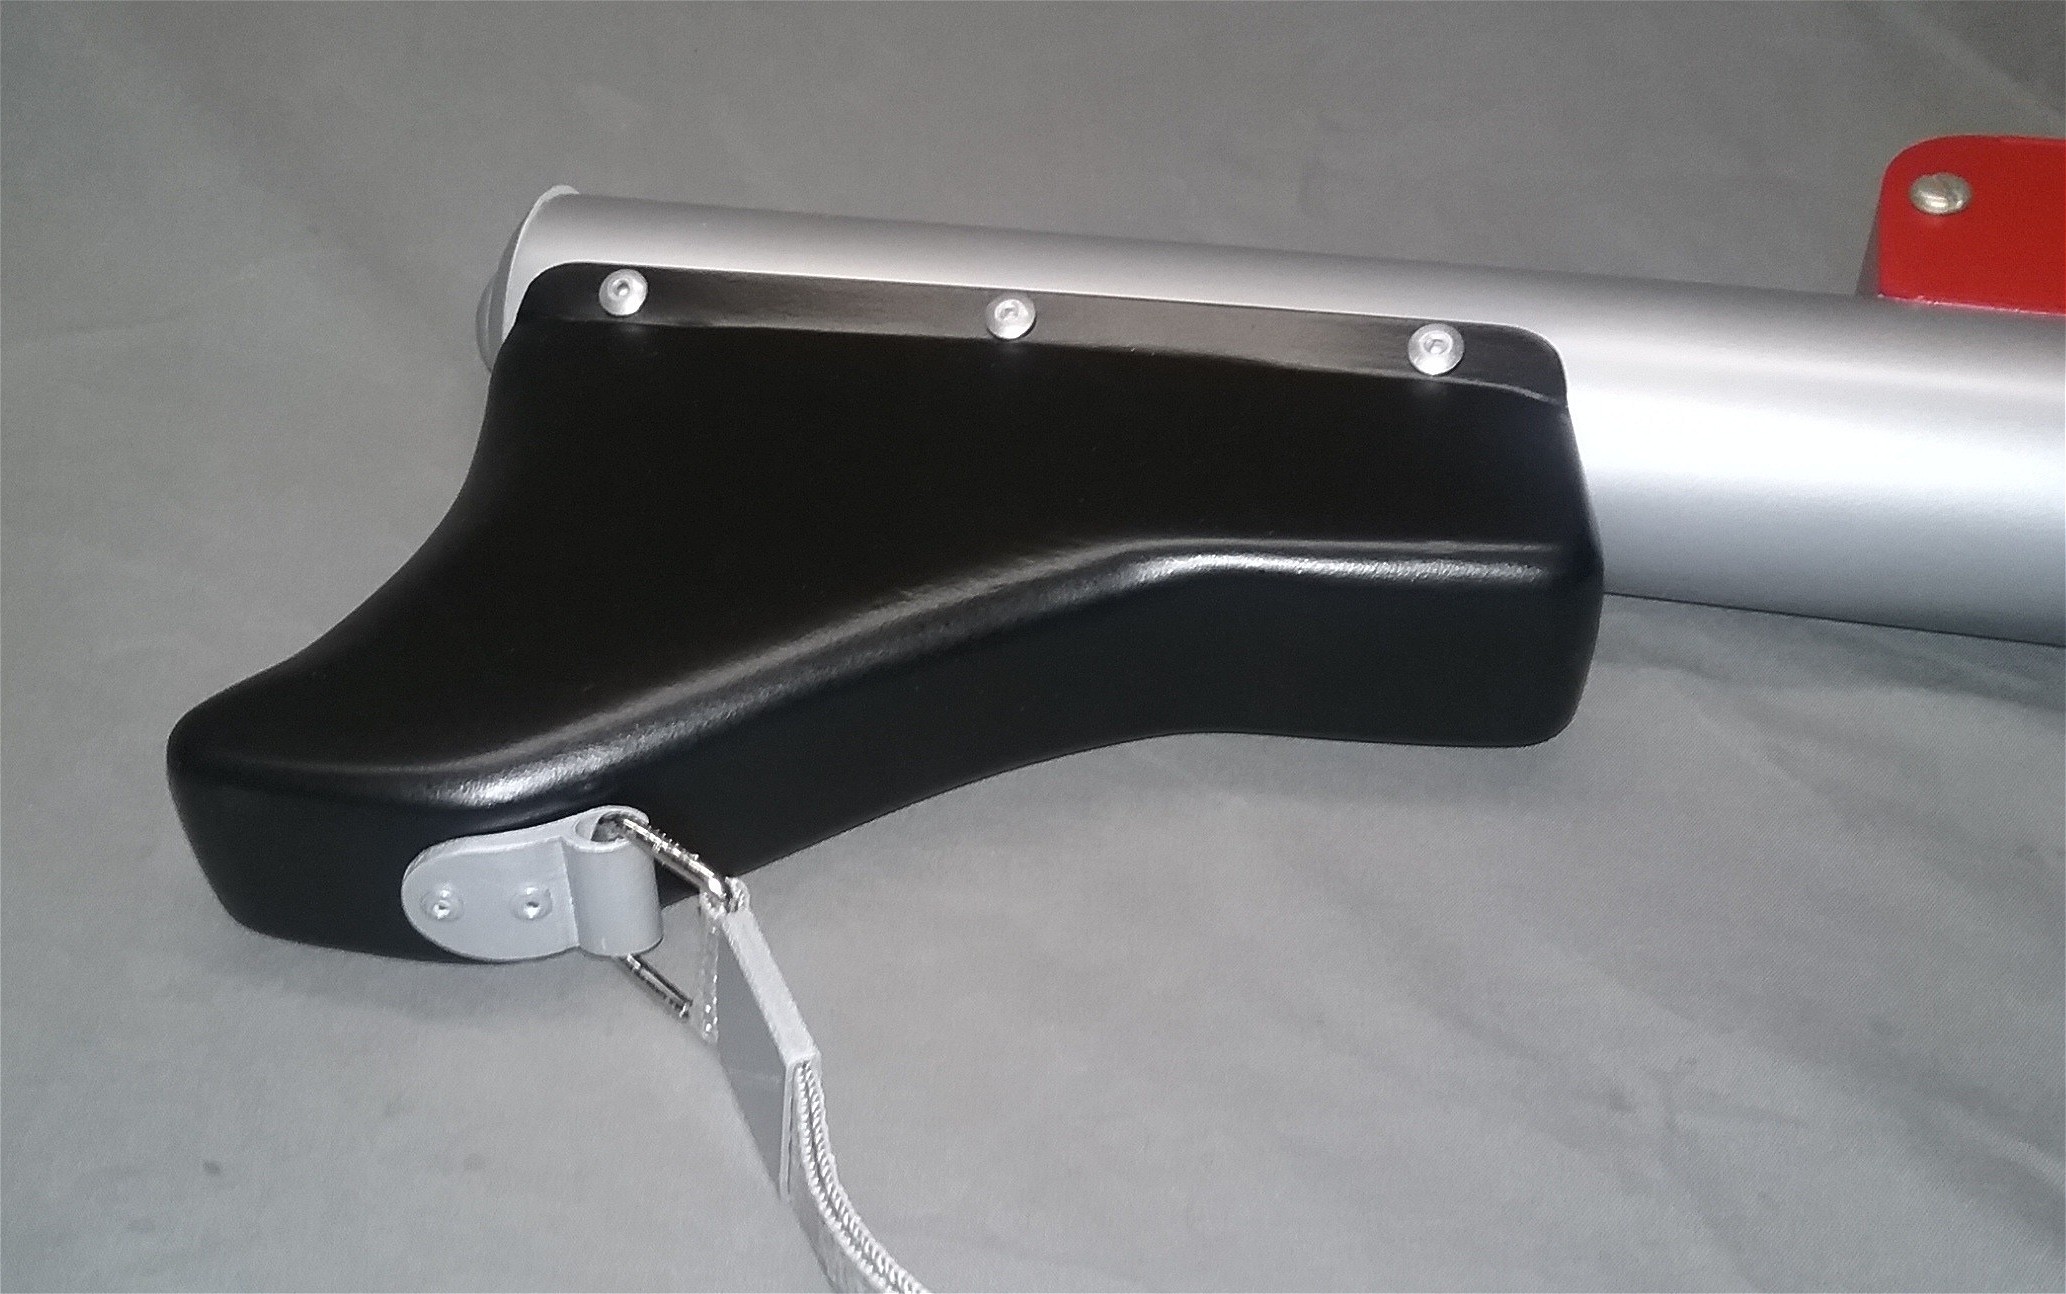
I went the somewhat simple route on the rifle stock and
front grip, deciding to
just make them out of wood. I printed a full scale template
of both and cut the
stock out of a 2x6 (actual dimensions 1.5x5.5 inches -
38x140mm) and the front
grip from a 0.75 inch (19mm) piece of pine. After getting
the rough cut finished,
I did a lot of sanding to get the final shape. A 0.040 inch (1mm) sheet styrene
mounting plate was added to the front grip, and 0.040 inch (1mm) sheet
styrene
flanges were added to each side of the stock.
Now that the laser, sound board and
most of the assemblies have been finished,
it's time for paint. I chose Tamiya spray paint Aluminum
Silver (TS-17 TAM85017)
for the rear and front barrel, which I painted before the
final joining of all parts because
I didn't want to go through the trouble of masking off
everything. After spraying
multiple coats over several days, and giving everything two
days to dry, it was
time to join the rear and front rifle barrels. I used some
wooden wedges inserted into the ends
of the rear rifle barrel to level and align the laser/front
rifle barrel assembly, and after many
adjustments, I glued the front and rear barrels together.
When I was sure everything was good and glued, I inserted
the sound board into the end of the rifle.
The speaker was slightly too big by about 1mm, so I ground
down the edge of the metal speaker frame
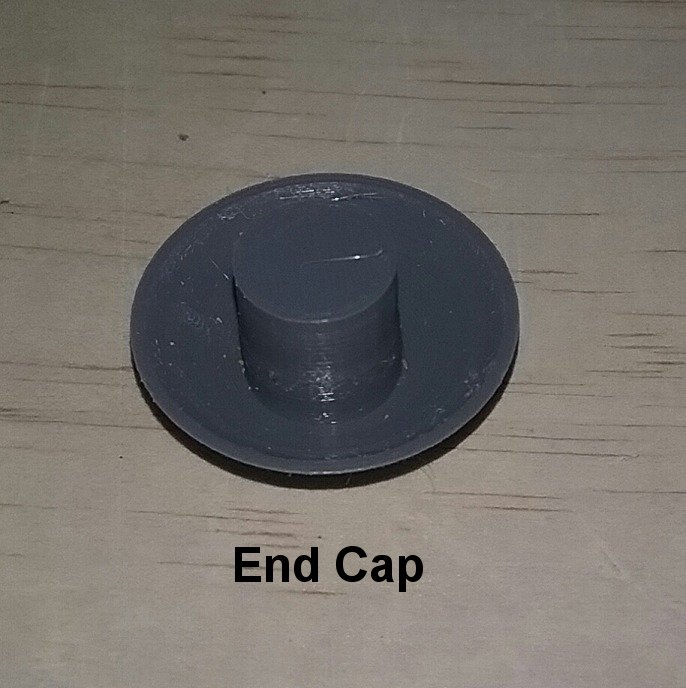
to get it to fit snug and secure. I made the end cap
from a PVC pipe cap which I cut and
sanded until it fit well. I added some small 2mm
magnets around the edge of the rear barrel
to hold the end cap on, and to give me easy access to the
sound board's batteries.
So far, so good! Now it was time to mount the toggle switch.
Even though I had done a test fit
earlier, I could not get the switch to go in now. I finally
had to cut out a section of the rear rifle
barrel to get the switch to fit. I cut out a matching piece
from a spare piece of PVC pipe, and did the
glue/putty/sand/repaint thing. Finally, I put the front cap
on and the main laser rifle body was finished.
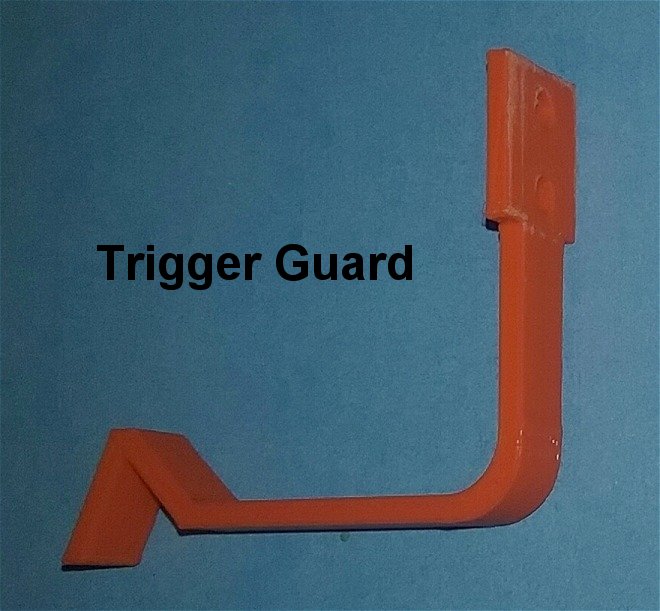
Now it was on to the detail parts. I
recently had bought an Ender 3 3D printer and
I had been wanting to do some designs of my own. After a bit
of a learning period on
Tinkercad, I felt ready to give these detail parts a try. It
took a few tries and some trial
and error, but eventually I got the size and shape I was
happy with.
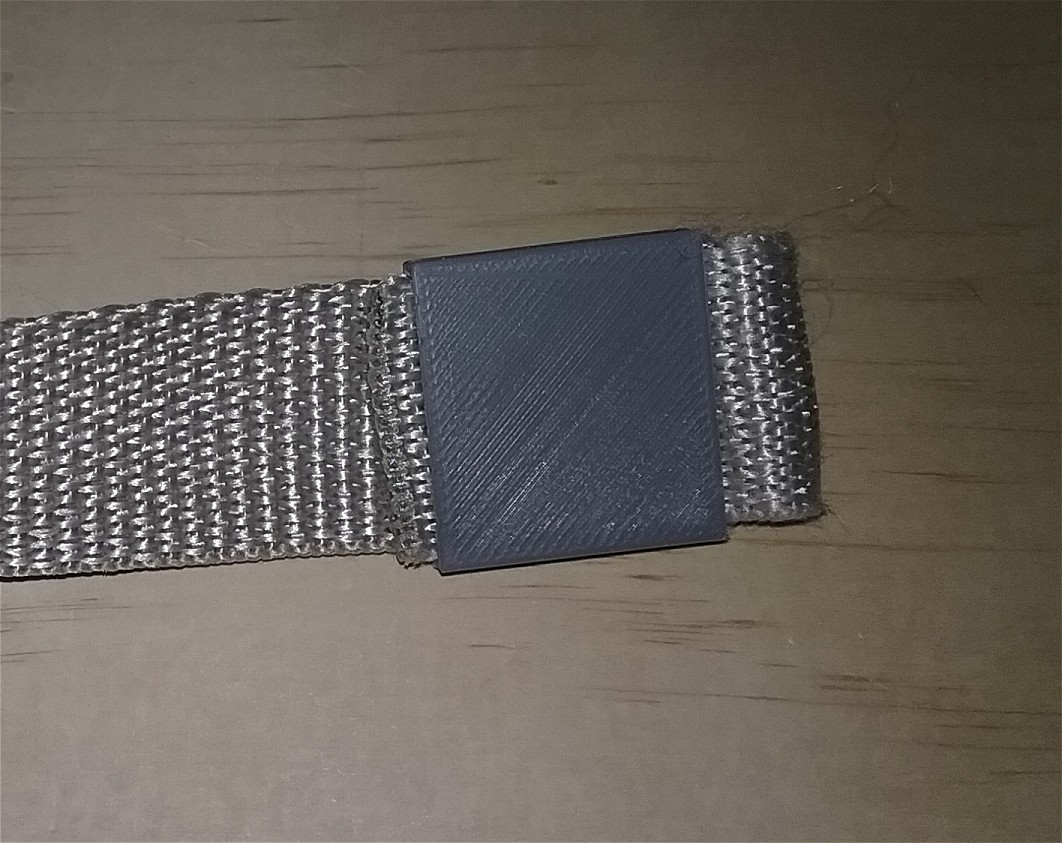
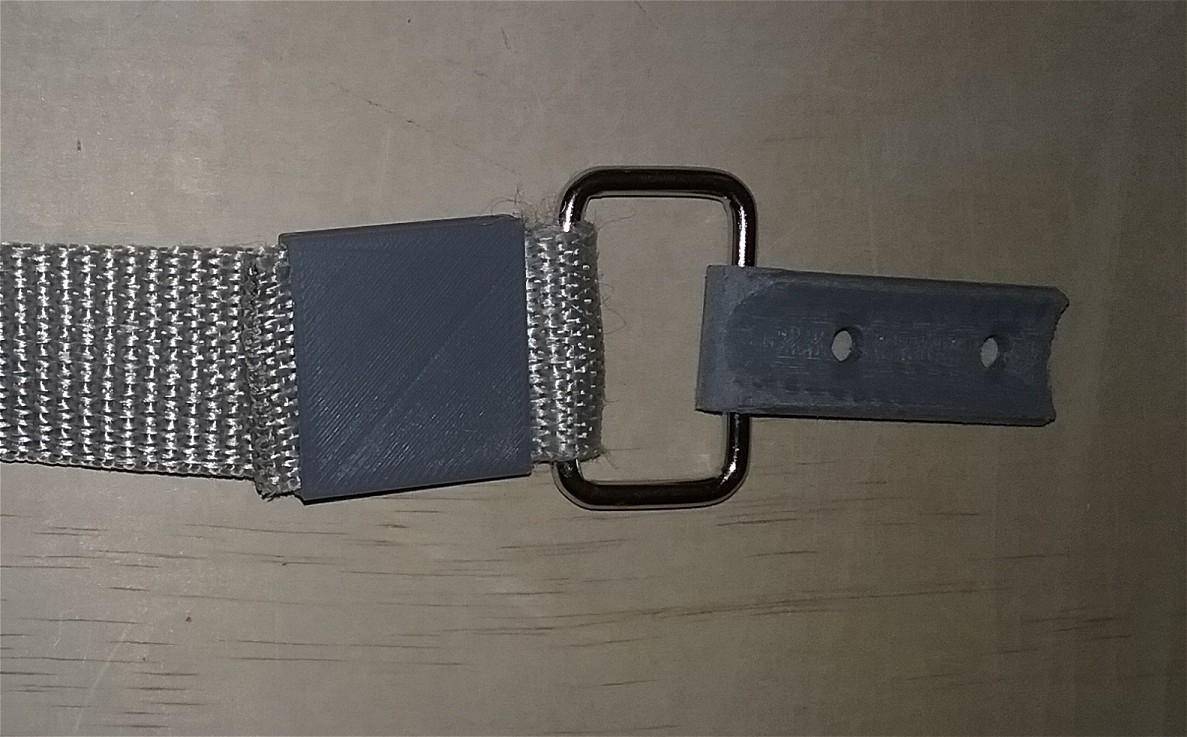
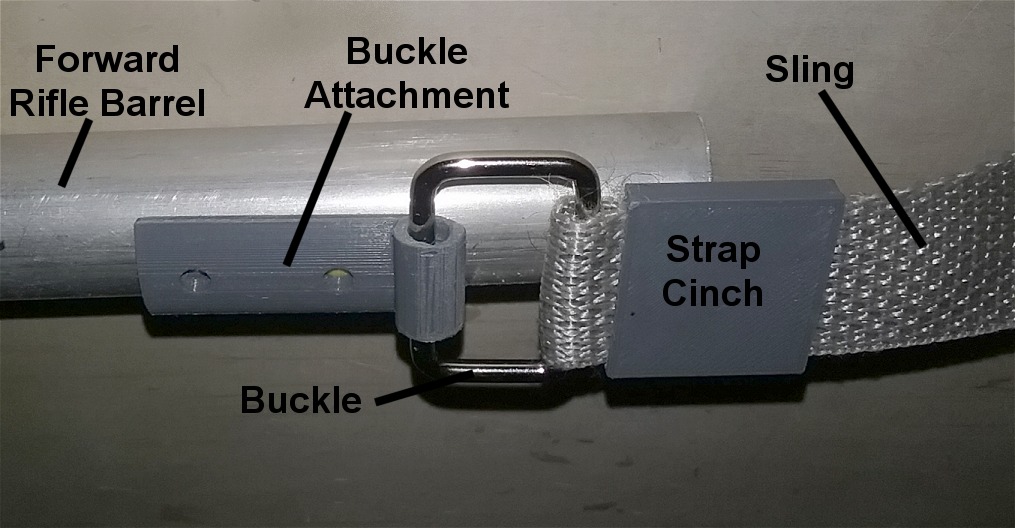
And finally, all that was left to complete the laser rifle
was the sling. I bought a
roll of 1 inch (25.4mm) silver webbing/strapping for the
sling itself and some
1.25 inch (32mm) metal buckles. It was hard to get good
views of the strap
hardware, but I feel like I got pretty close to the original
prop. I designed and
printed the 3D sling attachments and strap parts, and after
painting I
attached them to the rear stock and front rifle barrel.
Oh, one last detail. The original prop had various screws
and pop rivets holding together
the various parts. Since I have the laser, sound board and a
lot of wiring inside the
rifle, I wanted to keep the look of the original prop but I
didn't want any screws to penetrate
the rifle barrel. So I just cut off the screw heads and
rivets and glued those on where needed.
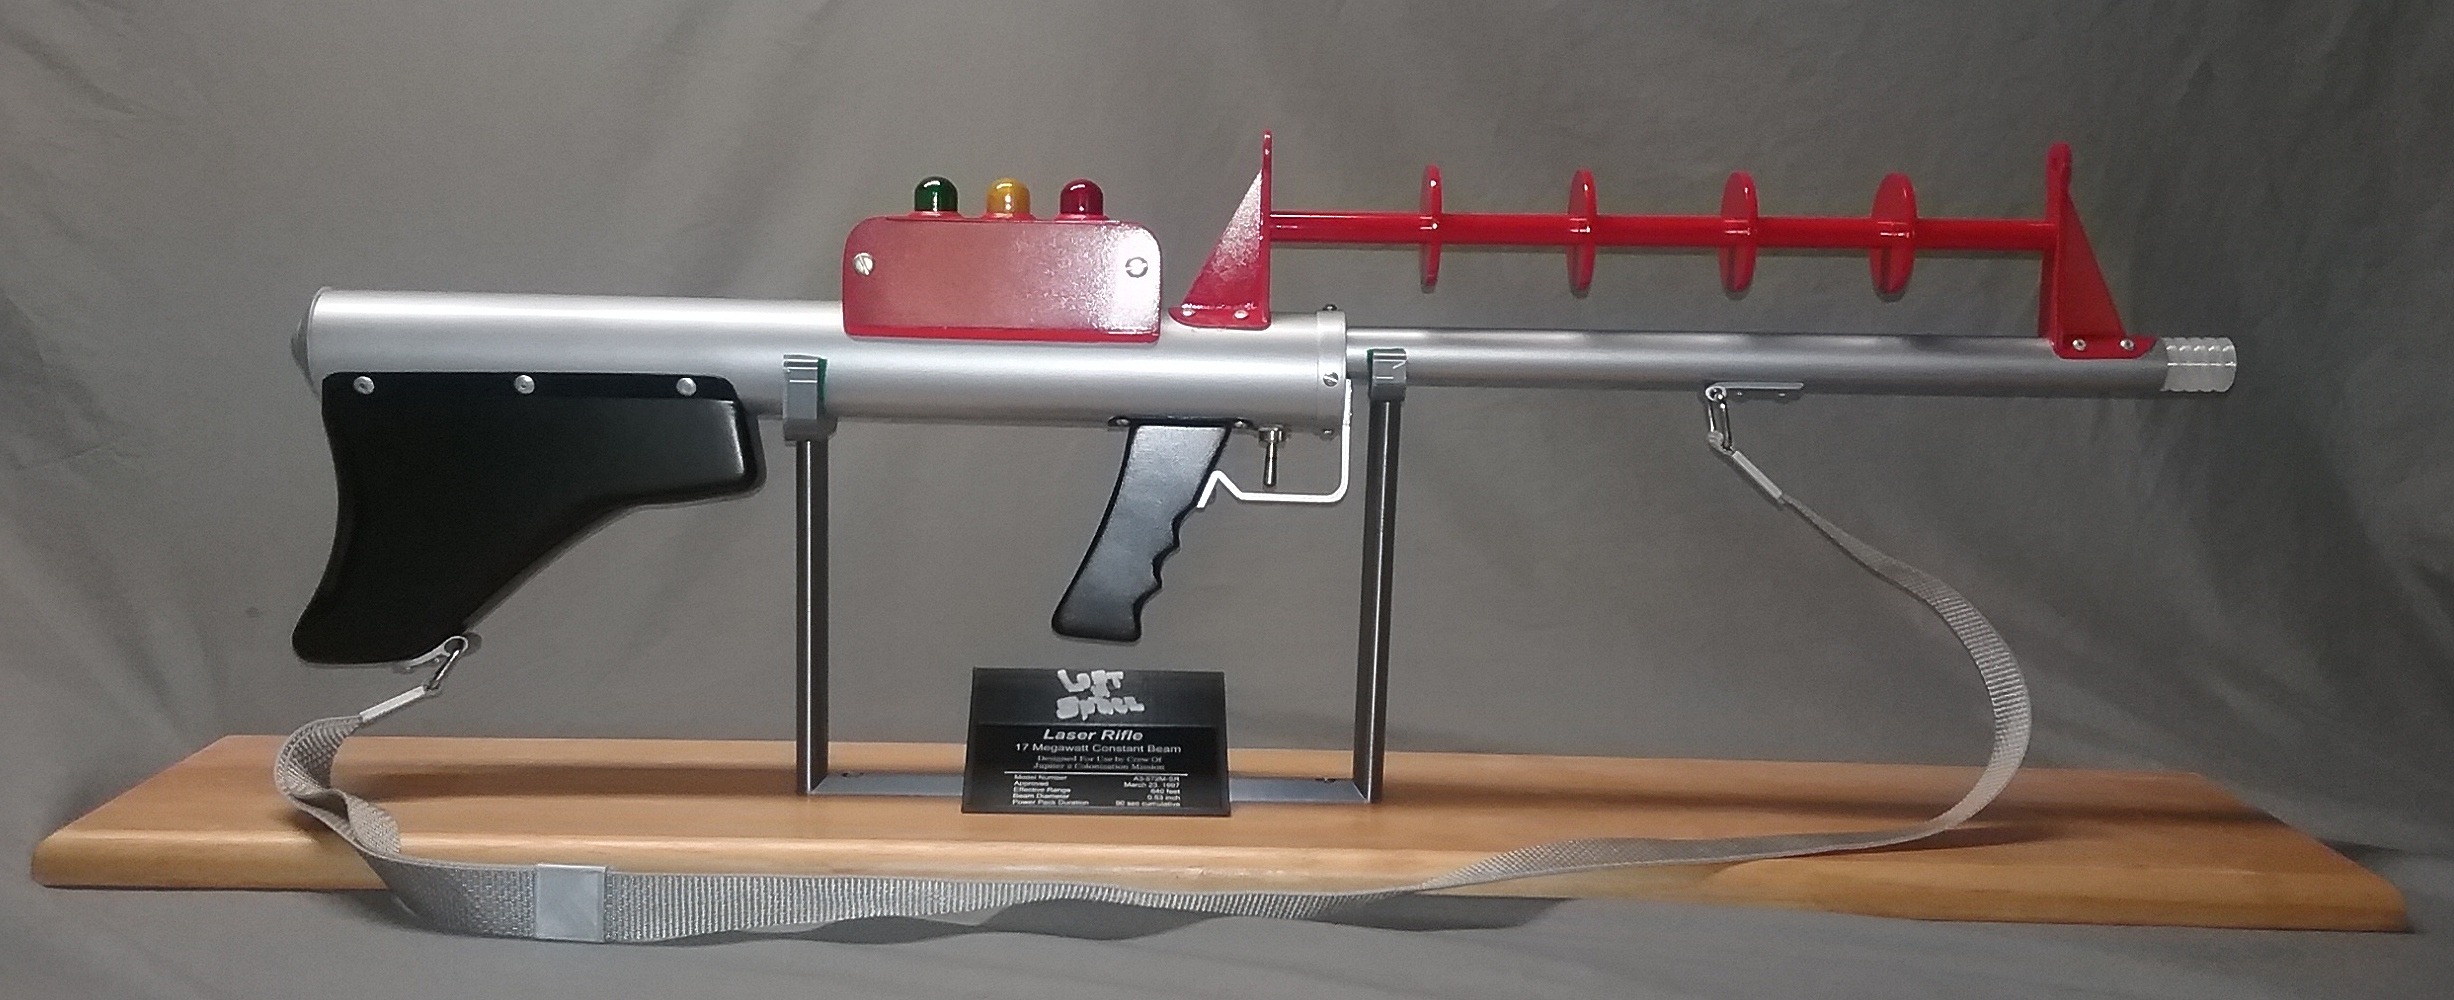
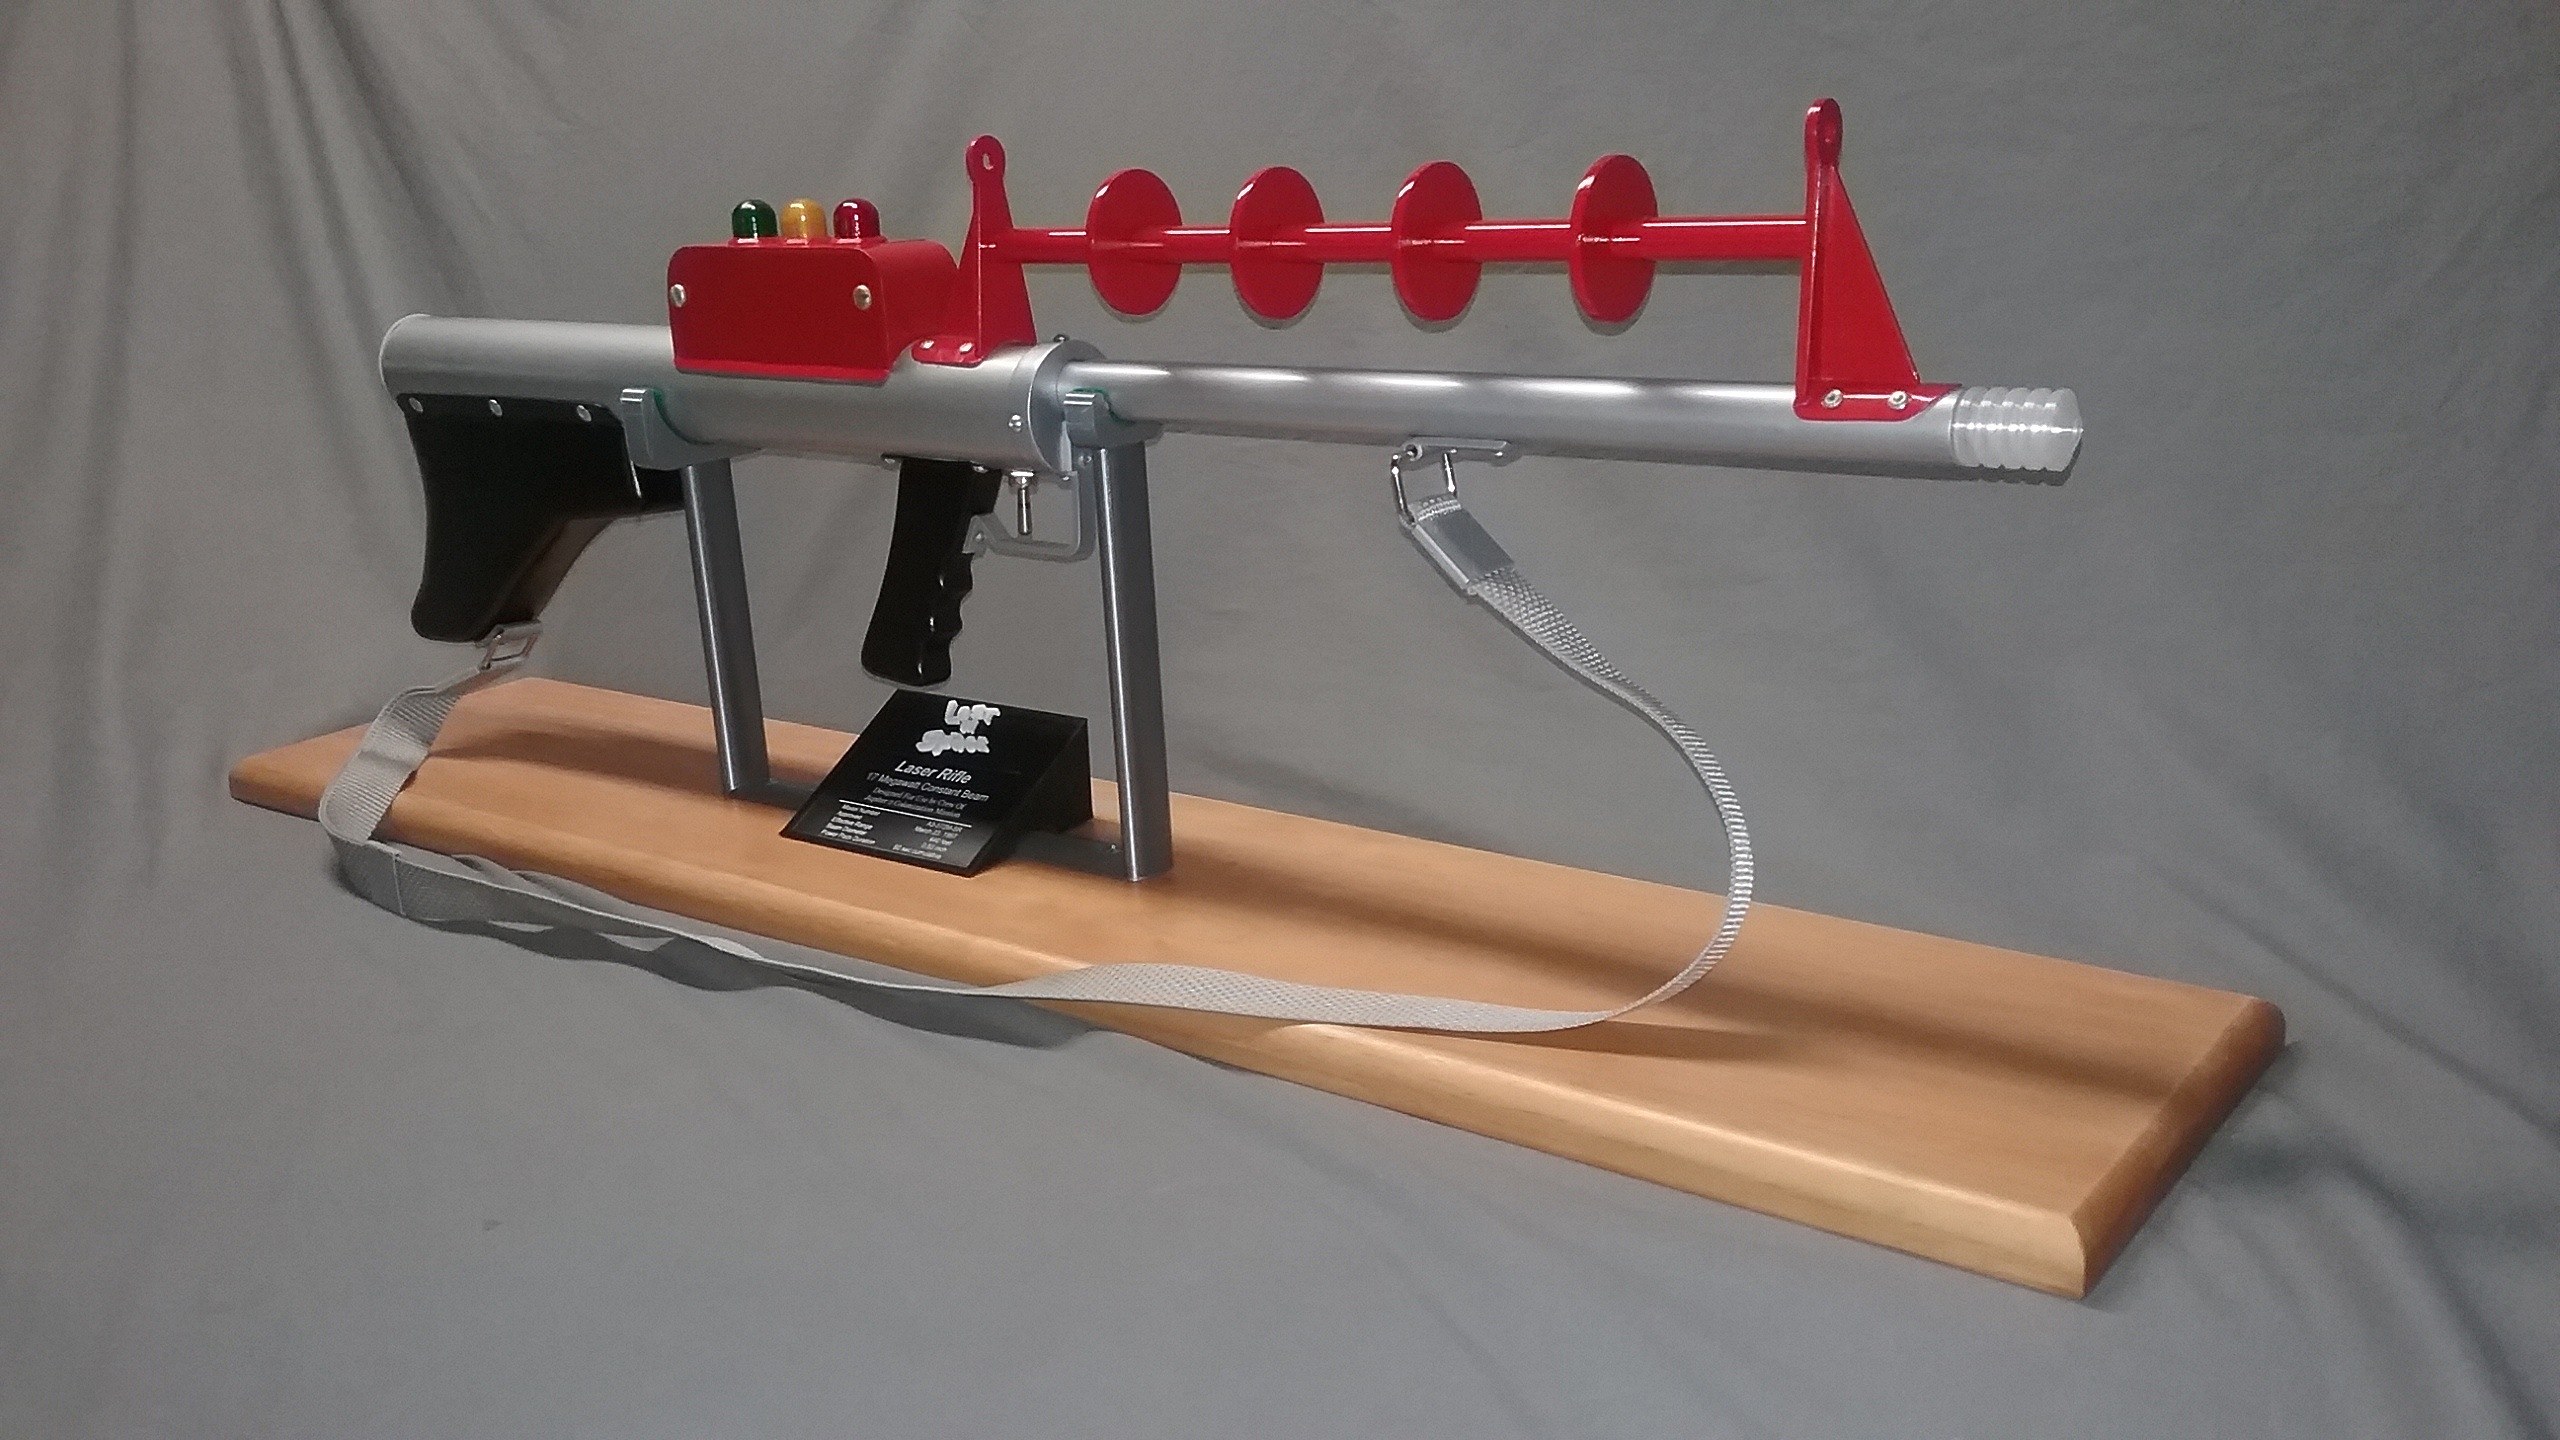
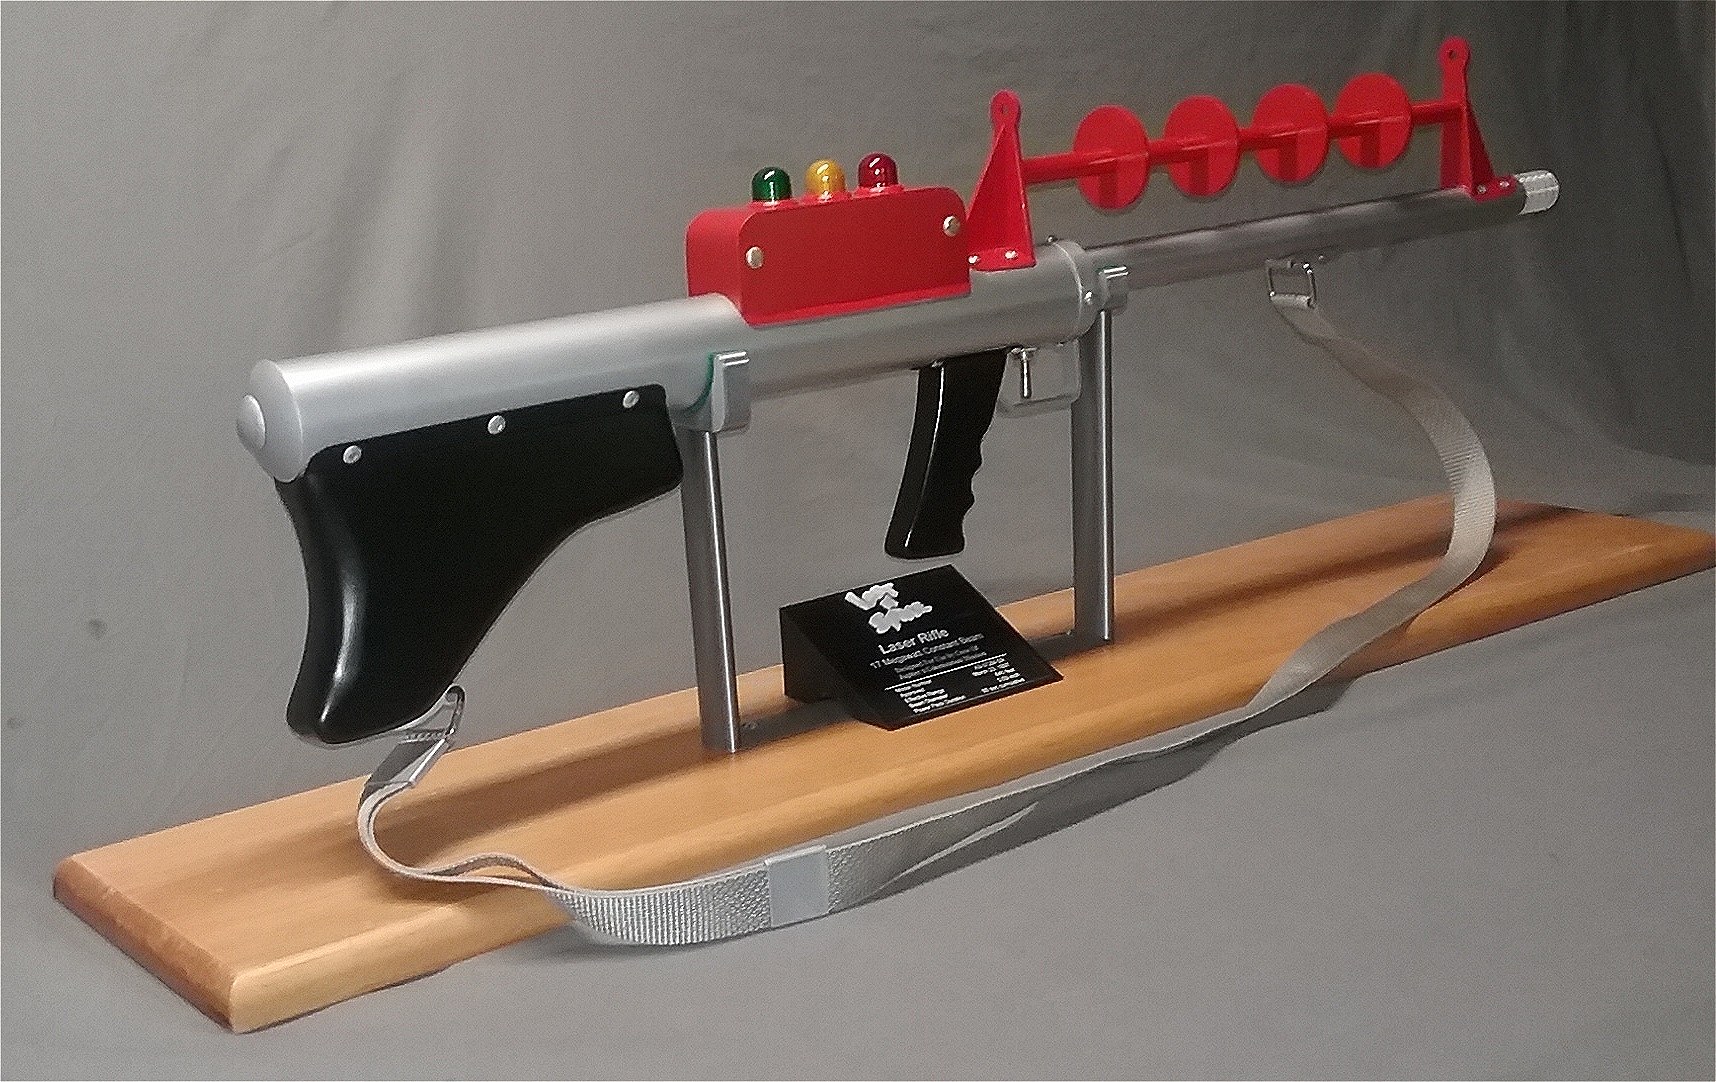
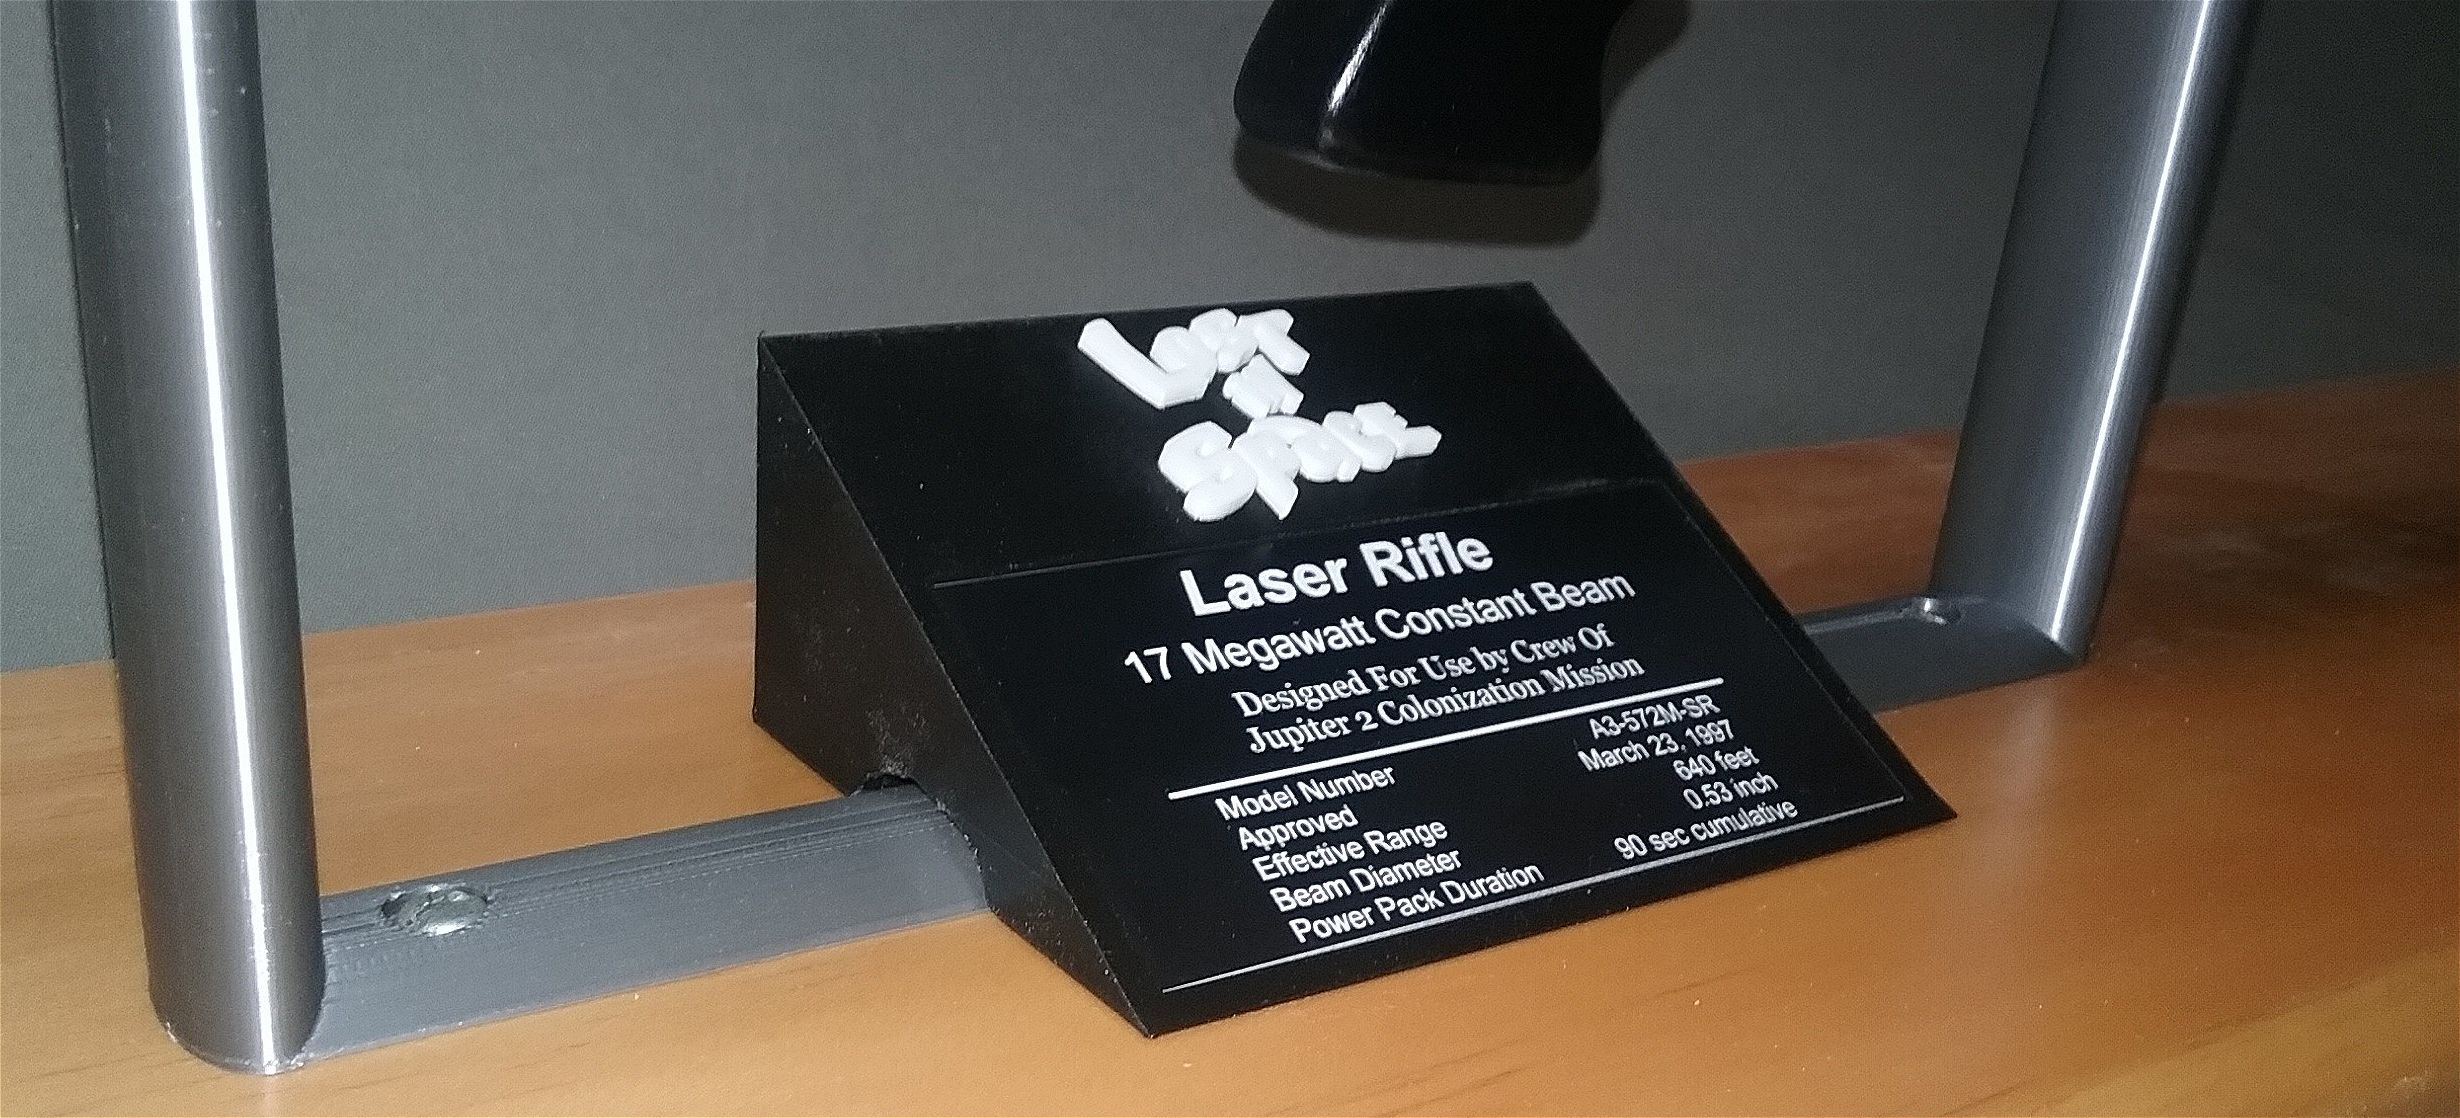
The
finished Lost in Space First Season Laser Rifle
And here it is again in case you missed it above.
Here's a video of the
laser rifle in action: Laser
Rifle Test Fire
The exact colors of the
original prop, as far as I know, has never been properly
nailed
down. Props from older TV shows were often reused and
repainted in other TV shows
and Irwin Allen, the creator of Lost in Space, was a great
believer in reusing and
repurposing props from his other TV shows. Props were
usually painted in colors, even
if they appear in a black and white show, so they could be
used later in color TV shows,
that is, if they didn't just repaint them in entirely new
paint schemes. I have never
seen a color photo from 1965-1966 of this laser rifle, if
anyone has a still or a
publicity photo I'd love to see it.
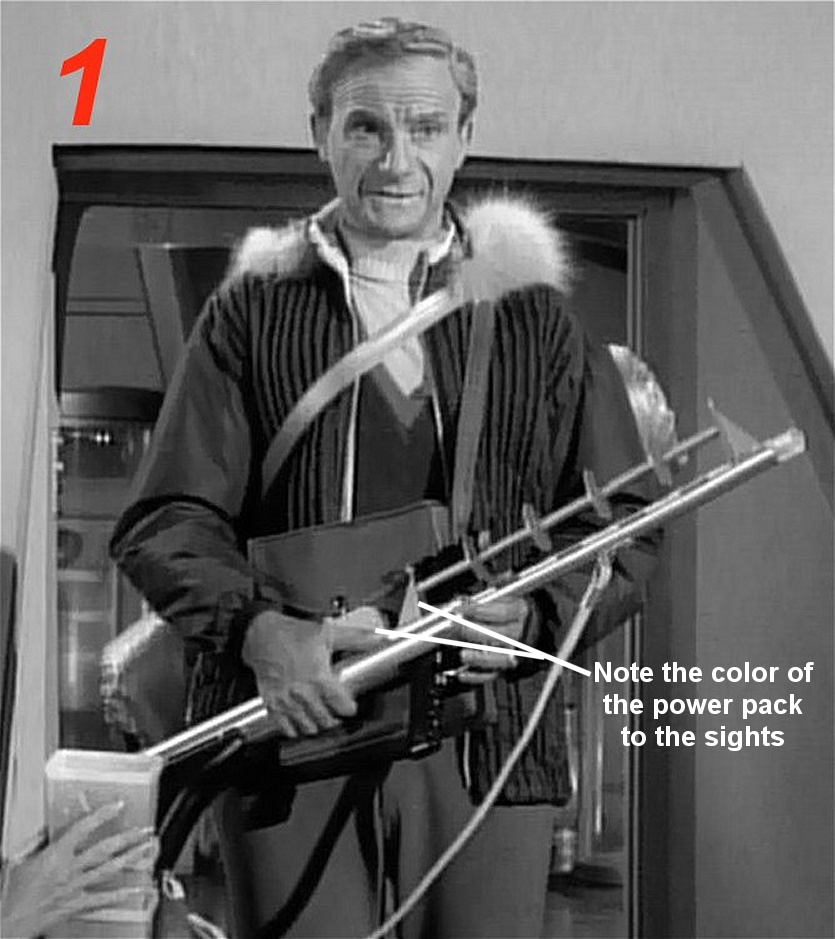
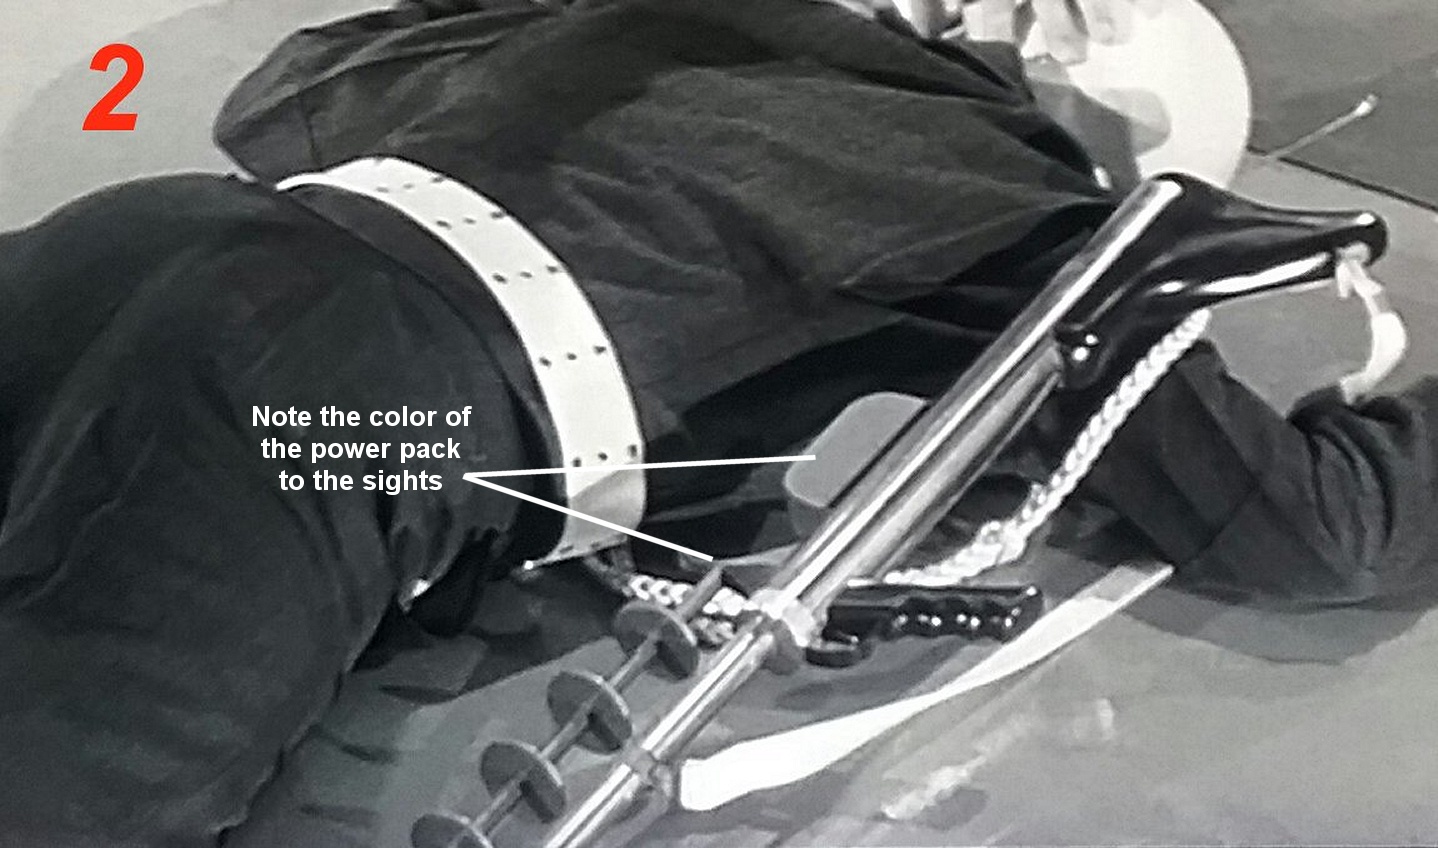
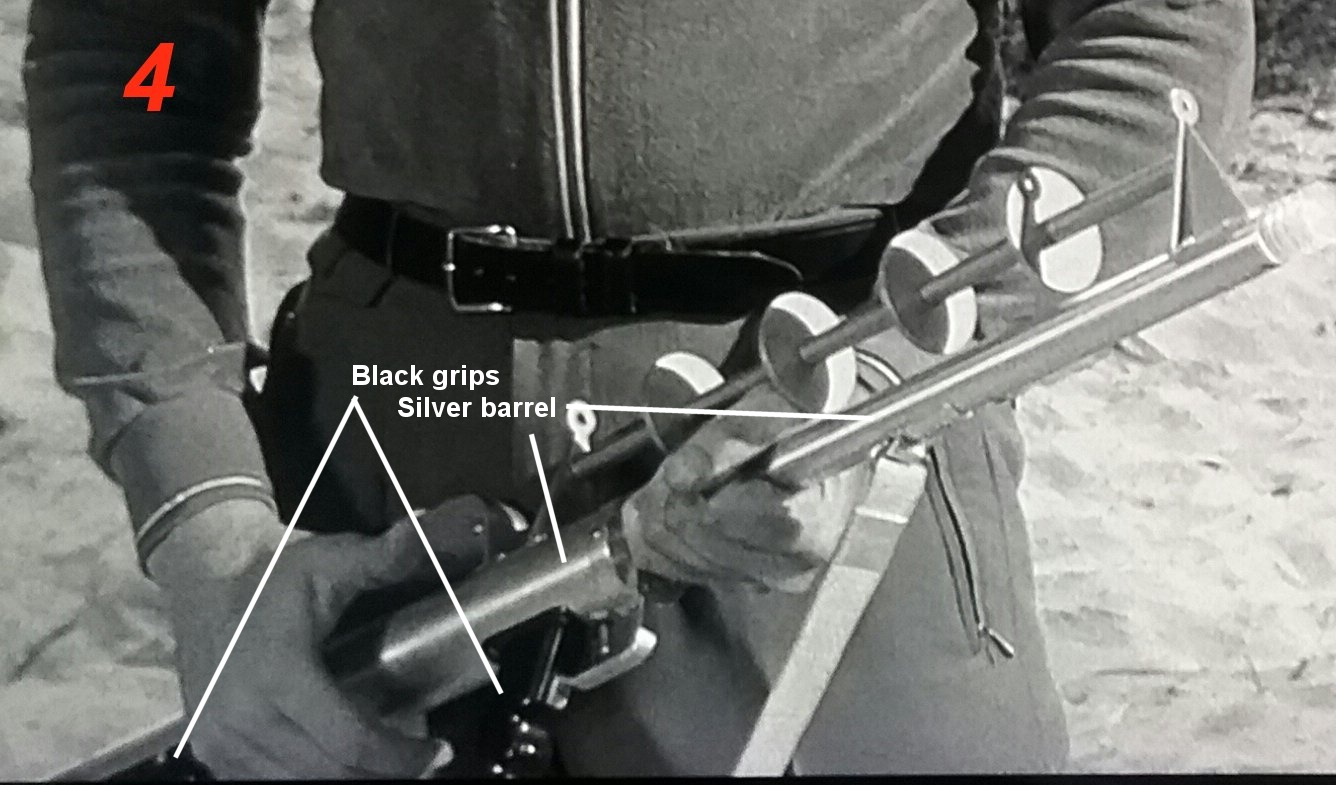
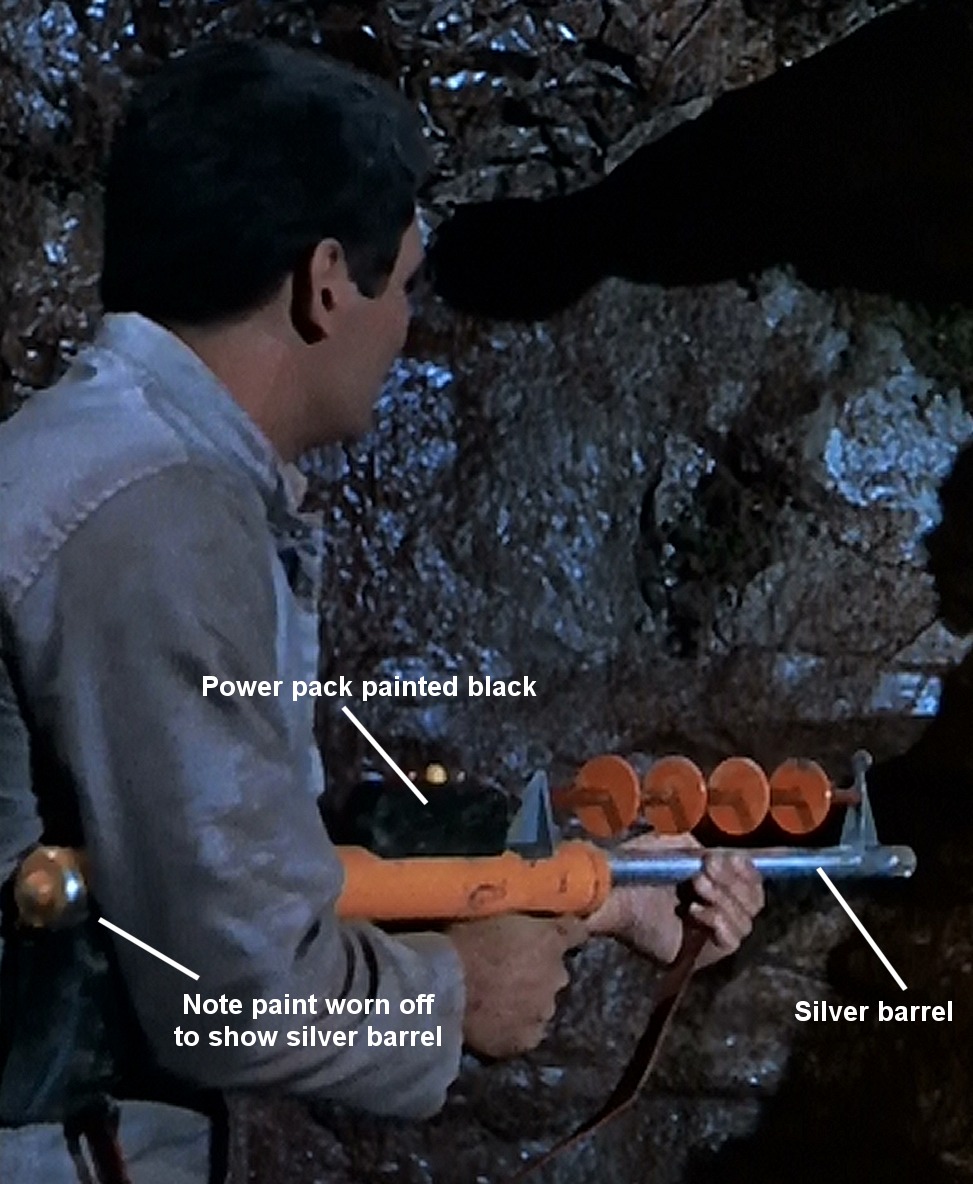
When I did my research, there are so many variables such as
the quality of the original source
material, light/shadows, etc. that it is almost guesswork.
Below are some photos that
help explain the colors I chose.
Basically, I went with a 3-color scheme - silver rifle
barrels,
black stock and grip, and red for the power pack, sights and
heat sink assembly. I feel this was somewhat accurate until
a color photo from the first season shows up.
Overall, I'm pretty happy with the way this project turned
out. It
was my first totally scratch build I've ever done. There are
a few mistakes
here and there, and I would do a few things differently if I
did one again.
Time wise, I started it in late May and finished it in early
October,
although I didn't work on it every day.
I'd like to thank Joe K. and Daniel R. for their
encouragement and help.
If you have any questions or comments, please send them to:
djohnson138@cox.net
Dan Johnson
November 2020
Back to Top of Page